Puy Lentils Braised with Rosemary and Garlic, from Jamie Oliver’s ‘The Naked Chef’ – Cooking the Books, week 9

Lentils tend to divide opinion – and Hubby sits on the ‘unconvinced’ side of the fence, by and large. These braised lentils seem to have changed that opinion, so – particularly if you expect lentils to be a bit floury and tasteless – I suggest you give this cooking method a try.

I prepared these lentils for Sunday evening dinner, and served them with roast confit duck legs and potatoes roasted in duck fat, but they would make a great accompaniment to all sorts of roast meats and game. The duck confit came in a tin, brought back from France for us, which has been sitting in the cupboard waiting for a suitable occasion. The lentils make a very traditional accompaniment – the roast potatoes, admittedly, less so!

To serve two –

  • Braised lentils - ingredients120g of dried Puy lentils
  • Half an onion
  • A clove of garlic
  • 2-3 sprigs of fresh rosemary
  • 40g of pancetta or dry cured streaky bacon (I used the last of my Christmas spiced home-cured bacon from the freezer).
  • Half a pint / 300ml of vegetable or chicken stock
  • Half a glass of white wine (optional)
  • Olive oil
  • Red wine vinegar
  • Salt & pepper

Accompanied with –

  • Two confit duck legs – ours were tinned, but they’re easy (if a little time consuming) to make at home!
  • Potatoes, suitable for roasting

Opened tin of duck confitPreheat the oven to 200C. Open the tin or jar of duck confit and spoon a couple of tablespoons into a roasting tin, and pop this in the oven to heat. Peel (and halve, if appropriate) your roast potatoes and toss these in the melted duck fat, along with a sprinkle of chopped fresh rosemary, salt and pepper, and put in the oven.

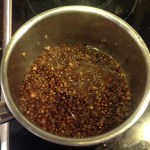
In a saucepan, heat a slug of olive oil (about a tablespoon). Slice your dry cured streaky bacon into small pieces, and fry gently until just taking some colour. Add half an onion and a clove of garlic, both finely chopped, and a good big teaspoon of chopped fresh rosemary, and fry until nicely softened. Rinse your lentils (Puy lentils don’t need pre-soaking) and add these to the pan and stir for a minute or two. The quantity of lentils will look tiny for two portions, but don’t worry!

Bring to a simmerNow add your stock (and wine, if using – I had a little bit left over in the bottom of a bottle, it seemed a shame not to throw it in – it’s not part of the original recipe) and bring up to a simmer. I used vegetable bouillon powder as my stock – due to lack of alternatives – but I think this recipe would be really improved by using real home-made, unsalted stock.

There’s some salt in the bacon already, and lentils tend to cook better in an unsalted solution – a bit like plums if you stew them with sugar, the skin tends to harden up a bit in a salted cooking liquor. Remember the confit duck legs are salted in preparation, too. It’s not the end of the world if, like me, you have to use packet / cube stock, but you may find the whole meal just marginally over-seasonned if you do.

Cover the pan and keep cooking at a gentle simmer, stirring occasionally, for about 40 to 45 minutes. You’ll probably find about 15 – 20 minutes have now passed since you put the potatoes in the oven.

Confit duck legs - before roastingRemove two duck legs from the tin, scrape off most of the fat from their surface, place them in a roasting tin, skin side up – sprinkle a little coarse salt over the skin – and put these in the oven with the roast potatoes. For the next three quarters of an hour or so, check on them occasionally, turning the dish if your oven has hot spots. I find roasting them for about 40 minutes gives crisp rich golden brown skin and falling-apart meat without any dryness.

Lentils - end of cookingAbout an hour after the potatoes went in the oven, everything should be more or less done. Check on the lentils, which should have absorbed essentially all of their cooking stock. Taste them for doneness – if they still seem a little hard or floury, turn the heat up for a final five minutes, but do keep an eye on them to make sure they don’t run dry and burn!

Once you’re happy they’re well cooked, taste for final seasoning. It’s unlikely you’ll need to add any salt, but a big pinch of pepper and a little splash of red wine vinegar (start with a teaspoon, then taste to see if you need any more) really brings up the flavours.

You’re done! Spoon the lentils onto your plates with a slotted spoon to leave behind any surplus cooking liquid. Add the roast duck and potatoes, and enjoy!

And serve!

This is a splendid winter dinner, and would work well for entertaining, too. The lentils really compete with the duck to be the stars of this dish, full of wonderful complex aromatic, earthy flavours which complement the succulent, tender, crispy and slightly sweet duck absolutely perfectly. And potatoes roasted in duck (or goose!) fat are just the very best – these had an amazing surface crunch with soft fluffy insides. Perfect.

**
Naked Chef - cover
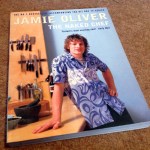
The Naked Chef, by Jamie Oliver
Penguin Books, 2001
ISBN 978-0-140-277814
Paperback, 250 pages, full colour. RRP £12.99.

[Full disclosure: This is my book, which I bought. I have received no payment or sponsorship for this post, nor have I accepted a review copy. I do not have an amazon affiliate account and do not profit from any links provided.]

‘The Naked Chef’ hit the shelves last century – the hardcover edition came out in 1999! – so this is a bit of a period piece now, I suppose. It’s been on my shelf for nearly all that time. A (startlingly young-looking) Jamie Oliver was in the vanguard of what became a veritable tidal wave of celebrity chefs gushing from screen to bookshelf, throughout the ‘noughties’.

Naked Chef - page
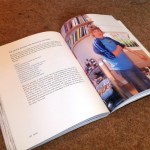
This is a tricky book for me to review. It’s been with me such a very long time –  one of the first books that Hubby and I bought and cooked from together, it played its part in cementing our shared love of food and cooking. Coming back to it now with a fresh eye, it hasn’t dated badly, despite the decade and a half that has passed since publication. Fewer exotic ingredients than are fashionable now, certainly, but very much ‘on-message’ with a focus on fresh good quality ingredients and simple, pared down preparation.

I particularly love the extensive chapter on home-made pasta. It’s funny, I used to make my own pasta all the time – I have a great collection of accumulated pasta-paraphenalia to show for it! – but like so many simple, worthwhile food preparation habits, it’s depressingly easy for them to fall by the wayside, victims to our busy lives. There’s a recipe for borage, nettle and marjoram ravioli which I definitely need to try, come the summer! The whole book has an overall Italian flavour to it, lots of olive oil, fresh herbs and garlic, without feeling like an ‘Italian’ cookbook as such.

It looks like the book may even be out of print now, though it should be widely available second hand. Despite its vintage, it’s aged very well. If you enjoy clean, fresh flavours, and fancy a bit of millennial nostalgia, I can wholeheartedly recommend it to you. And if you bought it at the time – lots of us did! – and it’s been gathering dust on your shelf, rather neglected for the last few years, like my copy, perhaps it’s a good time to dig it out, and give it a fresh look?

‘Cooking the Books’ is my self-imposed blog challenge for 2014 – I’ll be trying to cook a new recipe from one of my (rather extensive!) collection of cookbooks once a week, write it up and review it. Wish me luck!

Read more from the Country Skills blog >>

Banner320-260

Roast Lamb, from ‘The River Cottage Meat Book’ by Hugh Fearnley-Whittingstall – Cooking the Books, week 7

Who doesn’t love a proper traditional Sunday roast? We have some beautiful lamb in the freezer at the moment, sourced from an organic farmer who we know, and this small leg of lamb deserved nothing but the very best treatment.

Meat book - cover viewI have to admit, it’s been a very long time since it occurred to me to consult a cookbook for a recipe for a roast joint of meat – I’ll look up timings occasionally, but essentially, when it comes to roast dinner, whether it’s beef or lamb, pork or poultry, I know what I like and I like what I know. So, for lamb – leg or shoulder – my roasts have been done much the same way for years now – studded with little slivers of garlic, tufted with fresh rosemary, drizzled with oil, salt and pepper, and simply roasted until just pink in the middle.

You could say, then, that this recipe for roast lamb from The River Cottage Meat Book didn’t take me far out of my comfort zone! Then again, sometimes it’s the little variations on a theme, those small additions and tweaks, that take a good meal and turn it into something simply sensational.

My small leg of lamb was about 1.5kg in weight and served four with no leftovers. In addition to the lamb, you will require –

  • Roast lamb ingredientsA tin of anchovies
  • Two decent sprigs of fresh rosemary
  • Two or three nice juicy cloves of garlic
  • A couple of glasses of dry white wine
  • A spoonful of crab apple and chilli jelly (or other fruit jelly – redcurrant would be a great alternative)
  • Your choice of accompaniments – I served this with roast potatoes, mixed roast vegetables (sweet potato, parsnip and carrot – other great options include swede, pumpkin or squash, and beetroot, if you have them), and steamed winter greens
  • Salt and pepper

Garlic rosemary and anchoviesUsing a sharp paring knife, open up a pocket around the bone, as deeply as you can. In a pestle and mortar mash up a couple of the anchovies with a clove of garlic and some of your rosemary, chopped roughly, and stuff this into the pocket you have made, to help infuse flavour from the inside of the joint.

Lamb prepared for ovenTake four or five anchovies and cut them into quarters. Slice the garlic cloves into quite thick slices, and break up the rosemary into individual ‘tufts’ of leaves. Using the sharp paring knife, make stab incisions into the lamb and stuff a piece of anchovy, a slice of garlic and a tuft of rosemary into each one. Drizzle over some of the oil from the anchovy can and sprinkle over a little salt and pepper.

That’s the lamb all prepared. Slide it into a very hot oven (about 230C) for an initial half hour.

While the lamb is starting to sizzle, prepare your roast potatoes & roast vegetables.  These can go in when you turn the oven down to 160C after half an hour – or wait a while before putting them in, if it’s a big joint. When you turn the oven down, pour a glass of white wine over your lamb. Your timings will depend on the size of your joint and how pink you like your lamb – my small joint needed about another hour. I’m a big fan of my meat thermometer, just remember the centre of the joint will keep heating up while you rest your joint, which you should do, and allow at least 20 minutes resting before you even think about carving it.

Take the lamb out to restAbout 10 minutes before the joint is ready, pour a glass of water into the roasting tin. This will start to loosen the baked on meat juices from the bottom of the tray. When the meat comes out to rest, check how your roast potatoes and vegetables are coming along and adjust the oven temperature accordingly.

Carved lamb returned to gravyMake the gravy directly in the roasting tin on the hob (assuming your roasting tray will survive this treatment!). Pour off any excess fat, then mix in a little bit of flour if you like your gravy thickened, releasing all the lovely tasty ‘bits’ from the bottom of the pan as you go. Pour in a splash more wine, and stir in a spoonful of fruit jelly – I used the crab apple and chilli jelly I had in the fridge – and season with salt and pepper to taste. Carve the lamb thickly and return it to the roasting tray, mixing with all the lovely juices before serving with all the trimmings. I just adore a dollop of vinegary sweet apple and mint jelly with roast lamb.

Perfect roast lamb?

This is a great *great* roast lamb recipe. It’s the addition of the anchovies, and the lovely rich winey gravy, which set it head and shoulders above my previous efforts. As it happens, I’ve just rediscovered anchovies, and a couple of tins have taken up residence in my store cupboard for the first time in years. Used here, they add a luscious salty-savouriness to the lamb without any noticeable fishiness, so don’t be afraid of them! The gravy is simply fabulous, with the addition of the fruit jelly really balancing and melding the flavours.

I can only recommend that next time you’re roasting a leg or shoulder of lamb, you do it this way. I know I will!

**
Meat book - inner page viewThe River Cottage Meat Book, by Hugh Fearnley-Whittingstall
Hodder and Stoughton, 2004.
ISBN 978-0-340-826355.
Hardcover, 544 pages. RRP £25.

[Full disclosure: This is my book, which I bought. I have received no payment or sponsorship for this post, nor have I accepted a review copy. I do not have an amazon affiliate account and do not profit from any links provided.]

I bought this book in hardback, when it first came out almost a decade ago, and it has not disappointed, becoming one of the old-faithfuls of my cookbook collection. Not simply a recipe collection, this book contains lots of information about different meats and livestock, cuts, and preparation techniques, and deserves a place on the shelf of every committed carnivore!

Fearnley-Whittingstall is a particular champion of cheaper and less fashionable cuts of meat, and a great advocate for ethical meat-eating. The Meat book, then, is a great source of information on animal welfare and farming – and in these respects, inevitably, doesn’t always make easy reading – but also a very useful resource if you’re trying to eat well on a budget without compromising on flavour or on your principles. Unless you’re a committed vegetarian, I recommend you add this book to your wish-list if you don’t own it already!

‘Cooking the Books’ is my self-imposed blog challenge for 2014 – I’ll be trying to cook a new recipe from one of my (rather extensive!) collection of cookbooks once a week, write it up and review it. Wish me luck!

Read more from the Country Skills blog >>

Banner320-260

Taming the Tomato Glut – Part 7: finally, putting it on ice!

Now that's what you call a glut!

In the end, there’s always the freezer…

At the end of October, I had the last few bowls of tomatoes I hadn’t managed to preserve, eat, or give away, and we were on our way to Cornwall for a week. They weren’t going to survive until our return, so it was time for desperate measures.

Freezing is a great food preservation technique – maintaining all the freshness and nutritional value of your home-grown fruit and vegetables. This comes at some cost to texture, undoubtedly, but usually in ways that are irrelevant if you’re going to cook the veggies anyway. Preparation is generally quick and straightforward – certainly compared to preserving, bottling or pickling. Of course the limiting factor is always the space available in the freezer, which for me, despite the obvious advantages, tends to make freezing my preserving technique of last resort.

Wash & trim tomatoesI needed to get these tomatoes stored with as little faff as possible – I had a holiday to get started! – so I chose the simplest of all solutions.

Wash your tomatoes and discard any which are spoiled, trimming any minor damage. Remove their little green hats. Then, a batch at a time, just pulse them very quickly in a food processor enough to break them up.

Chop in food processorYou’re not trying to reduce them to pulp, just roughly chop to release enough juice that they will freeze as a solid ‘brick’ of tomato flesh and juice.

This leaves the skins and seeds in, which I know some will disapprove of. Personally I struggle to be offended by tomato skins – really, life’s too short to be peeling tomatoes! You will hear that chopping tomatoes in a food processor will break up the seeds and release a bitter flavour – while this may be the case if you’re trying to blend to a smooth texture, I’m pretty sure hardly any of seeds are damaged with such a short chop.

Pint measureDecide on your freezing volume – I chose to freeze these a pint at a time, in retrospect that was too much for us, since I’m usually just cooking for me and Hubby, and when I do this again in future I will probably freeze at least some in half-pint volumes for greater convenience.

Bag up your tomatoes, excluding all the air when you seal the bag, label the bags and tuck away in the deep freeze until you need them.

Ready for freezing

You can use these for more or less anything, to be honest. Allow them to thaw out, and use them in place of fresh tomatoes, for example in the recipe for roasted tomatoes with chicken and pasta. Passed through a mouli, you have a batch of fresh passata ready to go straight away – and thus remove the skins and seeds, if they offend your delicate sensibilities! You can also use them directly as a substitute for chopped tinned tomatoes in chillies and pasta sauces – I used some in the puttanesca sauce I made recently, and they were excellent. I can’t however recommend trying to eat them raw – the texture is altered by freezing and while the flavour is lovely and fresh, it would be a bit like putting tinned tomatoes in your salad!

Serve!

Well, folks, that’s it for last year’s tomato glut (I know, I know…)! It’s taken me a while to finish writing these posts up – hopefully they’ll be of use to my Southern hemisphere readers pretty soon, at least! But I still have jars and bottles of passata, tomato and chilli chutney, and green tomato chutney in the larder, ‘sun dried’ tomatoes in a jar in the kitchen, and a couple more bags of frozen tomatoes in the freezer. Even in the depths of winter, I can enjoy my summer’s produce, a genuine taste of bottled sunshine, and that makes it all utterly worthwhile!

Read more from the Country Skills blog >>

Baked Eggs with Smoked Haddock and Grain Mustard, from ‘Eggs’ by Michel Roux – Cooking the Books, week 6

Our hens have got laying early and enthusiastically this year, despite the quite horrible weather, and we have more eggs than we know what to do with. I bought this little book fairly soon after we got our girls, anticipating the inevitable hen-keeper’s egg glut, but despite that it’s seen very little use.

This is a lovely little recipe for baked eggs (‘en cocotte’ as I’m sure M. Roux would actually have it), which makes a gorgeous starter or, serving two per person, a really decent supper dish. Now, I have to admit I have made this recipe, and variations on it, a couple of times already, so my version does vary a little bit from the original.

To make four (serves four for a starter, or two for a main course) –

  • Baked eggs - ingredientsSmall fillet of un-dyed smoked haddock (or other cold-smoked fish), about 120g
  • Half a pint of milk (approximately)
  • 6 tbsp of double cream
  • 1 tbsp grain mustard
  • 4 eggs
  • Butter, to grease the ramekins
  • A little sprinkle of parmesan cheese
  • Salt & pepper

Start preparing this dish about an hour before you intend to eat it, as there’s a certain amount of standing time involved. But this is a dish that you can prepare plenty of time in advance, and then just put in the oven when needed, which makes it a great choice for entertaining!

If you store your eggs in the fridge, get them out and let them come to room temperature.

Poach fish in milkPlace the fish in a small saucepan and just cover the fillet with milk (you might need a little more or a little less than half a pint, depending on the size of the pan and the thickness of the fillet). It’s fine to cut the fillet up into two or three pieces if this makes life easier. Bring the milk gently to the boil, and then take the pan off the heat and set to one side, and allow to cool. After 20 minutes to half an hour, it will have cooled to nearly room temperature, and the fish will have cooked through in the residual heat of the poaching liquid.

Flake your fishDrain the fish, discarding the milk. If your fish has skin on, this should now peel away really easily. Now break the cooked smoked fish up into flakes. Those observant souls amongst you may have noticed that there’s something unusual about my ‘haddock’. This is actually a home-smoked whole fillet of arctic char, made following the same technique as my home-smoked trout. I’ve made this dish with smoked trout in the past, and that’s quite lovely. To be honest, I think any cold-smoked fish would work here, so why not experiment?

Combine cream with fish and mustardIf you’re cooking your eggs straight away, pre-heat the oven to 170C. Give your pan a quick wash and dry, and heat the cream to nearly-boiling. Take it off the heat and incorporate the flaked fish, mustard, and salt and pepper to taste (I never feel the need to add extra salt, there’s plenty from the fish!). Allow to cool to room temperature – you can speed this process up by immersing the pan in cold water.

Ready to go in the ovenButter your ramekins. Now spoon the fish, cream and mustard mixture evenly between them. As you do, make a dip in the centre, this will encourage the egg yolks to settle in the centre, which makes it easier to cook them to a lovely soft texture later! Crack an egg into each ramekin. Finally sprinkle over a little bit of freshly ground pepper and a little bit of parmesan cheese.

If you’re not cooking these straight away, pop them in the fridge, but remember to get them out long enough before cooking that they come back up to room temperature before going in the oven.

Finished eggsPlace your ramekins in a flat-bottomed roasting dish, boil the kettle, and then carefully pour boiling water into the roasting dish to come about half way up the pots. Slide into your pre-heated oven. I find these take about 12 minutes to cook – you can judge how they’re getting along by the amount of ‘wobble’ on the contents of the pots when you move them gently. I try to cook mine so the yolks are still runny and silky-textured, but the white is fully set – your preferences may vary! – but it’s much easier to achieve this if you can get your yolks bedded neatly in the centre of the mixture.

When they’re ready, serve immediately and simply with the very best buttered bread – this is my sourdough – and enjoy!

Serve and enjoy!

**
Eggs - cover shot‘Eggs’ by Michel Roux
Quadrille Publishing Ltd, 2005. Paperback edition 2007. ISBN 978-1-84400-311-2.
304 pages, paperback, full colour. RRP £9.99.

[Full disclosure: This is my book, which I bought. I have received no payment or sponsorship for this post, nor have I accepted a review copy. I do not have an amazon affiliate account and do not profit from any links provided.]

This book is a little treasure trove of (unsurprisingly, given the author) predominantly French-influenced dishes, all featuring eggs, though not necessarily in a starring role.

All the stalwarts are here, of course – eggs scrambled and poached, fried, baked, and constructed into soufflés, omelettes, and so on. There are some less obvious choices too – some great traditional French deserts and sweet treats, ice creams, and even fresh pasta.

Inside page viewIf I had a criticism, it would be that this is actually a rather unhelpful book to pick up if, like me, you’re often in the position of having a lot of eggs that need eating and are in need of inspiration for what to do with them. These are, for the most part, quite sophisticated recipes and as a result tend to include ingredients which aren’t routinely in my fridge and store cupboards. That said, there a lot of wonderful-looking food here and I definitely need to make an effort to experiment further!

The book itself is a pretty medium-format paperback, the food photography (credited to Martin Brigdale) is mouthwatering, but bucks the recent trend to illustrate every dish, with some – like this little baked egg dish – not illustrated at all.

Each section of the book starts with a well illustrated guide to the essential techniques, and this is very helpful, particularly as some aspects of egg cookery – poaching, making custards, or emulsions like mayonnaise or hollandaise sauce – can sometimes seem a bit like dark culinary magic, even to the more experienced cook. This is a little book, then, which not only provides some great recipe inspiration, but could help sharpen up a few kitchen skills into the bargain!

‘Cooking the Books’ is my self-imposed blog challenge for 2014 – I’ll be trying to cook a new recipe from one of my (rather extensive!) collection of cookbooks once a week, write it up and review it. Wish me luck!

Read more from the Country Skills blog >>

Mac and Cheese, from Nadia G’s ‘Bitchin Kitchen Cookbook’ – Cooking the Books, week 5

Belatedly – since this post should have been written and posted last Thursday. By the time we got to supper time, I was equally short of energy and inspiration, and really didn’t fancy a trip to the shops or a complicated culinary endeavour. Comfort food was definitely the order of the day… So my thoughts turned to pasta bakes, and what could be more traditional than the absolute classic of the genre, the much-loved macaroni and cheese.

Bitchin Kitchen cover shotThis is one of those dishes which tends a bit towards ‘throw in what you’ve got’ rather than coming from a cookbook, but that would go against the spirit of this blog challenge, so I had a flick though a few of the more likely candidates and found a promising version in the ‘Bitchin Kitchen’ cookbook – of which, more later. It was particularly promising because with a few minor substitutions, I could avoid a trip out in the nasty weather to the Co-op.

To serve two (very generous portions) I used –

  • Ingredients220g of good quality pasta – I used penne, the original recipe calls for fusilli, but any bite-sized shapes will do just fine
  • One small onion, finely chopped
  • Two particularly small dried bay leaves (one decent bay leaf would be perfect)
  • 80ml single cream
  • Half a pint of milk
  • Grated cheeseAbout a cup of grated cheese. I used two handfuls of mature Cheddar and a handful each of Caerphilly and Lincolnshire Poacher. The original recipe calls for Cheddar, Fontina, and ‘Swiss cheese’ (whatever that is). This is definitely a recipe where using a combination of cheeses adds significantly, so use whatever mixture tickles your fancy!
  • Home-made breadcrumbs
  • Butter, salt and pepper

Get some well salted water up to a good rolling boil in a saucepan before adding the pasta and parboil it (about five or six minutes ought to do it). Meanwhile pre-heat the oven to 180C. Drain the pasta in a colander, and toss with a splash of oil to prevent sticking.

Sauce at a simmerAfter giving your pan a quick clean, fry the onion in a little butter until soft and translucent. Add the milk and cream, and the bay leaves, and bring to a gentle simmer. I couldn’t resist adding a little freshly grated nutmeg. Give the mixture a couple of minutes to infuse and then add the grated cheese and stir gently while this melts into the sauce. Give a quick taste and add a good pinch of pepper and a little salt if you think it needs it – with the cheese, it probably won’t.

Incorporate pasta wellNow remove the bay leaves from the sauce, add back in the pasta, and mix fully ensuring all the pasta is fully coated. Butter a pie dish or other small baking dish (my trusty enamel pie dish was pressed into service once more) large enough to contain all the pasta.

Ready to go in the ovenTip in the pasta and sauce and sprinkle over a generous coating of breadcrumbs. Incidentally, if you’re buying breadcrumbs, for goodness sake stop it, they’re the simplest things ever to make at home and keep incredibly well, and if you’re baking your own bread and ever throwing any away, that’s a tragedy easily avoided!

I couldn’t resist adding a little sprinkle of parmesan to the breadcrumb topping. Dot with a couple of small pieces of butter, and throw it in the pre-heated oven for about 40 minutes.

Baked!

It should come out looking a little like this!

And serve...This is really decent warm comforting winter food, very little effort to make, store cupboard ingredients, but the little additions (the bay leaves, the nutmeg and the nice variety of cheeses) make it that little bit more special. I do like the onion, which I wouldn’t instinctively have added. The top layer of pasta comes out wonderfully crunchy with the breadcrumb topping and the texture of the dish avoids stodginess.

If I had one criticism it would be that the end result is a bit dry – there’s no really indulgent silky sauce to mop up, or extravagant strings of melted cheese.  I suspect incorporating a stringier cheese like a good mozzarella, cut into cubes and sprinkled into the pasta and sauce mixture, and increasing the sauce to pasta ratio, might just upgrade this from a really decent cold weather dish into comfort food heaven!

**
Nadia G’s Bitchin Kitchen Cookbook by Nadia Giosia
Publised by skirt!, an imprint of The Globe Pequot Press, 2009. ISBN 978-1-59921-441-2.
210 pages, paperback, full colour. RRP US $19.95.

[Full disclosure: This isn’t my book, it belongs to my husband, but I did buy it for him! I have received no payment or sponsorship for this post, nor have I accepted a review copy. I do not have an amazon affiliate account and do not profit from any links provided.]

Inside-page viewBitchin’ Kitchen came to TV screens in the UK about a year ago, after starting life as an internet comedy cooking show, and it certainly divides opinions! Personally I love it – it’s totally mad, no question, the sort of batshit-insane TV that only the Canadians seem to be able to make. Is it a serious cookery show? Who the heck knows. But at the end of the evening after a couple of glasses of wine, there’s nothing better on telly.

Now, this isn’t a TV review, really, so let’s turn our attention to the cookbook, which in its way is just as mad. The art design is quite unlike anything I’ve ever seen – I can put my hand on my heart and say that none of my other cookbooks feature images of decapitated dolls, bondage gear, animal prints or stilettos – but the recipes are *good*, and for the most part quite a bit more sophisticated than the mac and cheese featured here. As you would expect there are quite a few modern, Canadian-Italian dishes, but these complimented by a good variety of other influences from around the world. Be aware, this is a US-published book, and while there are weight / volume conversion tables in the back, a set of US cup measures and a willingness to creatively substitute ingredients will serve you well.

I bought this book as a bit of a joke for Hubby’s last birthday, truth be told, but it will definitely be coming out to be used again in the future. If you’ve seen the TV show and hated it, then probably give the book a miss – however good the food, the things that have annoyed you on telly will probably annoy you here too – but if that’s not the case, don’t dismiss this book as merely a novelty item – there’s plenty here to get your teeth into!

Ahem. I’ll get my coat.

‘Cooking the Books’ is my self-imposed blog challenge for 2014 – I’ll be trying to cook a new recipe from one of my (rather extensive!) collection of cookbooks once a week, write it up and review it. Wish me luck!

Read more from the Country Skills blog >>

Chicken Breast with Spaghetti Puttanesca, from ‘Food Lovers: Chicken’ – Cooking the Books, week 4

This week, my choice of recipe was guided by the fact I have two chicken breasts in the fridge that need eating today. Which, if you think about it, is an ordinary enough problem in a country where chicken breast portions are some of the most popular cuts of meat bought daily in our supermarkets.

Chicken breast portionsNow, I would normally buy a whole chicken and portion it up myself, but for reasons not worth going into here, on this occasion I’m the ‘proud’ owner of these two rather aggressively trimmed, skinless and boneless breast pieces. And I can immediately think of at least a dozen things to do with them, too – the trouble is, it’s Thursday, and I’m due to do a Cooking the Books post, so none of my usual go-to recipes will do, I need to find something different from among the extensive cookbook collection.

Cross-legged on the floor by the bookcase, I must have gone through at least half a dozen of my favourite books – Jamie Oliver, Nigel Slater, Hugh Fearnley-Whittingstall and even the Two Fat Ladies all let me down, their chicken breast recipes either variations on something I already regularly make – and prefer my version to theirs – or requiring an exciting range of exotic ingredients which aren’t in my kitchen cupboards and which, I suspect, I might have had trouble finding in our local village co-op!

So, down to my second string of cookbook options, the ‘collections’ – Good Housekeeping, Australian Woman’s Own, even the National Trust, and found the same problems here, too. What was going on? And then I spotted a paperback book which, I have to say, I’d forgotten we own, but the spine caught my attention, saying simply ‘Chicken’. Here, surely, would be the answer I was looking for?

Inside page viewI can’t remember whether this book came to us as a gift, or as a remaindered-bin find, but I’m pretty sure I haven’t cooked from it before. A flick through, though, came up with the goods – a recipe for spaghetti puttanesca with chicken breast. Perfect, a taste of summer for a winter supper, and because the recipe called for fresh cherry tomatoes as the base for the sauce, an opportunity to substitute some of my chopped and frozen home-grown tomatoes.

A quick read of the recipe instructions, however, immediately started to raise some doubts.  For instance, the second instruction, after ‘Heat the oven to 400F’, is ‘Cook the spaghetti according to the package instructions’. Before you’ve started to do anything with the raw chicken. So, you either have the slowest-cooking pasta known to mankind, or it’s going to be a nasty overcooked mush before your chicken is half-way to being safe to eat. Not an auspicious start. Still, the recipe for the most part seemed worth trying, caveat coquus

To serve two, you need to get together the following ingredients –

  • Assemble your ingredientsTwo chicken breast fillets, skinless and boneless
  • Six anchovy fillets
  • Two smallish cloves of garlic
  • 50g of black olives
  • 250g of fresh tomatoes (mine were home grown, roughly chopped and frozen last year, but fresh cherry tomatoes, halved, would be fine, or you could even use a tin)
  • A handful of sun-dried tomatoes (optional)
  • Dried rosemary, thyme and oregano
  • Chilli flakes
  • 200 g of decent italian dried spaghetti
  • Salt and pepper
  • Olive oil
  • Butter
  • Balsamic vinegar, or better, elderberry vinegar

Put the oven on to heat at 180 C.

Fry the anchovy, garlic and chilliIn a frying pan, heat a tablespoon or two of olive oil. Mince up four anchovies, and the garlic, and add these to the pan with about a quarter of a teaspoon of the dried chilli flakes. Fry until slightly browning, then add a teaspoon each of dried thyme and oregano, and about half a teaspoon of rosemary.

Chicken ready to go in the ovenSlice the chicken fillets in half to make four half-thickness fillets, and mix these with the herbs and flavours in the pan, coating evenly, and fry lightly on both sides, until just golden. Then transfer the chichen to an oven proof dish, with all the tasty extras, and put it in the oven.

Return the frying pan to the hob, add a little more olive oil and a knob of butter, and once this has melted, the fresh tomatoes. Here I deviate from the recipe in the book, quite significantly and without apology. The tomato sauce in the recipe is just fresh tomatoes, red wine, olives, salt & pepper.  I think it needs a little more than that to stand up to the highly-flavoured chicken fillets.

Fresh and dried tomatoesAdd the sun-dried tomatoes if you’re using these. They make a great addition if your fresh tomatoes are chopped, like mine, or if you’re using tinned tomatoes, as they’ll add texture to the final dish as well as the lovely sweet flavour. Mine are the dry type (home-made!), which you can add directly. If yours are in oil, drain as well as you can before adding.

Now, you can boil the kettle and get the pasta going. Use a big pan with lots of salted water and a glug of oil to keep the pasta from sticking.

Mince another two anchovies, and add these to the tomato in the frying pan, along with a sprinkle of thyme and oregano, and a pinch of chilli flakes. Once this has cooked down a little, add about half a glass of red wine. Keep tasting this tomato sauce as it’s the only way you’ll get it right. Tomato sauces often need a lift in the sugar and acid department, and my favourite way of adding this is by using a splash of vinegar – balsamic is great, but home-made elderberry vinegar is better! Add a pinch of freshly ground black pepper, if you think it needs it.

Finished sauceAt this stage, notice that your olives aren’t pitted, and swear under your breath. Squeeze out the stones, while keeping a close eye on the spaghetti, to make sure it’s not over-cooking, and on the sauce, to check it’s reducing nicely to a rich dark colour. Chop the olives roughly, and add them to the tomato sauce to heat through.

Mix pasta with sauceDrain the pasta and mix it into the tomato and olive sauce.  Take the chicken out of the oven, and check it’s cooked through (since you sliced it in half, it should be nicely done, cooked through but not dry). Serve the pasta in wide bowls, with the chicken on top, pouring over any pan juices from the chicken. Serve with a sprinkle of freshly grated parmesan.

So – the verdict? This is a properly decent pasta dish, with or without the chicken, but the chicken, pan-fried and finished in the oven with all those great flavours, is tender and really very good. I recommend this dish to you. Sadly I can’t say the same about the cookbook!

Serve!

**
Food Lovers: Chicken by various authors.
Recipes selected by Jonnie Léger. Images & Recipes by StockFood©.
Transatlantic Press, 2011. ISBN 978-1-907176-80-7.
400 pages. RRP £16.99.

[Full disclosure: This is my book. I have received no payment or sponsorship for this post, nor have I accepted a review copy. I do not have an amazon affiliate account and do not profit from any links provided.]

Chicken - cover shotThis is pretty much a ‘copy and paste’ effort of a cookbook, and I can’t honestly recommend you buy it. I may have been unlucky with the recipe I chose, but if the checking and proof reading standards are this unpredictable, I would bet on problems with other recipes, too. It’s quite a pretty book, in fairness, a nicely photographed large format paperback, and I’m sure there are some gems in among the 200 recipes featured, but I can’t see it being worth the hit and miss effort required to find them. And anyway, I rather suspect most of these recipes are probably available on the internet, in places like Epicurious.

So, probably not one to add to the collection – and as there seem to be others in the ‘Food Lovers’ series, I’d give those a miss, too.

‘Cooking the Books’ is my self-imposed blog challenge for 2014 – I’ll be trying to cook a new recipe from one of my (rather extensive!) collection of cookbooks once a week, write it up and review it. Wish me luck!

Read more from the Country Skills blog >>

Taming the Tomato Glut – Part 6: Grandma’s green tomato chutney

I remember my grandmother making her green tomato chutney, towards the end of the summer holidays, when it was clear that the best of the ripening days for the tomatoes she lovingly grew outdoors, on the patio, were over. After her death, my mother transcribed some of her hand-written recipes for my sister and I – including the green tomato chutney recipe.

Now that's what you call a glut!

Back at the end of last summer, I had rather a lot of green tomatoes.  So I went and had a dig around the darker, dustier recesses of my laptop hard disk, and retrieved the text files containing Grandma’s recipes, and hidden among them, sure enough, was this –

GREEN TOMATO CHUTNEY

3lb green tomatoes, 2lb cooking apples, 3/4lb sultanas. 1oz ground black pepper, 4 tbs salt, 1 quart malt vinegar, 1lb Demerara sugar, 1/2 oz mustard seeds, pinch cayenne pepper

Peel and slice tomatoes. Cut up apples. Chop sultanas. Put in enamelled saucepan with remaining ingredients. Boil gently for 2 hours, stirring constantly until chutney gets dark and tomatoes and apples are well cooked. Bottle when cool.

The main thing that struck me about this recipe was the lack of any onions – honestly, I can’t remember whether Grandma used them or not, but I expect onions in a chutney recipe! I made a couple of other, more minor modifications, too (Sorry, Grandma!), and scaled the recipe up to use as many of the green tomatoes as possible.

This, it turns out, was a mistake – the quantity I made was totally impractical, took forever to cook down, and almost ended in disaster, more of which later. Really, I can’t recommend making more than half this batch size. Even if, like me, you have a really big stock pot. Don’t say I didn’t warn you!

For my chutney, I used –

  • Cooking apples3 kg green tomatoes
  • 2 kg cooking apples
  • 1 kg onions
  • 1 kg Demerara sugar
  • 2 l malt vinegar
  • 750g dried vine fruits (I used a mix of raisins & sultanas)
  • 2 tbsp freshly ground pepper
  • 1 tbsp sea salt
  • 1 tbsp yellow mustard seeds
  • 1 tsp cayenne pepper

Life is too short to peel tomatoes (especially 3kg of them!) and I was cooking on a work night, so it was too short to lovingly chop them by hand, too! Out with the food processor, and rough-chop all the tomatoes, onions, and apples, before putting them in the stock pot with the rest of the wet and dry ingredients.

Chopped green tomatoes  Chopped onions  Ingredients mixed at start of cooking

And now, just simmer it, slowly, for what – with a batch of this size! – will be a very very long time! I had to give up and go to bed, fitting a tight lid to the pan, and finished cooking the chutney the following evening. This is one very good reason not to make such a giant batch at once.

The other, of course, is that you will require an enormous quantity of jars (with plastic lined lids, or they’ll corrode from the vinegar – mind you, I can’t remember the last time I was an un-lined jar lid!). While I was sorting these out, I took my eye off the pot, and the inevitable  happened – the chutney caught on the bottom of the pan, and started to burn.

Finished chutneyDisaster! I panicked a bit, and then with Hubby’s help, decanted most of the chutney into any available container, leaving the burned stuff on the bottom of the pan. After a damn good scrub, we were back in business, though I remained convinced for the rest of the cooking time that I could taste the burnt flavour in the chutney. This paranoia wasn’t helped by the highly visible flecks of black pepper in the mix, which my brain kept insisting on seeing as burnt bits.

I very nearly threw the whole lot in the bin, but a bit of gentle encouragement that I’d done all the work now anyway convinced me to bottle it anyway and hope for the best. I deviated from Grandma’s instructions again here and bottled hot, into hot oven-sterilised jars, as I usually do. Now all that was left to do was to leave the chutney to mature for a couple of months.

Served-up

This (and wanting to make sure this tale had a happy ending!) is the reason for the delay in writing up this recipe. I’m really pleased with the result – after maturing I’m pretty sure it doesn’t taste burnt, and is a lovely gentle fruity chutney, with a lovely black pepper warmth, which goes brilliantly with cheese, ham, and even curries!

So this year, at the end of the home-grown tomato season, why not make a batch? But, promise me, make it a smaller one?

As for me, I’m still really curious about the outcome of making the recipe as written – so perhaps this year I’ll make a test batch of the onion-free version. Who knows, it may be a revelation?

Read more from the Country Skills blog >>

Taming the Tomato Glut – Part 5: roasted tomato sauce

With apologies now, to all but my antipodean readers – the tomato glut, and the long hot days of summer, seem a long way behind us, but there were a couple of recipes that fell through the cracks, for one reason or another. Hopefully they’ll be of use to you later this year!

Lay out on baking trayThis is a great little recipe for using up those slightly over-ripe tomatoes that inevitably start to pile up once the harvest really gets going.

You will need –

  • Home grown tomatoes (about 1kg here)
  • Three garlic cloves
  • Two or three bay leaves
  • Sea salt, mixed dried italian-type herbs

Trim out any obvious damage and discard any that are really ‘over’, cut the tomatoes into even pieces, and lay the tomatoes out in a single layer on a baking sheet.

After roastingTuck the cloves of garlic in amongst them, and snuggle the bay leaves underneath, sprinkle over a little sea salt and a few mixed herbs, and roast in the oven at 180 C for 30 to 40 minutes until you’re starting to see some browning to the skins.

Pass through a mouliDiscard the bay leaves and put the rest through a mouli with the fine filter fitted (or push through a sieve with the back of a spoon, if you don’t mind the labour!). This will hold back the skins and seeds and allow just the beautiful smooth sweet tomato pulp through.

Done! How simple is that?

I started with around 1kg of lovely ripe home-grown tomatoes, and ended up with about 350ml of sauce, which may not seem like much but all the flavour and sweetness is concentrated right down into that sauce. I asked Hubby to taste a spoonful and he thought it tasted like tomato soup – and certainly you could let it down with a little bit of vegetable stock, maybe add a sprinkle of fresh basil, and enjoy it just as it is! I made lasagne with it, and it was perfectly wonderful.

Finished sauce

If you wanted to make a big batch, for keeping into the winter, you could bottle and pasteurise for storage just like the fresh passata. I wish I had, now! I could just do with some roasted bottled sunshine!

Read more from the Country Skills blog >>

Pain de Savoie, from Paul Hollywood’s ‘Bread’ – Cooking the Books, week 2

We seem to have ended the Christmas season with rather a lot of lovely cheese in the fridge! So today’s challenge was to find a recipe in my cookbook collection which would let me use some of it to make something absolutely scrummy. I haven’t baked any bread for a couple of weeks and remembered that Paul Hollywood might have something that would suit… So I dug out ‘Paul Hollywood’s Bread’, which accompanied last year’s popular BBC TV series.

Bread inner page view

And there it was – Pain de Savoie – a lovely looking loaf stuffed with cheese (yes!) and bacon (even better!). Savoie is an alpine region, and as everyone knows, mountain folk have all the best gorgeous stodgy winter comfort food. I had high hopes!

To make this loaf, I used –

  • White & rye flour400g of strong white bread flour
  • 100g of organic rye flour
  • 1 small tsp of sea salt (I can’t bring myself to put more than this into a loaf)
  • 7g pack of fast action dried yeast (oddly, the recipe wanted 8g)
  • 150g of home-cured smoked streaky bacon, rind removed, and cut into lardons
  • 200g of wonderful aged Gruyère
  • Olive oil
  • 330ml of tepid water

Start by weighing your flours and combining in a large mixing bowl, add the salt, yeast, a generous tablespoon of olive oil, and then mix in about two thirds of the water, using your fingers.

Roughly mixed ingredientsThis should roughly combine the dry ingredients but leave them a little dry, so add the remaining water progressively until all the dry ingredients come together as a ball, leaving the sides of the bowl reasonably clean. I found I had just over 50ml left over, but this will depend on the characteristics of your flours. The dough should look a little like this before kneading.

Now knead for 5-10 minutes until it becomes smooth and elastic. You’ll notice the difference – it may take longer than this if you’re not accustomed to kneading, but you’ll get there! I have wholeheartedly adopted Paul’s recommendation of kneading dough on an oiled surface, after a lifetime of using flour – I don’t think it makes very much difference to the dough, but it doesn’t half reduce the mess you make of your kitchen!

After kneadingOnce you’re done, the dough ball will look like this. [You’re supposed to add the fried & cooled lardons at this stage. I suffered an unfortunate spot of reading comprehension fail, and didn’t.] Oil the mixing bowl and put the dough ball back inside, cover with a piece of oiled PVC-free cling film, and set aside for a couple of hours until it’s doubled or more in size.

Ignore anything you might have heard about putting dough to rise somewhere warm like an airing cupboard, just sitting out on the kitchen counter should be fine, unless it’s very very cold, in which case I’ve done well with putting the bowl in the oven with just the oven light turned on. Letting bread rise in a warm environment certainly will speed the process up, but at the expense of the flavour that develops with a slower, lower temperature rise – and if you wanted tasteless bread, you’d just eat the junk from the supermarket.

Fried bacon lardonsIf like me you’ve forgotten to include your lardons, now is the time to fry them until golden. I used my home-cured black pepper bacon, which is lightly smoked. Incidentally, this is what really good dry-cured bacon should look like, when you’re frying it. See that lovely, clear bacon fat in the pan? That’s all that should ever leak out. And because it’s not wet, and doesn’t leach phosphate water, it fries to a beautiful golden caramelised surface. Fabulous. Once it’s cooked, set aside to cool. And try not to sample too many pieces in the name of ‘quality control, eh?

Combine with baconI turned the dough out onto the work surface, knocked it back into a rough rectangle, and sprinkled over the cooled bacon pieces before rolling it up into a rough sausage and cutting it into three (very roughly) equal sized pieces. Each of these pieces I kneaded a little to get the bacon well combined and formed into balls. [If you had already added the bacon before the dough proved for the first time, you could just cut the dough into thirds, knock them back gently and form into balls, and go straight ahead to assembling the loaf in the loaf tin. But I hadn’t, so…]

Dough balls and cheese cubesAfter kneading the little dough balls, they were a bit tight, so I gave them a little time to relax before moving on to the next stage. About half an hour did the trick. In the meantime, cut your cheese up into ~1cm cubes. The original recipe calls for Comté, which would be glorious. This Gruyère, which happened to be what I had in the fridge, and will be a pretty good match, but really any good firm well flavoured cheese will do very nicely – I think a decent mature cheddar would work a treat!

Assemble the breadOil your tin – the recipe calls for a 20cm ‘springform’ tin. I haven’t got one of those, but I do have an 8″ loose-bottomed cake tin I usually use for Christmas cake. Paul says to roll out the dough with a rolling pin into tin-sized rounds. I just pushed it out with my fingertips, which seemed to work fine. After putting the first circle of dough in the bottom of the oiled tin, spread out half the cheese cubes over the surface, repeat with the second ball of dough, and then finally press the third circle of dough over the top. Sprinkle the top with a little bit of rye flour, and cover with the clingfilm for another hour or so until it’s nicely risen.

Before rising  Nicely risen  Fresh from the oven

Once you’re happy, pre-heat your oven to 220 and, once it’s up to temperature, slide the tin into the oven and bake for half an hour. It should come out a lovely rich mid-brown colour on top.

Rest in the tin for 10 minutes before turning out onto a wire rack to cool for as long as you can bear it, before carving off a thick slice, adding a bit of lovely unsalted butter, and cramming it in your mouth.

Cooling

This is really really good bread. The rye flour gives it a lovely nutty flavour without making it heavy. The cheese has melted during baking to leave quite striking square holes in the dough. Hubby compared it to a really good cheese and bacon sandwich, and I suppose that’s it, really. It’s a thing of great simplicity, but simple things can be fabulous and this really is. But of course the simpler the dish, the more it depends on the quality of the ingredients. So, make it! But be sure to use really good cheese and bacon, m’kay?

Share and enjoy!

Technically, it’s not difficult, though having a ‘feel’ for bread dough will obviously be helpful. Not much equipment required and relatively minimal washing up – kitchen scales, a large mixing bowl, and a deep round cake tin are essential. A dough scraper is useful but not actually necessary. If you don’t have a wire cooling rack, it’s perfectly reasonable to use a (cold!) oven rack

**
Bread cover shot‘Paul Hollywood’s Bread’
Bloomsbury Publishing PLC, 2013. ISBN 978-14088-4069-6
Hardcover, full colour, 224 pages. RRP £20.

[Full disclosure: This is my book, which I bought in the traditional way! I have received no payment or sponsorship for this post, nor have I accepted a review copy. I do not have an amazon affiliate account and do not profit from any links provided.]

This is a really great book for anyone interested in bread baking, whether you’ve never baked a loaf before and just want to know how to get started, or have a fair amount of baking experience, there’s something for you here. I would definitely recommend it to any keen but inexperienced home-bakers, as the techniques are well explained and the book is quite lavishly illustrated with step-by-step photography.

Sourdough baking is even covered a little, though after my experiences with getting a sourdough starter going a couple of years ago, I think the process given for this may be a tad on the optimistically simple side! (Incidentally, if you’re just taking up baking, and particularly if you’re interested in sourdough, I would also recommend ‘River Cottage Handbook No. 3 – Bread’ by Daniel Stevens)

There are some lovely unusual bread recipes, such as this one, and one or two ‘extras’ to accompany them, and there should be something new to try here even if you’re already a confident baker!

‘Cooking the Books’ is my self-imposed blog challenge for 2014 – I’ll be trying to cook a new recipe from one of my (rather extensive!) collection of cookbooks once a week, write it up and review it. Wish me luck!

Read more from the Country Skills blog >>

Venison Pie, from Darina Allen’s ‘Forgotten Skills of Cooking’ – Cooking the Books, week 1

“Hi, my name is Kate, and I have a cookbook problem…”

Some of my library

I just can’t resist them. A nice cookbook is such a marvellous object, it’s a thing of beauty, solidly bound and gloriously illustrated, as well as containing the promise – such promise! – of tasty food to come. So, I buy cookbooks (and people buy them for me, too, of course), and continue to buy them until they overflow our bookshelves and end up living in piles under coffee tables and stacked against the walls of our little cottage. As I said, it’s a problem. Last year sometime, I had a quick count up – and stopped counting when I got close to 100.

All those books – all those different recipes – and yet it’s relatively rare that I cook something completely new. For all the usual reasons – busy lives, habit, and having a really good set of family-staple recipes we come back to time after time. But it’s good to push out of your culinary comfort zone – for how else do we learn? – and with such a wonderful resource at my fingertips (and, sometimes, underfoot!) I really have no excuses!

So to welcome in 2014 – and in lieu of a New Year’s resolution – I’ve decided to set myself the challenge, once a week if I possibly can, to cook a brand new recipe form one of my cookbooks, and write it up for the blog, adding a little review of the book itself. Obviously such a silly endeavour needs a name, so I think we’ll call it ‘Cooking The Books’.

Inside-page viewToday’s recipe is Venison Pie, and was chosen because Hubby found some lovely wild venison at the Farmers’ Market. The recipe is from Darina Allen’s beautiful big hardback cookbook ‘Forgotten Skills of Cooking’, which came to me as a gift from my Dad last year.

I’ve scaled down the quantities because there are only two of us (the original recipe serves 8), and made a couple of minor modifications to account for ingredient availability. In general I’m trying to stay as close to the original recipes as I can – or what’s the point, really? This will, inevitably, affect my choice of recipes  – I really don’t want this challenge to end up filling my kitchen cupboards and fridge with half-used packs of ingredients that just go to waste! Actually, thinking about it, this is a big factor in why I don’t often cook from cookbooks. But enough housekeeping – let’s get on with the cooking!

Start by preparing your venison. Darina’s recipe calls for venison shoulder, cut into pieces, but I had a ~1lb pack of already-cut stewing venison. It’s worth taking a little time to trim out any particularly obvious gristly bits from your meat at this stage. Also try to pull out any deer hairs you discover in your meat (which isn’t a particularly unusual thing to find with wild venison, because of the way it’s shot, handled and butchered).

Now mix the meat into a marinade consisting of –

  • IngredientsA small glass of red wine (use something you’ll want to drink – not only is this always excellent advice for cooking with wine, but there’ll be another 5 glasses left in the bottle!)
  • A small onion (I used a red one, but a yellow one, or even a couple of shallots would be fine) halved and sliced.
  • A bouquet garni consisting of a bay leaf, sprig of thyme and some parsley stalks
  • A tablespoon each of brandy and olive oil
  • Salt and cracked black pepper to season (I used two big pinches of pepper and one of salt)

In the marinadeIdeally you might allow this to marinade overnight, but even a few hours will make a big difference. Cover the bowl and place it in the fridge. If, like me, you’re going to use frozen prepared puff pastry to finish the pie, now would be a good time to take it out of the freezer, and either place in the fridge to defrost overnight, or out on the side in the kitchen if it needs to defrost faster than that. Pastry is always better worked reasonably cold,so once it’s defrosted, put it in the fridge so it’s nice and firm.

Once your meat has marinaded to your satisfaction (I gave it three hours), drain the meat in a colander over a bowl, retaining the marinading liquid.  While it’s draining, get together the ingredients and equipment you’ll need for the next stage –

  • Home-cured bacon lardons80-100g of dry cured streaky bacon or pancetta, chopped into lardons or cubes. I used my home-cured ‘Christmas’ bacon (with bay, juniper, allspice and molasses in the cure, lightly smoked), which I happen to have around at the moment. It’s really worth seeking out good dry cured bacon if you’re not going to make your own!
  • A small onion, chopped reasonably finely
  • Half a carrot, diced reasonably small
  • A small clove of garlic
  • 200ml of beef stock (I used a stock cube – I know, I know…)

Venison coated in flourPat the pieces of meat dry with kitchen paper and coat them in seasoned flour (I needed about 2 tablespoons). I picked the meat out of the sliced onions, but this probably isn’t necessary. This bit of the process is pretty faffy, to be honest, and is something I tend not to bother with when making stews. Let me just say, though, it produces the most wonderful, silky, rich gravy, so I may be using this trick a lot more in the future!

Meanwhile, in a frying pan, fry off the bacon until it starts to brown and donates some of that lovely bacon fat. Once it’s done, transfer the bacon to a big saucepan.  Now brown the floured venison in the bacon fat. You may need to add a little extra olive oil. Transfer this to the pan once there’s some nice colour, and fry off the onions, carrot and garlic for a few minutes before adding them to the pan as well.

Ready to simmerI couldn’t see why I’d waste the nice sliced onion from the marinade (and the recipe doesn’t appear to specify what should be done with it), so into the frying that went until it softened nicely, and joined the rest of the ingredients in the saucepan.

Now we’re called to deglaze the pan with the wine marinade, and transfer this to the saucepan with all the meat and vegetables before topping up the pan with the beef stock (pre-heated, if it’s proper stock) until the meat and vegetables are just covered. I added a bit of extra water and a slosh more wine to make up the volume. Finally add back the bouquet garni from the marinade, cover the pan and simmer very gently on a low heat for about an hour and a half (or a bit longer if required), until the venison is beautifully tender. Keep a reasonably close eye on it, stirring occasionally, and make sure it doesn’t catch on the bottom of the pan.

Once you’re happy the venison is perfectly cooked, you can take it off the heat. Time to add the last few bits, which are –

  • Saute sliced mushroomsA good handful of mushrooms. Darina wants wild ones if possible. I managed to get some oyster mushrooms and something a little bit cep-looking calling itself a ‘king oyster’ at our local supermarket, I added a couple of chestnut button mushrooms.
  • A handful of cooked chestnuts – these were the vaccuum-packed sort, left over from Christmas. The recipe says these should be omitted if you’re making a pie rather than a stew, but I couldn’t miss the opportunity to use them up!
  • A few teaspoons of homemade apricot jam. The recipe wanted redcurrant jelly, but I didn’t have any. I have a feeling crab apple jelly would work very well here, too.
  • Olive oil
  • Salt and pepper if required to season.
  • And not forgetting your block of defrosted puff pastry!

Wash out your frying pan and heat up a couple of spoonfuls of olive oil. Saute the mushrooms until colouring slightly, and once they’re done, add them to the pan with the chestnuts, cut in halves. Now taste to check your seasoning. The recipe suggests you might slike to add some redcurrant jelly, or a pinch of sugar, or possibly even some lemon juice at this stage depending on how things are coming together.

Filling in the dishI did find there was a slightly lacking sweet / acid note so substituted about three teaspoons of my homemade French apricot jam (avoiding the whole bits of fruit), one at a time and tasting carefully in between. It’s slightly miraculous, actually – makes such a huge difference to the final flavour. Add a bit more salt and pepper at this stage if required.

Edged with pastryYou could serve it now and call it a venison stew, and it would be wonderful with mashed potatoes on a cold winter’s night. But we’re going the whole hog and turning it into a pie, so transfer the filling into your chosen pie tin – I’ve used my gorgeous, very traditional, white and blue enamelware dish. Get your block of puff pastry out of the fridge and roll it out.

Finished pastry lidThe book suggests a way of attaching the pie crust in a two-stage process, fist attaching a strip of pastry all around the edge brushing with  water beneath and on top, before adding the pastry lid, trimming the excess, scalloping the edge with the handle of a spoon, and egg-wash the surface, adding some decoration if you wish.

Pierce the centre of the crust and put into a piping hot oven for 10-15 minutes before turning the heat down to about 190C until the crust is golden and the contents bubbling hot. If your oven has a hot-spot (most do) don’t forget to turn the pie around at some point to keep the colour even.

Hot from the oven

That’s it – isn’t it beautiful? Time to serve with your choice of accompaniments. Hubby requested roast potatoes, so we had those and steamed broccoli to go with it.

'Serving suggestion'What can I say? It looks pretty spanking, and tastes glorious. I love the way the late addition of the sauteed mushrooms means they retain their separate flavour, texture and identity in the dish. The venison is perfectly tender, the gravy is rich and thick and full of  beautifully balanced flavour. These quantities will feed four, I would say.

I heartily recommend you make this pie!

This is undoubtedly a time-consuming and relatively labour intensive recipe, with four separate preparation stages. Consequently it generates quite a bit of washing up, too – I counted a saucepan & lid, a frying pan, a pie dish, two mixing bowls, a colander, chopping board and knives, garlic crusher, pastry board (or your kitchen worktop), rolling pin, an assortment of spoons of different sizes, a spatula, and I’m sure I’ve forgotten a few bits. But nothing unusual and no gadgets or gizmos required. I started marinading the venison just after lunch, and we eventually ate around 7.

Serving timeIt’s a reasonably complex recipe, but no part of it is particularly technically demanding and no special skills are required – anyone who can follow a slightly complicated set of instructions should be able to cope! While there are a lot of ingredients, they’re quite ‘standard’ ones and pretty much all of them were already in my fridge and kitchen cupboards, which was a big bonus.

Perhaps something a bit quicker and simpler for next week..?

**
Cover shot‘Forgotten Skills of Cooking’ by Darina Allen.
Kyle Cathie Ltd, 2009. ISBN 978-1-85626-788-5.
Hardcover, full colour, 600 pages.

[Full disclosure: This is my book, which was a gift from my Dad. I have received no payment or sponsorship for this post, nor have I accepted a review copy. I do not have an amazon affiliate account and do not profit from any links provided.]

This is a fabulous book, full of unexpected surprises – I only realised after I’d written about the copper-cleaning power of salt and lemon juice the other day that this is one of the tips in the back of this wide-ranging tome! As well as a really good range of hearty traditional recipes, both sweet and savoury, with a focus on quality local seasonal ingredients, there are – amongst many other things! – instructions for buttermaking and producing your own clotted cream, curing and smoking techniques for meat and fish, yeasted and sourdough bread baking, and even advice on choosing livestock. It’s also a beautiful book, richly illustrated and nicely printed, which never hurts.

I would say that it deserves a place on any cookbook shelf, particularly so if, like me, you’re more interested in traditional farmhouse, country food and techniques  than in ‘cheffy’, restaurant-style cooking.

‘Cooking the Books’ is my self-imposed blog challenge for 2014 – I’ll be trying to cook a new recipe from one of my (rather extensive!) collection of cookbooks once a week, write it up and review it. Wish me luck!

Read more from the Country Skills blog >>