Baked Eggs with Smoked Haddock and Grain Mustard, from ‘Eggs’ by Michel Roux – Cooking the Books, week 6

Our hens have got laying early and enthusiastically this year, despite the quite horrible weather, and we have more eggs than we know what to do with. I bought this little book fairly soon after we got our girls, anticipating the inevitable hen-keeper’s egg glut, but despite that it’s seen very little use.

This is a lovely little recipe for baked eggs (‘en cocotte’ as I’m sure M. Roux would actually have it), which makes a gorgeous starter or, serving two per person, a really decent supper dish. Now, I have to admit I have made this recipe, and variations on it, a couple of times already, so my version does vary a little bit from the original.

To make four (serves four for a starter, or two for a main course) –

  • Baked eggs - ingredientsSmall fillet of un-dyed smoked haddock (or other cold-smoked fish), about 120g
  • Half a pint of milk (approximately)
  • 6 tbsp of double cream
  • 1 tbsp grain mustard
  • 4 eggs
  • Butter, to grease the ramekins
  • A little sprinkle of parmesan cheese
  • Salt & pepper

Start preparing this dish about an hour before you intend to eat it, as there’s a certain amount of standing time involved. But this is a dish that you can prepare plenty of time in advance, and then just put in the oven when needed, which makes it a great choice for entertaining!

If you store your eggs in the fridge, get them out and let them come to room temperature.

Poach fish in milkPlace the fish in a small saucepan and just cover the fillet with milk (you might need a little more or a little less than half a pint, depending on the size of the pan and the thickness of the fillet). It’s fine to cut the fillet up into two or three pieces if this makes life easier. Bring the milk gently to the boil, and then take the pan off the heat and set to one side, and allow to cool. After 20 minutes to half an hour, it will have cooled to nearly room temperature, and the fish will have cooked through in the residual heat of the poaching liquid.

Flake your fish
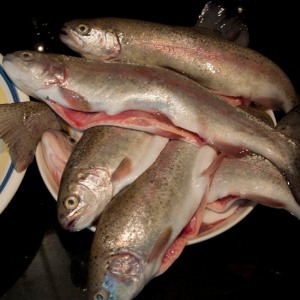
Drain the fish, discarding the milk. If your fish has skin on, this should now peel away really easily. Now break the cooked smoked fish up into flakes. Those observant souls amongst you may have noticed that there’s something unusual about my ‘haddock’. This is actually a home-smoked whole fillet of arctic char, made following the same technique as my home-smoked trout. I’ve made this dish with smoked trout in the past, and that’s quite lovely. To be honest, I think any cold-smoked fish would work here, so why not experiment?

Combine cream with fish and mustardIf you’re cooking your eggs straight away, pre-heat the oven to 170C. Give your pan a quick wash and dry, and heat the cream to nearly-boiling. Take it off the heat and incorporate the flaked fish, mustard, and salt and pepper to taste (I never feel the need to add extra salt, there’s plenty from the fish!). Allow to cool to room temperature – you can speed this process up by immersing the pan in cold water.

Ready to go in the ovenButter your ramekins. Now spoon the fish, cream and mustard mixture evenly between them. As you do, make a dip in the centre, this will encourage the egg yolks to settle in the centre, which makes it easier to cook them to a lovely soft texture later! Crack an egg into each ramekin. Finally sprinkle over a little bit of freshly ground pepper and a little bit of parmesan cheese.

If you’re not cooking these straight away, pop them in the fridge, but remember to get them out long enough before cooking that they come back up to room temperature before going in the oven.

Finished eggsPlace your ramekins in a flat-bottomed roasting dish, boil the kettle, and then carefully pour boiling water into the roasting dish to come about half way up the pots. Slide into your pre-heated oven. I find these take about 12 minutes to cook – you can judge how they’re getting along by the amount of ‘wobble’ on the contents of the pots when you move them gently. I try to cook mine so the yolks are still runny and silky-textured, but the white is fully set – your preferences may vary! – but it’s much easier to achieve this if you can get your yolks bedded neatly in the centre of the mixture.

When they’re ready, serve immediately and simply with the very best buttered bread – this is my sourdough – and enjoy!

Serve and enjoy!

**
Eggs - cover shot‘Eggs’ by Michel Roux
Quadrille Publishing Ltd, 2005. Paperback edition 2007. ISBN 978-1-84400-311-2.
304 pages, paperback, full colour. RRP £9.99.

[Full disclosure: This is my book, which I bought. I have received no payment or sponsorship for this post, nor have I accepted a review copy. I do not have an amazon affiliate account and do not profit from any links provided.]

This book is a little treasure trove of (unsurprisingly, given the author) predominantly French-influenced dishes, all featuring eggs, though not necessarily in a starring role.

All the stalwarts are here, of course – eggs scrambled and poached, fried, baked, and constructed into soufflés, omelettes, and so on. There are some less obvious choices too – some great traditional French deserts and sweet treats, ice creams, and even fresh pasta.

Inside page viewIf I had a criticism, it would be that this is actually a rather unhelpful book to pick up if, like me, you’re often in the position of having a lot of eggs that need eating and are in need of inspiration for what to do with them. These are, for the most part, quite sophisticated recipes and as a result tend to include ingredients which aren’t routinely in my fridge and store cupboards. That said, there a lot of wonderful-looking food here and I definitely need to make an effort to experiment further!

The book itself is a pretty medium-format paperback, the food photography (credited to Martin Brigdale) is mouthwatering, but bucks the recent trend to illustrate every dish, with some – like this little baked egg dish – not illustrated at all.

Each section of the book starts with a well illustrated guide to the essential techniques, and this is very helpful, particularly as some aspects of egg cookery – poaching, making custards, or emulsions like mayonnaise or hollandaise sauce – can sometimes seem a bit like dark culinary magic, even to the more experienced cook. This is a little book, then, which not only provides some great recipe inspiration, but could help sharpen up a few kitchen skills into the bargain!

‘Cooking the Books’ is my self-imposed blog challenge for 2014 – I’ll be trying to cook a new recipe from one of my (rather extensive!) collection of cookbooks once a week, write it up and review it. Wish me luck!

Read more from the Country Skills blog >>

Fillets Of Fish – how to gut, clean, and fillet a trout – Blog Advent (16)

After the ‘fishmonger’ at Morrisons managed to completely ruin some beautiful fish with a bodged filleting job, there was no way I was letting them have another crack at the task!  The replacement trout we chose were completely unprepared – a bit of a job for us, but at least we could make sure it was done properly this time!

There’s a tradition of fish-eating at Christmas in many countries, with carp featuring on many European Christmas tables.  We’ll often have fish on Christmas Eve, and whole fish make a great celebration dish – salmon can be a fabulous alternative Christmas dinner for those not so keen on poultry or red meat.

Lovely fresh fish

A lot of people are frightened by fish preparation, and there’s really no need to be. There are knacks, sure, and you won’t be very fast to start with, but preparing a whole fish from scratch is actually really quite straightforward (and, really, not at all disgusting!).

You’ll need two knives, a small pointy paring-type knife for gutting, and a long, thin knife for filleting.  Both need to be very sharp.

Whole rainbow troutFirst, you’ll need to gut your fish.  In most cases, this will have been done for you, unless you’ve caught the fish yourself.  Fresh fish doesn’t smell, but can be very ‘slimy’! This mucus coating helps protect the fish’s skin and scales, in life, and helps it move smoothly through the water.  It’s worth taking a bit of time to remove this, if you can.  I find it easiest to wash the fish in cold water and wipe the mucus away with kitchen towel.  Going to a bit of trouble to do this will make the fish easier to keep hold of, and, especially if you’re trying knife skills you’re not familiar with, will probably improve your success and safety!

Gutting fishWIth a small sharp pointy knife, make small stab incision just behind the head, between the pectoral fins.  Without stabbing too deeply inside the abdomen, extend this incision lengthways until you get to the vent, just in front of the anal fin.  Reach into the abdomen and gently pull out the contents.

Remove abdominal contentsThe end of the gut should come away from the vent at the back, with some gentle traction. The attachment behind the head is stronger, pull this out as well as you can, and then cut it away with the knife.  There will probably be a bit of blood spilled at this point – just wash the cavity out with cold running water.

Your fish is now ready to cook, if you’re planning to prepare it whole.  If not, then it’s time to fillet it.  Put your small pointy knife away now, as you want a long, thin, sharp knife for this bit.

Position of first filleting cutPosition your fish on the board with the dorsal fin towards you (belly facing away).  Make a cut behind the gills and pectoral fins, into the flesh, perpendicular to the backbone.  Stop when you can feel the backbone, don’t cut through.

Starting to cut the filletNow turn the blade 90 degrees with the blade pointing towards the tail, and, grasping the head firmly, start to cut the flesh parallel with, and as close to the backbone as you can. Go slowly – it’s not a race!

Continuing to cut the filletAfter you’ve cut a little way, you’ll be able to hold onto the fillet instead of the head, which will make the whole process a lot easier to control.

Your first filletCarry on now, all the way to the tail.  Congratulations, you’ve got a fillet!  Don’t worry if there are ribs attached at this stage – we’ll get to that later.

Second filletPut your fillet to one side, turn the fish over, and do the same the other side.  The head of the fish will be facing the opposite direction, ad you may find the whole process a bit ‘backhanded’ this way around.  Just go slowly and take the time you need.  Personally I don’t find it helpful to work with the fish’s belly pointing towards me for the second side, but you may find it easier, so give it a go that way if you’re finding it particularly awkward.

You can see from this photo, it’s a tidy job and almost no waste!

Trim the ribsNow you want to tidy up your fillet.  Gently scrape, and wash away any bloody material on the fillet under running water.  Now, using your long thin knife, insert it under any ribs that are left attached, and trim these away, trying not to take any flesh with you.

Finished filletPin bones are the little bones that you’ll feel running from the front of your fillet towards the middle, along the lateral line of the fish.  If you’re planning to cook your fillet, I probably wouldn’t bother with them – they’re easy enough to pick out once the fish is cooked, and pretty small and soft in a fish of this size.  I’m curing and smoking this fish, so I tried to remove them all.  You can cut them out in a narrow ‘wedge’ of muscle, or pull them out individually with tweezers.  Both are quite fiddly and time consuming and leave a bit of a tear in the muscle, so try both and see which works best for you!

All Done!

Finally, trim away any fins and tidy up any ragged edges. I’m quite proud of this batch of fillets and I’m sure they’re going to make absolutely lovely smoked trout for Christmas food and gifts!  They’re in the fridge, curing, right now.

So don’t be afraid of that whole fish – it’s quite likely you too can do a better job of preparing and filleting it than whoever the supermarket has working behind their fish counter today!

Advent - day 16

I’m trying to write a post a day during Advent, so, please come along with me while I try to Blog Advent – the Country Skills Way – and forgive me if I don’t quite manage it!

Read more from the Country Skills blog >>

Banner320-260

Very Fishy – in a change from our scheduled programming, a complaint to Morrisons – Blog Advent (14)

I was really excited to find that the fish counter at our local Morrisons had two beautiful arctic char, and some very lovely looking rainbow trout.  I’ve been hoping I’d be able to find some to cure and smoke to add to my family Christmas ‘hampers’ (sorry, this is a spoiler for those of you who’ll be getting them).  Because I was buying two char and three trout, to save a little time I asked the fishmonger to fillet them for me.  This took an age, but I didn’t think much of it – I felt a bit sorry for the bloke, to be honest, since it was a bit of a big job!  Eventually they reappeared, heat-sealed into Morrisons’ white plastic fish-pouches, and I got on with the rest of my shopping.  The char was expensive – just over £10 for the two fish, but since it’s a rare and very special little fish, I figured that’s OK.

Ruined arctic char fillets

I opened the char this evening and nearly wanted to cry.  I’ve never seen such a mess.  I’m not a chef and have no formal training in this sort of thing, but I can – and *have* – filleted fish better than this.  Anyone can see that this is a total, utter, ghastly mess.  I spent 45 minutes trying to tidy up these fillets in the hope of saving them, but in the end I had to give up. They were uneven, still had all their ribs and fins attached, weren’t even split down the midline – one piece had a centimetre of flesh (nearly half an inch) still attached to the *other* side of the dorsal fin!  Great chunks of fish were missing, too.

They look like they’ve been filleted with a blunt bread-knife. The cut surface is completely macerated, with the layers of muscle ripped apart.  And one of the pieces, you can see, has a nasty blood clot within the flesh, which was connected to a cystic structure is the muscle – I don’t know exactly what this is, but I suspect it probably ought to have been grounds for rejecting the fillet or possibly even the whole fish.

As for the trout, well… see for yourselves.  Just more of the same.

Badly filleted rainbow trout  What a sad mess

I’m so angry and disappointed about this, mostly because it’s such a f*cking waste of beautiful fresh fish.  For goodness sake, Morrisons, is it too much to ask for you arrange to have fishmongers on your fish counters who can actually fillet a salmonid without making a complete dog’s dinner of it?  They’re about as simple a fish to fillet as it comes, after all!  I’d politely suggest they start with a sharp knife, and see how they go from there…

I’ll be taking it all back tomorrow.

Right, rant over.  I was going to share my decorated Christmas cake with you all tonight – perhaps tomorrow, eh?

Advent - day 14

I’m trying to write a post a day during Advent, so, please come along with me while I try to Blog Advent – the Country Skills Way – and forgive me if I don’t quite manage it!

Read more from the Country Skills blog >>

Smoked Trout – so simple, so tasty, and all home-made

Smoked trout – like its close cousin smoked salmon – is one of the great ‘luxury’ foods.  I find I prefer it – the finished product, while it looks very similar to salmon, has a more delicate flavour with less of the aggressively-fishy oiliness which can characterise smoked salmon.  It’s much less readily available, too – and can certainly be expensive, a quick google suggests prices from £40 – £80 a kilo direct from a number of British producers.  Expect further mark-up in a smart London delicatessen!

Sliced home-smoked trout

Of course, if I were just writing this in praise of smoked trout and telling you to go and buy some from a smokehouse on the internet, it wouldn’t be the country skills blog!  Making smoked trout at home is straightforward, and produces a first-class product which is the match of anything you’ll buy from even the most up-market smokehouse or deli counter.  Better still, it costs a fraction of the commercial product.  The two fillets of rainbow trout I cured and smoked for this post cost the princely sum of £1.53, with a combined final weight of a little over 200g – including other ingredients and consumables, that’s a total cost of well below £10/kg.  A little luxury, then, that we can all afford to enjoy a bit more often!

You’re going to be eating this fish raw, effectively, so freshness is of the essence.  Choose a lovely fresh whole trout – with bright clear eyes, red gills and no ‘fishy’ smell – and have it descaled and filleted for you by the fishmonger (or do it yourself – it’s not that tricky really!).  Good quality farmed trout is readily available, even on supermarket fish counters, and if you can get hold of a lovely fresh wild fish, even better!  Avoid pre-packed fillets, whose freshness it is more difficult to be certain of.  Wash the fillets off carefully under the tap, to remove all the mucus coating from the skin.  Make sure you’ve removed all the rib bones and pin-bones (the small pointy bones that run along the middle of the fillet) – a pair of tweezers is very useful here.  This will take a few minutes, but is worth the effort to do properly.  Then rinse the fillets and dry them carefully with kitchen towel.   Weigh the fillets and make a note of this weight.

Trout fillets with cure appliedThe cure I use for trout and salmon is very simple – made up of 1/3rd sugar (golden caster sugar is my favourite here) and 2/3rd table salt.   I favour a short curing time – just overnight – with an excess of dry-cure so that the cure stays saturated throughout.  Be generous – you can afford to be, since the ingredient cost is very low – in the scale of pence for a couple of fillets.

Weighed down for curingYou want a thin layer of cure in your non-metallic dish below the fish, and a good coating over the top.  The photo gives a good idea of the sort of coating you’re aiming for.

You then want to weigh down the fillets to help draw water out – you’ll need to improvise something – I found a couple of plastic ‘take-away’ containers fitted very nicely in my dish, and then weighed them down with tin cans.  Don’t use anything metallic in direct contact with the curing fish.  Put the salted fillets in the fridge.

Cured fillets, next morningI would tend to get the cure going when I get home from work, having collected my fresh fish on the way home – so just before bed I turn the fillets over in the cure, and replace the weights before putting them back in the refrigerator.  The next morning, there will be quite a lot of liquid in the dish and most of the cure will have dissolved. Take the fillets out of the dish, noting the change in texture – the skin will have taken on a harder, almost cardboard character, and the flesh will be firmer and more translucent.  Rinse and dry the fillets, and weigh them again, and note down the reduction in weight.  My fillets had dropped from a starting weight of 256g to 220g at this stage – a 14% water loss.  You’re aiming for a final loss of ~18% by the end of the process, so that’s well on target. Now place the fillets on an open plate, uncovered, in the refrigerator for 24 hours before cold smoking.

You may have read this far, and are now thinking ‘well, that’s no use to me – who has a cold smoker at home?!’.  At it’s simplest, cold smoking requires two things – a source of cold smoke (from smouldering sawdust, for instance), and a space in which to contain it.  Last year, I built a wooden tower smoker, but there’s no need to start with a construction project.  A cardboard box, or a (clean!) upturned bin or barrel, rigged up creatively with a rack or two, will do just as well for the occasional smoking job!

ProQ cold smoke generator, litYou will need a smoke source, and I can heartily recommend the ProQ Cold Smoke Generator, which is a nifty little gadget which entirely takes any stress or complication out of the process.  It’s a little pricey (around £35 at this time), but will pay for itself incredibly quickly once you get the smoking bug!  It reliably provides 10 – 12 hours of cold smoke (depending on the temperature, humidity, and your sawdust choice) with very little heat production.  Have a look at the Supplier’s List for suggested sources of smoking and curing supplies.

Trout fillets, loaded in the smokerChoose a day without too much wind or rain (the occasional shower isn’t important), and where the temperature is roughly between 5 degrees and 15 degrees centigrade.  I’ve successfully smoked between 0 and 5 degrees but smoke penetration is less effective.  Colder, and your fish will freeze rather than taking smoke.  Warmer and the risk of spoilage increases considerably – though cold smoking temperatures up to about 20 degrees are cited in some places.  Get the smoker going first thing in the morning, and leave it for the day – though I would keep it under much closer supervision if using a cardboard box!.

I used a mix of alder and maple sawdust for this smoker burn (about 10% maple) – this produced a gorgeous neutral smoke-flavour with very little bitterness and with a noticeable ‘sweet’ note, presumably from the maple.  It’s definitely a mix I’ll use again in the future.

Trout, fresh from the smokerOnce the smoke generator has burned all the way through, unload your smoker, and take a final weight on your fillets. They should have lost another 4 – 5 %.  They will have a lovely orange-pink colour with a noticeable translucency and a glossy surface.  Then wrap them tightly in cling film, and freeze them.  Smoking fish in this way isn’t really a preserving mechanism, and storage time in the fridge is about 3 – 4 days.  Even if I’m going to eat them very soon, though, I tend to freeze them at this stage – a day or two in the freezer should ensure any parasites which may be present in the fish have been killed off.  You can keep them frozen for a couple of weeks without too much loss of quality, but after a month or so you’ll start to notice the deterioration.

Sliced smoked trout fillet

Once thawed, I slice the smoked trout thinly with a sharp knife, starting at the ‘head’ end of the fillet, at about a 45 degree angle.  There’s a bit of a knack to this, but you’ll get good at it really quickly – and who cares if the slices are thicker, or a bit uneven?  This produces small, almost translucent slices which are great for nibbles.  I love to serve these with water biscuits or oatcakes (or your preferred sort of cracker), cream cheese – or a soft goat’s cheese is also very nice, freshly ground black pepper and a squeeze of lemon juice.  But the limit is really your imagination.  Smoked trout with scrambled eggs on a toasted muffin is a beautifully indulgent breakfast!

I really do hope you chose to give home-smoked trout a try, and that however you prepare and enjoy it, it brings you as much foodie pleasure as it brings me!

Read more from the Country Skills blog >>

Banner320-260