Bavette steaks with peppercorn sauce

I’ve been planning to write up my old-faithful peppercorn sauce recipe for ages but it never quite felt like it deserved its own blog post (harsh, for an old standard of mine, thank goodness recipes don’t have feelings!). And then the lovely people at Swaledale Butchers offered to send me some of their meat to try and it seemed like a combination made in heaven, because I get to talk about one of my favourite butchery cuts, the bavette steak, a French standard but sadly hard to come by in UK, and share my favourite peppercorn sauce recipe with you into the bargain. 

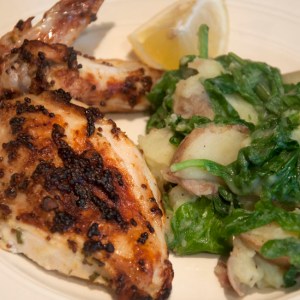
We had visitors last weekend so my dinner plan worked perfectly, almost everything can be prepared ahead of time leaving just the steaks to fry off in a good pan to medium rare, with a good long rest afterwards during which all the last little fiddly bits can come together. I served the steaks with a rich creamy peppercorn sauce, a very traditional French-style tomato salad, a herby green rocket salad, and oven chips. 

You can do most of the work on the sauce before the steaks go anywhere near the pan, which really takes the pressure off multitasking at the last minute and over-doing the meat by accident. So do this first, until the mix is reduced by half, and then take the pan off the heat. 

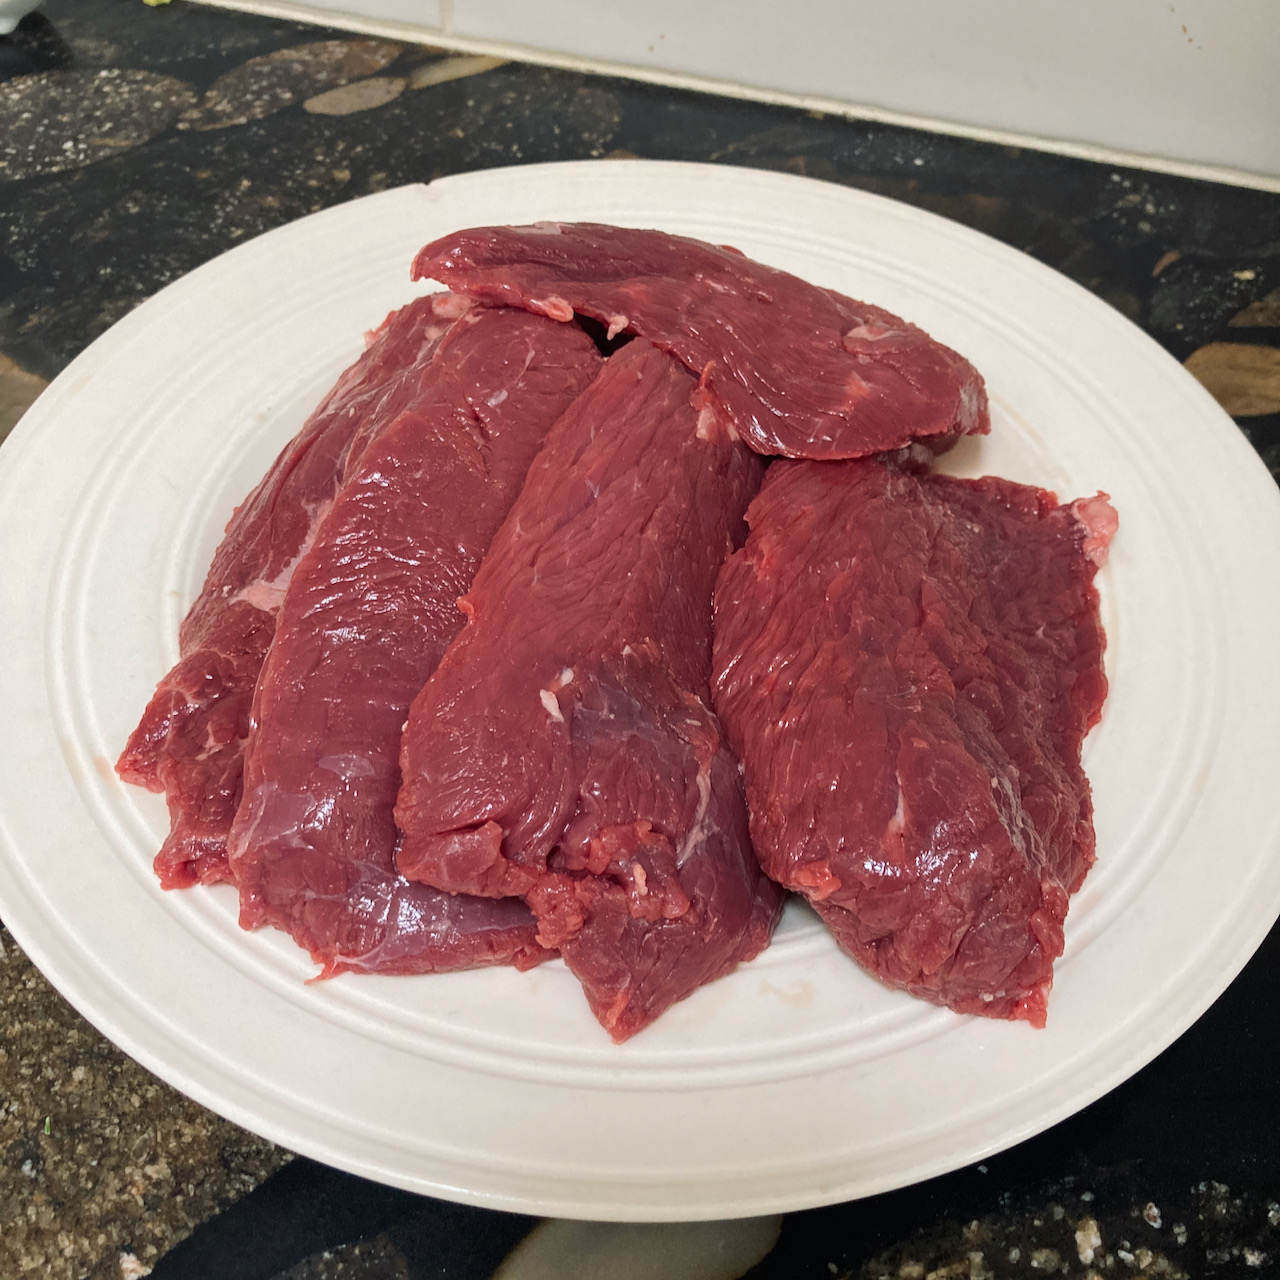
Bavette steaks are a favourite of mine and I can be depended to order them if I find them on a decent bistro menu. Anatomically they come from the area where the lower part of the sirloin joins the flank. They don’t have surface fat but will often have a little marbling within the meat itself. The muscle fibres are relatively loosely joined here and are arranged length-wise in the butchered steak, which means it’s important to slice the steak across the fibres when serving – but if you do that the result is a lovely juicy, buttery mouthful which can easily be tackled without any need for a steak knife. 

To cook your steaks to perfection, get them out of the refrigerator a little in advance, pat them dry of any juices, and allow them to come to room temperature. (Make sure they’re covered to keep flies off if that’s a problem where you are!) 

These are quite thick steaks and will take longer in the pan than you expect, and benefit from a good period of resting afterwards (ten minutes is a good target). I would ideally cook these medium-rare, medium would probably be OK – if you’re a ‘well-done’ steak person (by choice or by necessity) then bavette probably isn’t the right cut for you. 

You want a pan that you can get really, decently hot – this isn’t a job for a non-stick pan, you’re going to burn the non-stick surface if it’s hot enough and if it isn’t, you’re not going to do the steak justice. I have a great carbon steel pan that I bought about three years ago which is slowly developing a good nearly non-stick seasoned surface and this is absolutely perfect for this task. 

Season the steaks lightly with just a pinch of salt and pepper immediately before they go in the pan. 

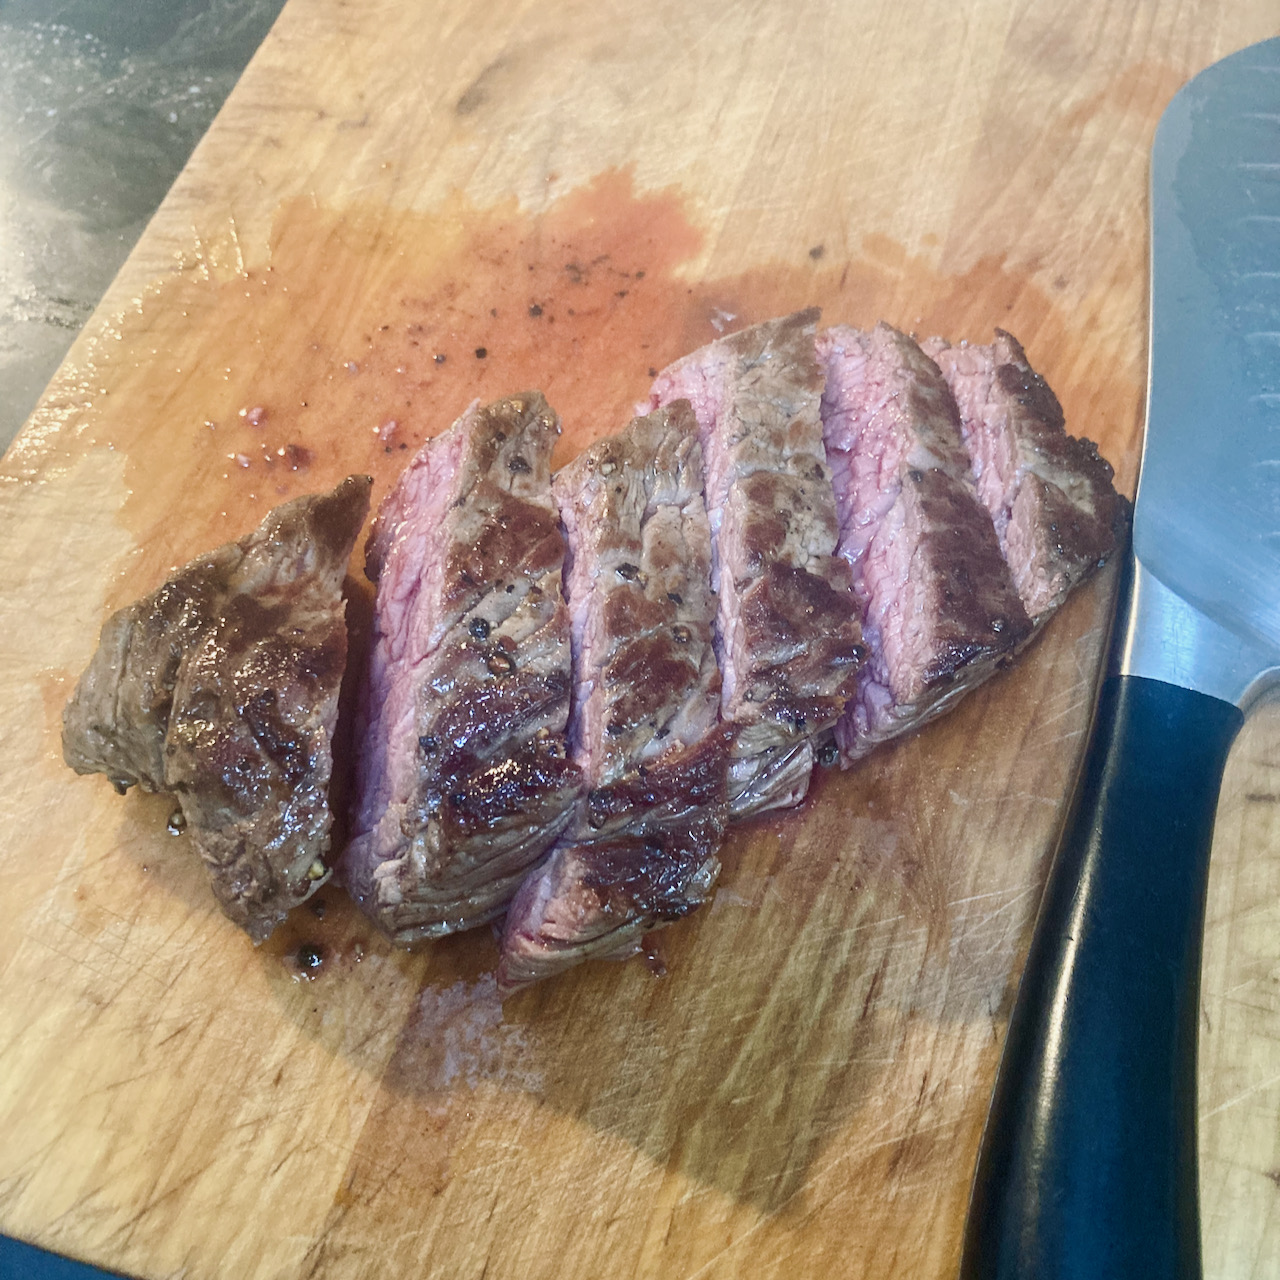
I like to fry my steaks in a mix of half butter, half cold-pressed rapeseed oil. Heat the fats until the butter is foaming, and then place the steaks in the pan. Don’t crowd them. They should sizzle immediately. Leave them still for several minutes (I would give the first side five minutes, probably). When you turn them over you should find a lovely golden brown caramelised crust has formed. Give them the same amount of time on the other side and then check for doneness. The best way I have ever been shown of doing this is to check the texture of the steak. It sounds odd but if you press a finger tip into your cheek, and then to your chin, and then to your forehead, that difference in firmness is a good approximation to the difference between a rare (cheek), medium (chin) and well-done (forehead) steak. Depending on the thickness of the steak and your preferences they may well need a few minutes longer. If in doubt, you can always cut into the steak to check (you’ll be slicing them to serve anyway) but bear in mind that they will continue to cook a little while they rest. 

If you’re happy, set them aside, covered, somewhere warm, to rest for 10 minutes. 

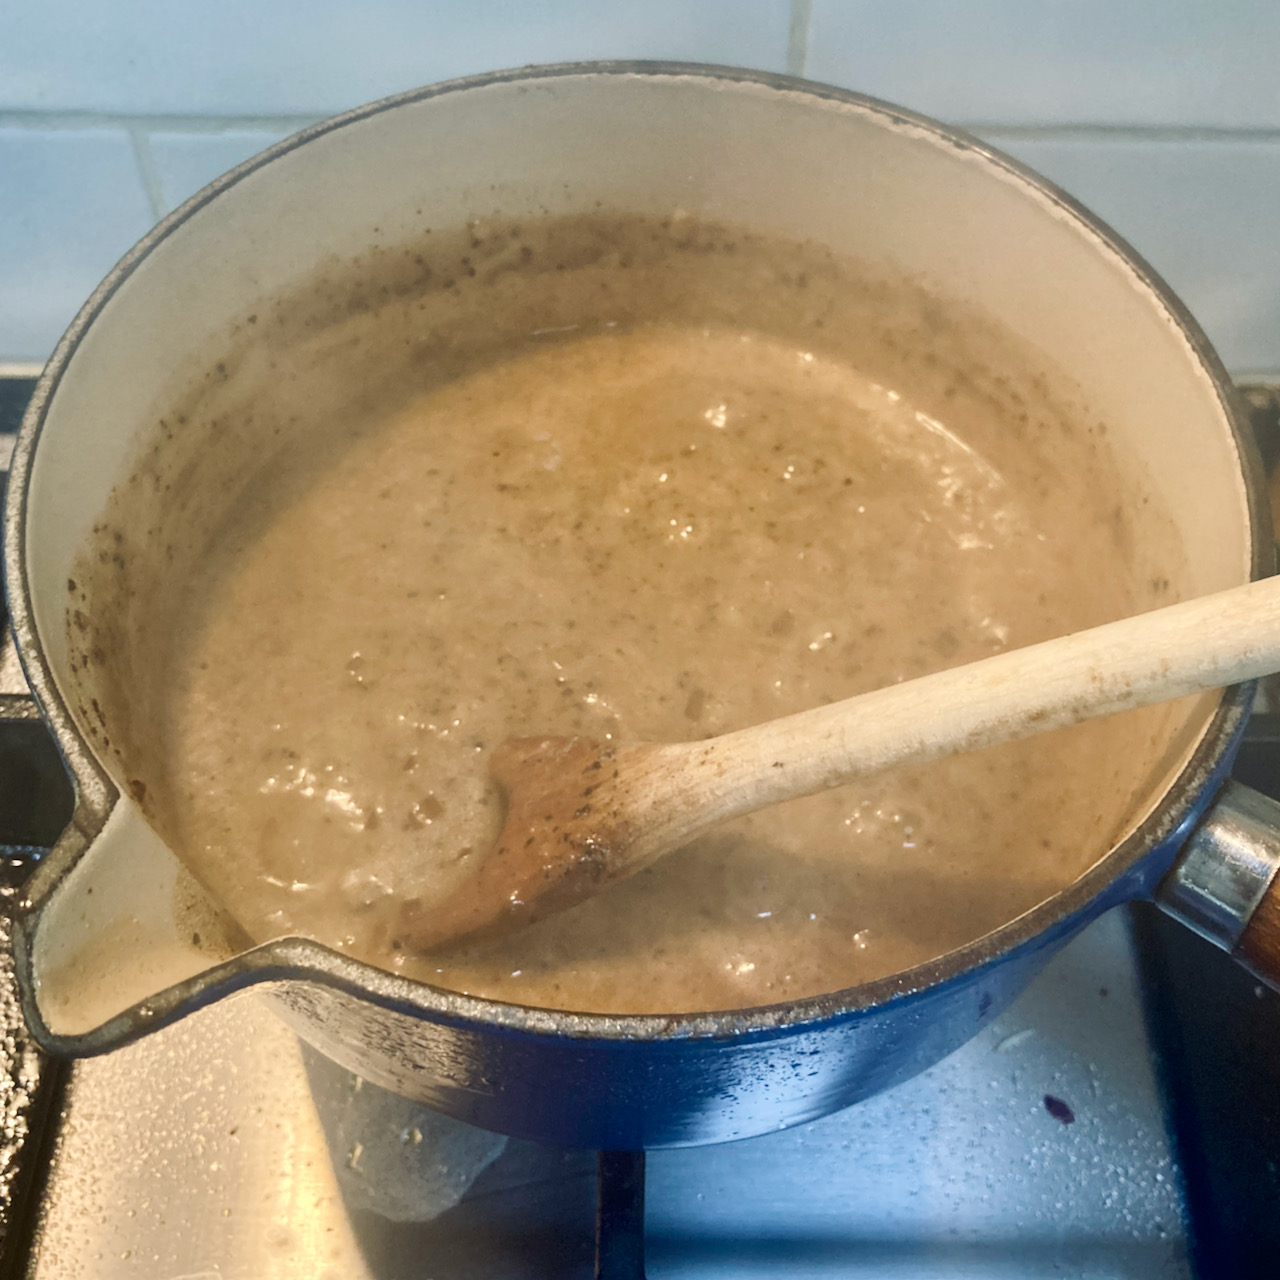
Put the pan with the peppercorn sauce back on the heat and warm it back through. Just before serving, stir in the clotted cream and any juices that have leaked during resting and slicing the steaks, and bring it to the table in a jugs so that people can help themselves. 

To serve, slice the steaks across the grain into slices about half an inch thick. Add chips and salads. Pour over the peppercorn sauce. That’s it. Could it be simpler?

For the Peppercorn Sauce (to serve four):
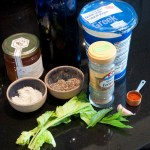
Ingredients:

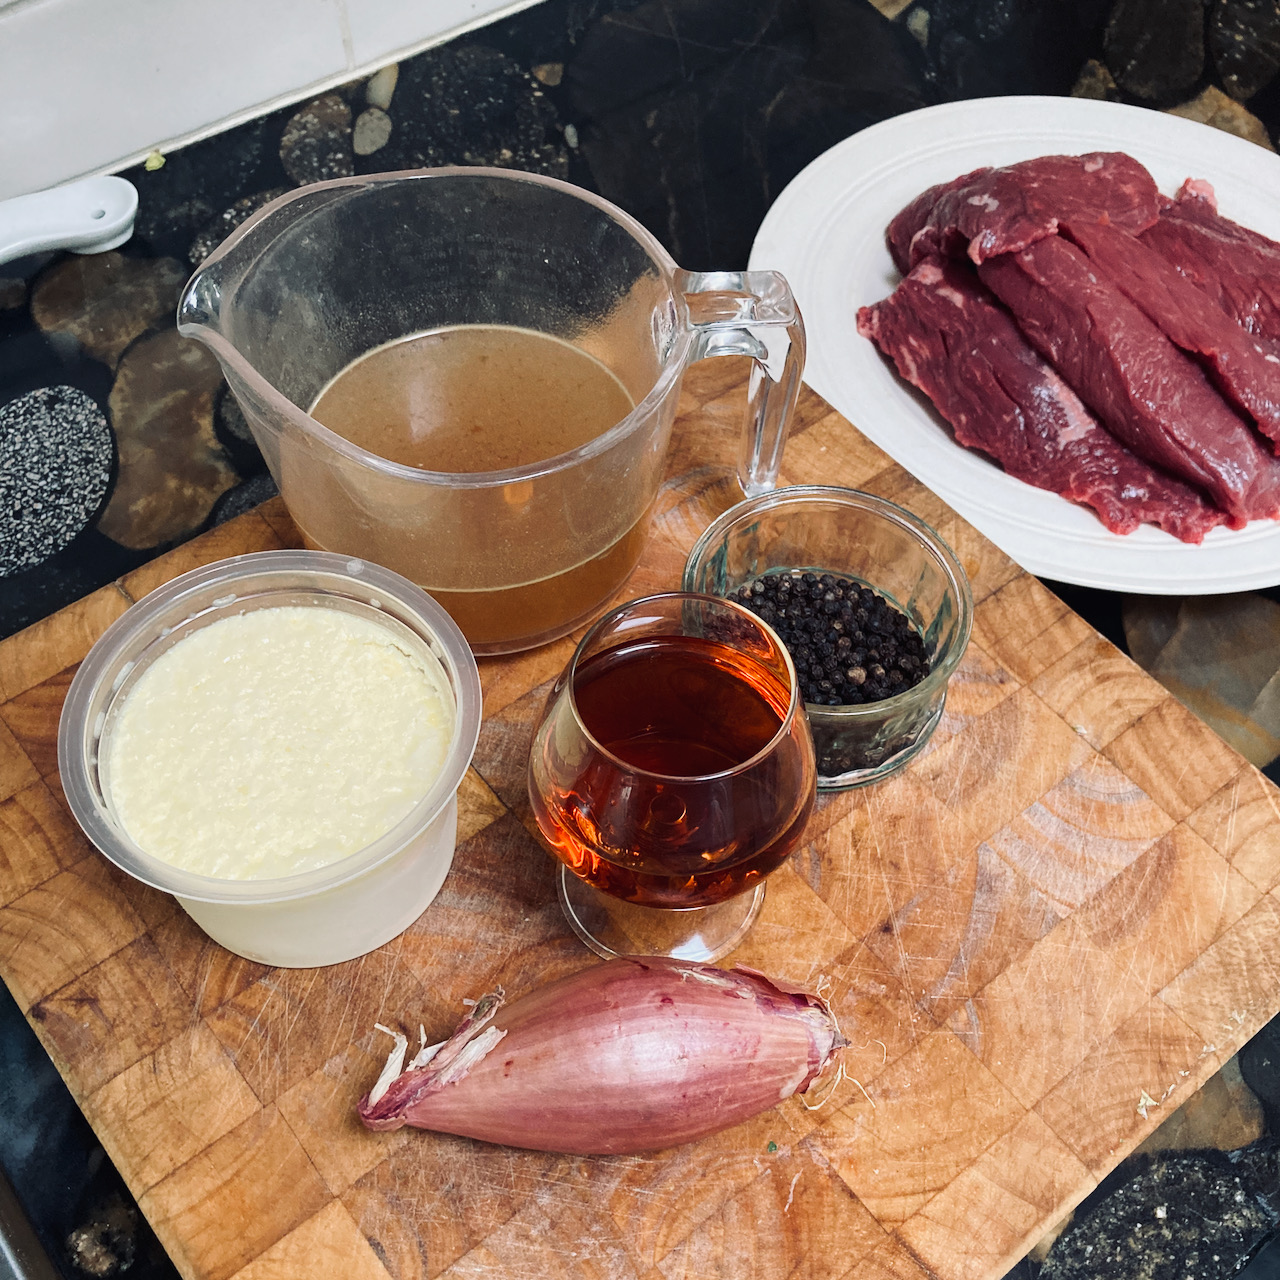
  • 2 small or one large shallots
  • Big knob of butter
  • 200ml good beef stock
  • 1 tbsp roughly ground peppercorns
  • 100ml brandy
  • 2 good tablespoons of clotted cream
  • Salt (to taste, if needed)

Melt the butter in a saucepan. 

Finely chop the shallots and cook gently in the butter until soft and translucent (about five minutes)

Add the stock and bring to a simmer. Add the ground pepper. 

Add the brandy and start to reduce the stock gently. It will take about fifteen minutes for the brandy to cook off and the volume of the sauce to reduce by half. 

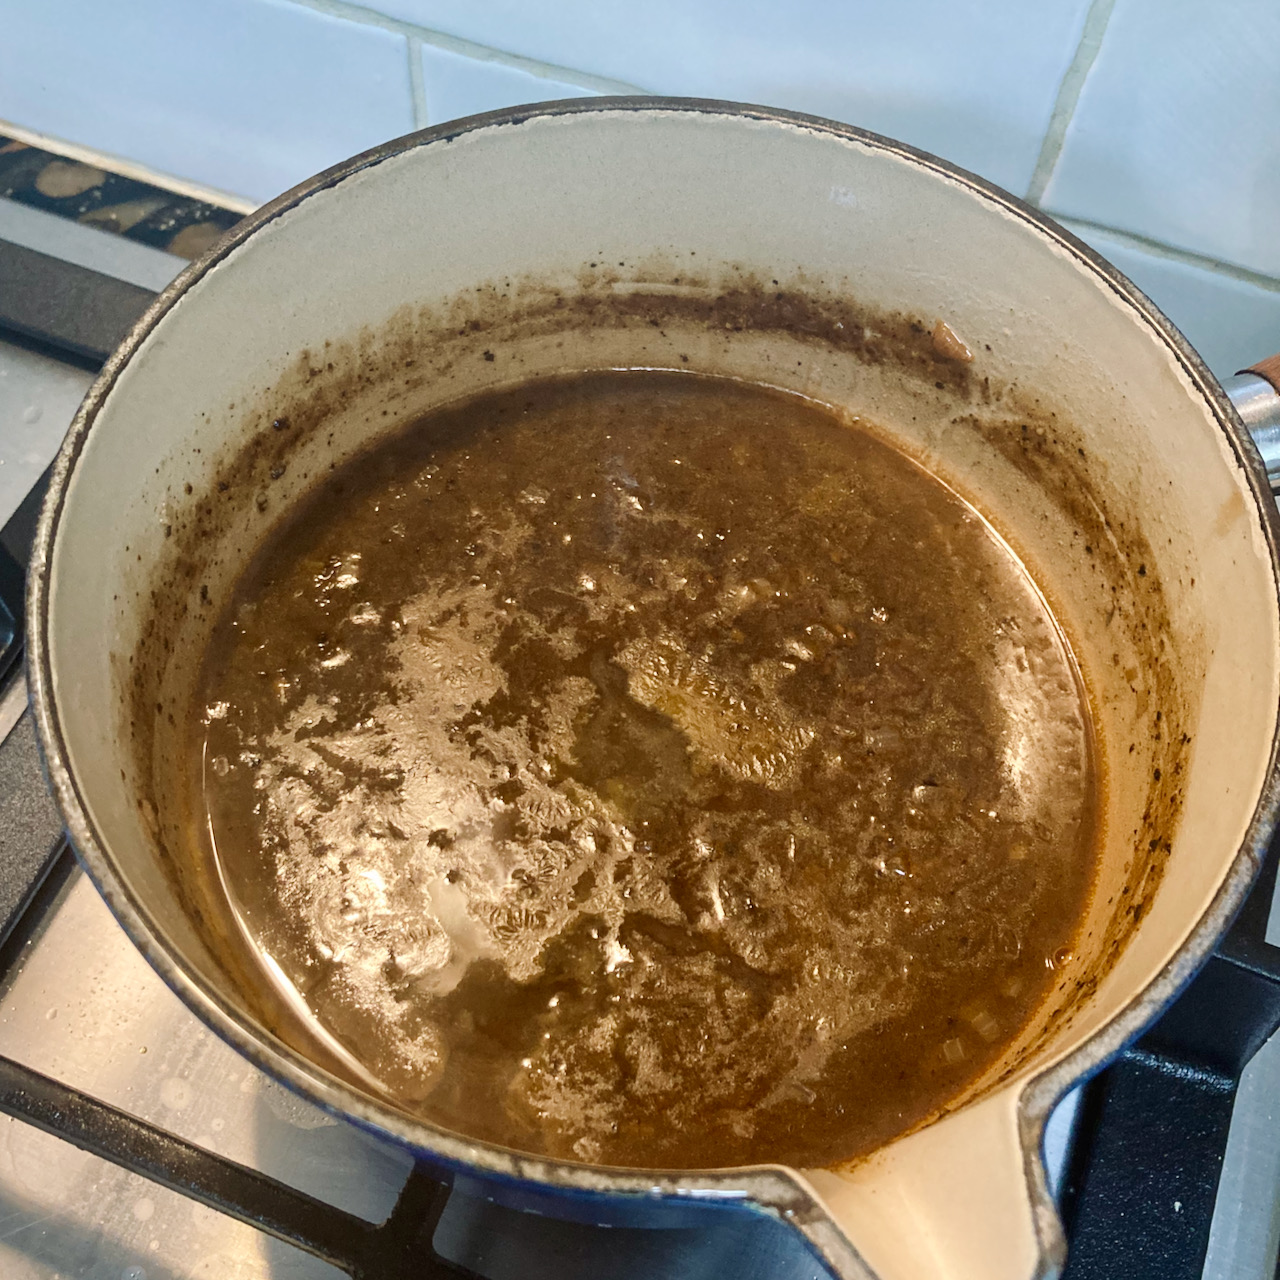
(Once it’s reduced by half you can take it off the heat and attend to other things, and continue when the steaks are resting. Warm it back up again before continuing as below.)

Just before serving, add the clotted cream and stir in, reduce the heat and stir gently until you’re ready to serve. Add any juices from the resting plate and from slicing the steaks and stir these in. Taste and season with a little salt if needed, and bring to the table piping hot in a suitable jug or sauce boat. 

For the side dishes – 

Salade de tomates / Tomato salad

This is the simplest thing in the world. Take good ripe tomatoes, slice them thinly (some people think you should peel them first but I am with my grandmother on this one – life is too darn short to peel tomatoes!) and lay them on a plate, seasoned lightly with just a pinch of salt between layers. Sprinkle over with finely chopped fresh herbs – I used a mixture of parsley, chives and oregano. Serve with a good mustardy vinaigrette to taste.
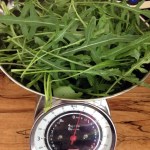
Herby rocket salad 

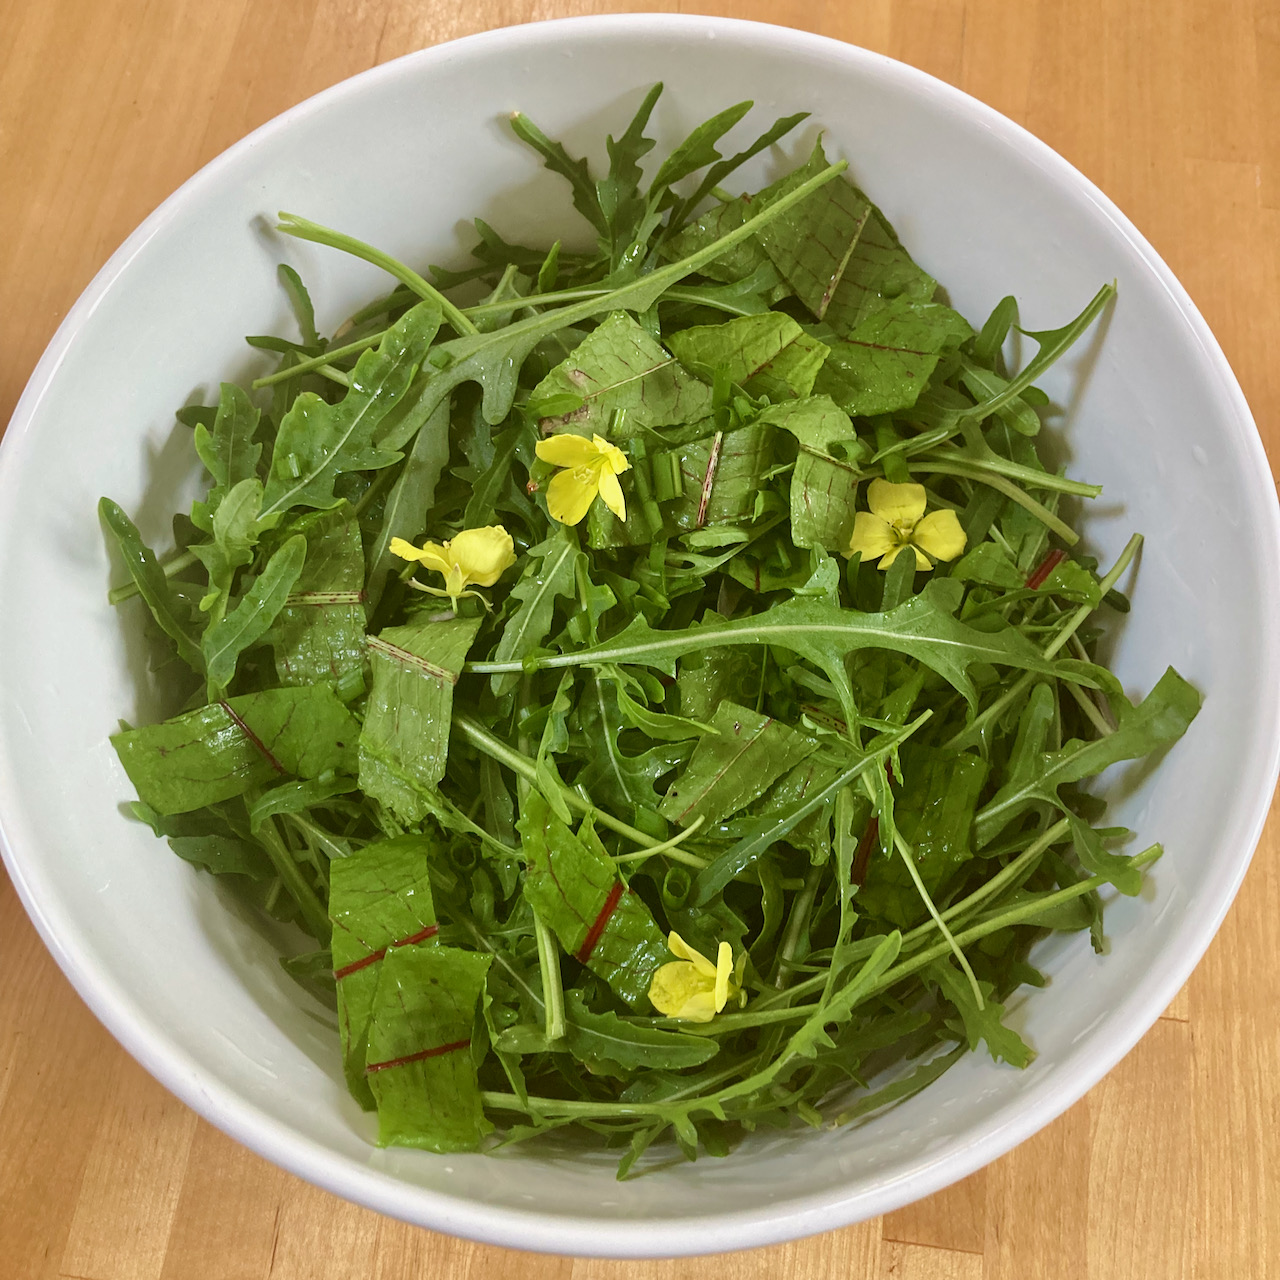
Because the rocket is growing here and the rest of the salad veg isn’t ready yet – but the peppery punch of good wild rocket goes a treat with the peppercorn sauce. This was just wild rocket, with a few slivers of sorrel, mixed with roughly chopped fresh herbs – the same as above, parsley, chives and oregano, be generous. Add a few rocket flowers if you have them, they taste of vanilla! It likes the same mustardy vinaigrette that suits the tomatoes – handy, that!

A few words about the steaks:

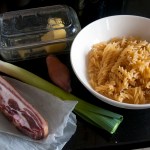
I’ve always openly disclosed any freebies or sponsorship on this blog and that won’t ever change. The steaks were sent to me FOC to review, but otherwise Swaledale had no input into the content of this post. There are no affiliate links and I don’t stand to make a penny whether you all decide to go and buy their steaks or not! (You should, though, because they were very good indeed.)

I’m very impressed with Swaledale’s approach to butchery – a focus on locally farmed, traditional breed animals and then using the whole carcass, which is why they offer more unusual – and cost-effective, these steaks cost a fraction of what you’d pay for a sirloin or rib-eye – cuts like the bavette, along with other great options you don’t often see in the UK like onglet, featherblade and spider steaks. The delivery was nicely packed in recyclable materials with lots of ice packs and the meat arrived in perfect condition. Despite (inevitably) being vacuum packed, the bavette steaks caramelised beautifully in the pan. 

You can order from Swaledale Butchers here

Read more from the Country Skills blog >>

Simple Quick and Tasty Home-Made Dog Biscuits – treats for your special friend, from the Fallback Pantry

We’re all having to make-do at the moment when supplies run low – it’s not reasonable to pop to the shops just to pick up one or two grocery items. Then again, there’s no explaining any of this to our pets, and Rosheen (our Rough Collie) would be inconsolable if she didn’t receive her biscuit treats at least ‘once or twice’ a day!

When the biscuit jar ran dry, something had to be done. I developed this recipe for home-made dog treats, it’s so simple, only 10 minutes to make and 20-25 minutes to bake, full of  wholesome things, and good enough you can eat them yourself (but maybe don’t let your dog see you do it!).

dog-biscuits-fallback_7


Ingredients:

  • dog-biscuits-fallback_1
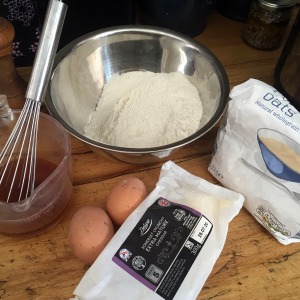
250g plain flour (any other flour will almost certainly also work here as a substitute)
  • 100g rolled oats (substitute linseeds, plain roast pumpkin seeds (chopped up), or just skip these if you haven’t got them)
  • 2 eggs
  • 25g hard cheese, grated – the stronger flavoured the better
  • 1 low salt beef stock cube (or chicken)
  • ~100ml water


You will need a mixing bowl, a rolling pin (a wine bottle can serve in an emergency) and a baking tray with a non-stick sheet or a piece of baking parchment or greaseproof paper.

Pre-heat your oven to 180C / 350F.

In a jug or bowl, dissolve the stock cube in the smallest amount of boiling water you can – ideally less than 100ml.

Combine the flour, eggs, two handfuls of the oats, and the grated cheese in the bowl, mixing well. Now add the concentrated stock a little at a time until the dough comes together and leaves the bowl clean. Give the mix a gentle knead to make sure everything is evenly incorporated (not too much, especially if you’re using strong / bread flour as we don’t really want to develop the gluten for biscuits).

dog-biscuits-fallback_2

Scatter some of the remaining oats on the non-stick sheet or baking parchment, and on the top of the biscuit dough, and roll the dough out to about the size of your baking sheet, between 3mm and 5mm thick. Add a few extra oats if the mix starts to stick (you can use flour for this if you haven’t got any oats).

dog-biscuits-fallback_3

Now, using a long-bladed knife, mark the dough right through at 1” intervals, and then repeat this at around 45 degrees to the first, to mark a diamond pattern in the dough. 

dog-biscuits-fallback_4

Bake in the pre-heated oven for 20-25 minutes, until the biscuits are crispy and starting to brown a little. You want these crisp not chewy so put them back in for another five minutes if they’re at all squishy when you get them out. 

dog-biscuits-fallback_5

Transfer to a wire rack and allow to cool, then break up the biscuits and store in an airtight container once they’re completely cold. 

dog-biscuits-fallback_6

Sample (if you like!) or just accept your dog’s opinion. They smell great and Rosheen goes mad for them! They will store well in an airtight container for about two weeks – if you ever manage to keep them that long!


More from the Fallback Pantry  ::  More from the Country Skills Blog >>

Fridge Dough, your Flexible Bread-Baking Friend – from the Fallback Pantry

Home-baked bread is the best, isn’t it? But there’s no way around the fact that it can be time consuming – by the time the dough has been mixed, kneaded, proved, shaped, proved again, and finally baked you’re at least two, if not three or four hours into the process. Flatbreads like Pitta, wraps, and pizza, can be made a bit faster, but the dough still needs to be mixed, kneaded, rested, and shaped before it’s baked or cooked in a skillet – so you’re still waiting an hour at least before lovely fresh bread can be yours.  

At the moment, while many of us are at home under restrictions, time may not be such a challenge as it normally would be, but access to ingredients can be an issue. In various places, yeast seems to be a commodity in short supply. Fridge dough can help us here, too.

Dough in the mixer

What if I told you you could have a batch of dough, in your refrigerator, ready to be baked into flatbreads within about half an hour, or risen dough loaves, rolls etc after simply shaping and an hour or so proving? And what if I told you that this was a batch that you could keep using again and again just by adding fresh flour, water, and a little pinch of salt and sugar. Sounds like magic, right? 

In a way, it is – it’s the magic that has kept traditional bakeries going for centuries, long before standardised, fresh and dry commercial yeast became the usual technology for baking loaves. It’s not *quite* a magic bullet for yeast shortages – you will need a dose of yeast to start it, and you may need to top up with fresh yeast from time to time (because of a process called attenuation that I’ll come back to), but by using this technique you should be able to have almost ready-to-bake dough ready to be used at the drop of a hat, and stretch a single spoon-full of dried yeast to bake batch after batch of lovely fresh bread, which is great if you’re trying to eke-out limited supplies. 

I’m sold, how does this work? 

You start by making a batch of normal yeasted bread dough. Mine is made from a mix of 75% strong white and 25% wholemeal flour, because it gives a lovely flavour and texture while retaining the nice soft character of white bread, but use whatever you prefer. 

Start your batch with:

  • 500g strong bread flour (75% strong white, 25% strong wholemeal)
  • 1tsp dried instant yeast
  • 1tsp salt
  • 1tsp sugar
  • Progressively add cool water to make a well hydrated, elastic dough. 

Kneed by hand or in a mixer with a dough hook, with a little oil (I use cold-pressed rapeseed oil, but a nice light-flavoured olive oil would be fine), for 5-10 minutes until the dough is soft, pliable and elastic. 

Oil the inside of a bowl, or Tupperware-type container (a size about 3-4 times the volume of kneaded dough is ideal), pop the oiled dough into this, cover with a lid or cling film (don’t seal it completely as you need to allow gas to escape as the yeast works) and pop it in the refrigerator at least overnight. 

Fridge dough in tupperware container

When you come to use the dough:

  • Take the dough from the fridge, turn it out onto a clean, oiled worktop, divide the batch in two. 
  • Set half aside to bake with, and put half into a bowl or mixer, and add:
    • 250g strong bread flour (mix as above)
    • Pinch of salt
    • Pinch of sugar
    • Mix, adding enough cool water to make a well hydrated, elastic dough
  • Kneed, oil, and return to the refrigerator. You need to be baking with and refreshing the dough at least every 2-3 days to keep it healthy and in good condition. 

Now, you can bake the other half of the batch. The technique for pittas is here – you should be eating them within 30 minutes – but really anything you can think of will probably work, just experiment! The recipe and process for soughdough pizza should be equally applicable to your fridge dough. I will add to the tested techniques in a future blog post.


But my yeast is out of date and a bit rubbish, will this still work?

The key here is to really get the yeast going before you make the first batch, so I would modify the process like this:

Activate your yeast in some warm water with a bit of sugar, waiting until it really froths up nicely before making the dough. Then, rather than putting the dough straight in the fridge, I would allow it a full proving cycle at room temperature, so that the dough at least doubles in size, I would then take half the dough out and bake with it straight away, add fresh flour, water, salt and sugar as above, and only then pop it in the fridge. Hopefully your yeast will be strong and healthy and present in sufficient quantity by this stage. 

It worked, to start with, but it’s been in the fridge a couple of weeks now, and despite baking and refreshing regularly it’s just not rising properly any more. My loaves / rolls are turning out heavy and stodgy. What’s going wrong? 

You’ve almost certainly run into a problem with yeast attenuation. Without getting unnecessarily nerdy about this, your fridge dough is a live yeast culture. Yeast is a highly adaptable little blighter which gets through generations fast, and the culture you are maintaining in your dough can quickly change its growth characteristics to adapt to the circumstances it finds itself in. For nice soft puffy risen loaves and rolls, you want a yeast that expands its population rapidly at room temperature when its nutritional needs are met (that’s to say, once you shape the dough and leave it to prove before baking). Keeping the dough in the fridge, convenient as it is, in in effect selecting for yeast strains that are happier working and dividing more steadily at colder temperatures. This is less important if you want to use the dough for flatbreads, pizza bases and so on, as you’re not asking the yeast to put on that final ‘push’ of multiplication before baking, but if you want to use the dough to bake loaves and rolls too, it can be an issue. 

One option is to add an extra spoon of new yeast next time you add fresh flour to the mix. You’ll probably find topping up every four or five times keeps things ticking over reasonably crisply, and you’ll still be reducing your fresh yeast use by a significant margin. 

Another option worth experimenting with is giving the dough a room temperature proving step every few uses (as described above with older  yeast) as this might tune the behaviour of the yeast culture more towards the one we want. 

If all else fails, bake up a big batch of pizza or pittas with the dough you have, and start over!

More from the Fallback Pantry  ::  More from the Country Skills Blog >>

Pitta and Naan Breads – from the Fallback Pantry

Pittas and other flatbreads are so versatile – whether you like to stuff them, wrap them or dip them – and the difference between the pre-packed long-life supermarket versions and freshly cooked bread is night and day. There are essentially two sorts of flatbreads – yeast leavened flatbreads, of which pittas and naan breads are good examples, which tend to be cooked in an oven, and unleavened breads, such as chapatis and tortillas, which are usually cooked on a hotplate or skillet. Different breads vary in their ingredients, but the process for each type is essentially the same.

Pittas are served

These are some of the easiest and fastest breads to make – it’s a mystery to me really why anyone ever buys them when they’re so quick, easy and satisfying to make at home. You can even make the dough a day or more ahead of baking – once baked it’s best to eat these breads immediately, as they go stale quickly. If you bake more than you can eat in one go, they’re best frozen as soon as they’re cold.  This recipe for pitta breads can easily be adapted to make naan, with the modifications to the ingredients noted below. 

To make 12 pittas (takes about 2 hours, including proving and baking time):

  • 500g strong bread flour (I use a 75% white, 25% wholemeal mix because I prefer the flavour and texture, but 100% white is fine too. Flatbreads are more forgiving of lower gluten flours, so if you only have plain flour at home you can still attempt this bread, it will just be a little less elastic / chewy) plus extra for dusting / shaping.
  • 2 tsp sugar
  • 1 tsp salt
  • 1 tsp instant dried yeast
  • Oil – I use cold pressed rapeseed oil for this (and almost everything), but olive oil would be more traditional
  • Water (about 300-400ml)

In a bowl (or bowl mixer fitted with a dough hook) combine all the dry ingredients, about a tablespoon of oil, and mix in enough water to form a nice elastic dough. One of the most common mistakes people make when making bread is not adding enough water to the mix. The best bread comes from a really well-hydrated dough that’s just on the edge of being too wet to work with, under-hydrated dough makes stodgy, heavy bread with poor texture and rise. The more practice you have with this, the easier it will become to judge – I use a little shortcut, which is to add water until I’ve gone a little bit too far, so the dough is starting to become sticky, and then add a spoon or two of extra flour back in just to make it handleable again.

Knead the dough for 5-10 minutes, by hand or in the mixer, until it becomes lovely, smooth and elastic. I oil my countertop for kneading rather than flouring it, as that avoids accidentally incorporating more flour into the dough. 

What you do next depends on whether you want the bread today, or not:

  • If you want to bake the pittas straight away, oil your ball of dough, return it to the bowl, cover with a clean tea-towel and leave it at room temperature to double in size, which should take an hour and a half or so. 
  • If you don’t want the pittas until tomorrow (or a little later) oil the dough and cover the bowl with cling film, or put it in a good-sized Tupperware-type container, and put it in the fridge at least overnight. (What you’ve done here is create a batch of ‘fridge dough’, which is really versatile – more on this later. If you’re short of baking yeast at the moment, this is a game changer!).

When you’re ready to bake: 

Set your oven to its highest temperature (ideally at least 220C), with a heavy baking sheet or baking stone inside. 

Decide how many pittas you want to bake – I tend to take half the dough and divide it into six pieces. Flour your work surface generously for this bit.  Form each piece into a tight ball by drawing the edge repeatedly into the centre, and then leave the balls to rest for about 10 minutes, covered with a tea towel. 

To shape the breads, you could use a rolling pin (in which case try to roll them out about 5mm thick and in an oval sort of shape). Personally though I can’t see the point, it’s just as easy to stretch them out by hand and I think the texture is better. First, squash the balls down into a thick disk, then slowly stretch them out.

IMG_6576_1

Only stretch the edge, the middle will take care of itself. You’ll find they want to spring back but keep working on them in turn, each time you ‘go around’ you’ll find them willing to stretch a little bit further. Get them to the size and shape you want, around 5mm thick (but this will be a bit variable – it’s fine, but try to avoid going particularly thin as these areas won’t be able to ‘puff’ into the traditional pocket). Cover them again with the tea towel for about 5 minutes. 

IMG_6577

When the oven is up to temperature, working very quickly, pull out the hot baking sheet or stone. Place each pitta on it, the opposite side up to the way they were on the work surface (having the ‘dry’ upper side down seems to help them bake nicely), and get them back in the top of the very hot oven as quickly as you can. You want to avoid losing any heat if you can. 

If everything has gone right, they should puff up in the oven into little ‘pillows’. Once they’ve puffed, you can turn the baking sheet around (particularly important if your oven has hot spots). You want to cook them until the outside of the bread is dry but still soft. Don’t wait for the top to brown, they’ll be crispy by then – they’ll normally have some colour on the bottom where they have been in contact with the baking sheet. Take them out of the oven and cover with a tea towel until serving, just as soon as they’re still warm but not too hot. 

IMG_6580

They’re perfect for stuffing, dipping in home-made hummus, or enjoying with soups, salads – anything you can think of!

Variation: To make naan – 

  • Use strong white flour or a 50:50 mix of strong and plain flour (Or 100% plain, see note above). 
  • Use a mix of half-milk, half water, and add about four tablespoons of plain yoghurt (you’ll need less water/milk as a result). 
  • You can use a plain-flavoured oil or melted ghee in the dough.
  • Once out of the oven, brush with melted ghee or butter while still wet. Mix crushed garlic with this butter for a garlic naan, or fold chopped dried sultanas, figs, or dates and almonds into the dough, before shaping, for a Peshwari-style naan. 
  • I expect my naan to be a bit bigger than pittas, so I would make six or eight from a full quantity of dough. 


More from the Fallback Pantry  ::  More from the Country Skills Blog >>


Give Us This Day Our Daily Bread – a collection of recipes from the Fallback Pantry

Limited shopping opportunities mean many of us are baking bread at home for the first time – or at least, for the first time in a long while! So here’s a quick round-up of recipes and techniques to give you some extra ideas and inspiration.

“But I can’t get…” Some advice on ingredients and making do:

Flour and yeast seem to be ingredients in short supply at the moment, so some creative baking may be required.

If you can’t get bread flour, you still have options if you have other flour types available.

  • Chapati (Atta) flour works well as a bread flour, it makes a slightly dense but very tasty wholemeal loaf. I recommend using a bread tin for this.
  • Soda bread and flatbreads are more forgiving than traditional loaves – you can make pittas, tortillas, chapatis and all sorts of lovely things.
  • You can bake with any mix of bread flours – combining rye, spelt, or wholemeal flour with strong white gives a tasty satisfying loaf which rises better than these flours will on their own.

If yeast is the problem:

  • Get cracking with that sourdough starter!
  • In the meantime, experiment with soda bread.
  • Old expired yeast (those packets in the back of that cupboard!) will be sluggish and produce poor results, but can often be brought back to life. It will take a little care and attention – activate the yeast in some warm water with a bit of sugar before baking, even if the instructions say this isn’t necessary, and use more than the recipe says. Be prepared to give it extra time to prove – time is flavour so this is not a bad thing!
  • If you have a little bit of yeast, you can make it last (almost!) indefinitely by making a ‘fridge dough’, which maintains a live yeast culture in the fridge for batch after batch of baking. This is what traditional bakeries have done for centuries, and works really well – store the live dough in the fridge and plan to bake two or three times a week to keep it refreshed and active.

Good luck and happy baking!

Yeasted breads:

No Weigh! – the bake-anywhere, traveller’s loaf
A basic, white bread recipe and technique which requires no special kitchen equipment – if you have flour, water, salt, yeast and oil, access to an oven and some sort of a baking tray, you can make this loaf.

Don’t be Sour – a dalliance with yeasted ‘quick’ bread
A good basic ‘pain d’épi’ loaf recipe that can be adapted for all sorts of different flour types.

Roast Garlic & Rosemary Bread
A lovely fougasse-type bread ideal for serving with pasta.

Pain de Savoie, from Paul Hollywood’s ‘Bread’ – Cooking the Books, week 2
This is a filing, savoury loaf with which is a meal in itself – made with bacon (or ham) and cheese, it really hits the spot.

Milk Loaf, from ‘How To Bake’ by Paul Hollywood – Cooking the Books, week 14
Something a little sweeter and more sophisticated – if you’re missing posh breakfast breads this simple but delicious milk loaf might be for you.


Sourdough (and semi-sourdough) baking:

Sourdough Saga: Episode 1 – failure to launch
How (not) to create a sourdough starter.

Sourdough Saga: Episode 2 – keep calm and carry on?
We got there in the end!

Sourdough Saga: Episode 3 – good things come to those who wait!
My basic sourdough recipe.

Sourdough Saga: Episode 4 – cheese and sun dried tomato bread
A nice recipe variation.

Sourdough Saga: Episode 5 – how to look after your starter

Sourdough Saga: Episode 6 – awesome home-made sourdough pizza
This is a really good replacement for take-away!

Sourdough Saga: Episode 7 – six months on, life with my sourdough starter

Sourdough Saga: Episode 8 – semi-sourdough baguettes
Not a ‘novice’ bake, but one I’m really really proud of. These baguettes are the business!


Read more from the Country Skills blog >>

Like a Rocket – summer glut-busting: wild rocket pesto

Summer days are here at last, and for those of us who grow our own fruit and vegetables, that means the summer gluts are starting, too. Wild rocket is really very easy to grow, which is great, as the sad little plastic salad bags at the supermarket cost a small fortune! Even if you only have space for a window box or a pot on a sunny doorstep, you’re quite likely to be able to grow more of this really punchy, peppery salad leaf than you can bear to eat in salad. Even better, wild rocket is perennial, which means that you only have to plant it once and it will come back, year after year. In the garden of our last house, we ended up with a big clump of wild rocket growing at the edge of the lawn which served us for many years.

A few weeks ago, I transplanted three rather sad looking overwintered plants from an exhausted grow-bag into one of the raised beds in my poly-tunnel. And look what happened!

Wild rocket

There you go, straight away – more rocket than I can possibly eat! And then, I thought – I wonder if I can make pesto with this stuff? It’s punchy, peppery, and in many respects quite like basil, so I was hopeful. A quick search around the internet confirmed my suspicions that it should be possible, so I got picking.

For my batch of pesto, which filled an average-sized jam jar with a little to spare, I used –

  • 120g of freshly picked wild rocket leaves. To give you a rough idea of how much rocket that is, the supermarket packs of rocket leaves are usually between 50g and 70g.
  • Washed & dried rocket3 large cloves of garlic
  • 50g pine kernels, lightly toasted in a dry frying pan
  • 50g good quality parmesan cheese
  • Plenty of good extra virgin olive oil
  • One lemon
  • A pinch of salt

Wash your rocket, removing tougher stems and any flower stalks, and dry it in a salad spinner (or give it a really good shake in a colander with a plate over the top).

You can make this pesto in a pestle and mortar (in fact, it’s my favourite way of making small batches of basil pesto, as you keep closer control over the texture and you’re much less likely to over process) but given the quantities I used my food processor for this batch. First, blitz the garlic cloves with a pinch of salt until they’re finely chopped down. Then add the parmesan, and reduce to crumbs, before adding the pine kernels. Aim to retain some texture in the pine kernels, you’re not trying to purée them!

Once that’s done, add the rocket, a handful at a time, adding some olive oil as you go if the mix gets a bit dry. Aim to retain a little texture in the mix.

Rocket pesto after processing

Once it looks like this, squeeze in the juice of half a lemon, mix well, and add oil until it reaches the texture you prefer. Taste – you’ll find it punchy, peppery, and pungent – and add more lemon juice if you feel it’s needed. You won’t need to add pepper – trust me on this! – but you may want to add a little more salt at this stage, too.

The pesto will store for a few days in a screw-top jar in the refrigerator. Keep the surface covered with a layer of olive oil to prevent oxidation. If you want to store your pesto for longer, you can freeze it in an ice cube tray, and take it out in single-serve portions. How clever is that?

Pesto in jar

Use your rocket pesto any way you would use the basil kind. It’s wonderful stirred through pasta or, particularly, gnocchi. Add a few little dabs to the top of your pizza before baking. Or spread it on burger buns as a punchy, peppery relish.

Read more from the Country Skills blog >

Macaroni with Leeks and Bacon, from Delia Smith’s Complete Cookery Course, Cooking the Books, week 24

Pasta bakes are such a staple that it almost seems odd to treat them as a recipe. Still, we’re clearing the store cupboard and fridge as much as possible, and this variation on the classic macaroni and cheese caught my eye.

To serve two –

  • Ingredients for bacon leek macaroni175g of pasta (I used fusilli, penne would be more traditional)
  • 1 large leek (or one small one and a shallot, as I’ve used)
  • 90g streaky bacon or pancetta
  • Butter
  • Plain flour
  • 3/4 pint of milk
  • Ingredients for cheese sauce90g grated cheddar cheese
  • 45ml double cream
  • Whole nutmeg
  • 1 tbsp grated parmesan cheese
  • 1 tbsp breadcrumbs
  • Cayenne pepper
  • Salt and pepper

Put the pasta on to cook in plenty of well salted boiling water, and cook until not quite done, so that there’s still just a hard ‘bite’ to it. When you’re happy with it (about 8 minutes, probably) drain into a colander and run under cold water to stop the cooking, then mix in a drizzle of oil to stop it sticking to itself and set aside.

Mix pasta, leek and baconWhile that’s going, chop up your bacon into pieces and fry until just going crispy, set aside, and using the same frying pan, slice and fry the leek (and/or shallot or onion) until just soft but still nice and green-coloured.

Mix the leek and bacon into the pasta in an oven dish. Pre-heat your oven to 180C.

To make the cheese sauce, start with 25g each of butter and flour in the pan on a relatively low heat, melt the butter and make your roux, mix in the milk and bring up to a very light simmer. When it has thickened to your taste, melt in the cheese, and season with salt, pepper, and some freshly grated nutmeg.

Frozen cream-cubes
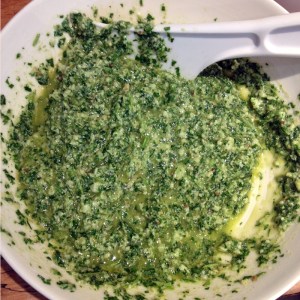
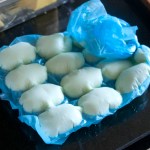
Now, a little aside, if you don’t mind, about small quantities of cream. I’m always buying cream for this or that recipe, and then the rest goes off in the door of the fridge and eventually gets thrown away. But as it turns out, there’s an alternative. Take any surplus cream you have after cooking with it, and pour it into an ice cube bag (I prefer the bags for this to the open plastic trays, because the cream is fully sealed in them and can’t take on flavours).

Cream-cubes
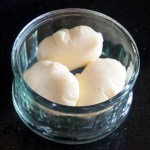
Tie the top securely, and freeze. My bags produce cream-cubes of almost exactly 15ml each, conveniently a tablespoon measure. Then, when you need a little bit of cream for a recipe – sauces like this one are a classic example – just take what you need out of the freezer. I don’t think it would whip-up properly after this treatment, but for this kind of use it’s perfect.

To finish the sauce, add the double cream. You can thaw the cream-cubes out before using – it will tend to separate a bit but whip it lightly and it’ll come back together – or in this case, just throw the cream cubes into the hot sauce and stir until they’re dissolved. Or, add your fresh cream now, if you’re using it!

Macaroni ready for the ovenPour the cheese sauce over your pasta, pressing it down to make sure it’s all nicely covered. Then sprinkle over the breadcrumbs and parmesan mixed with a pinch or two of cayenne pepper. Pop the dish in your pre-heated oven until it’s browned and bubbling – just over half an hour should do it!

This is a really solid variation on the classic mac ‘n cheese. And you can easily substitute alternative alliums for the leeks, depending on what you have to hand. Other cheeses would be fine too – I felt it would benefit from something a bit punchier than the mid-range cheddar I had in the fridge.

Ready to serve

If you don’t over-cook your leeks they come out still looking lovely fresh and green, which is great. The cayenne pepper just adds a little unexpected warmth which is a great detail. It’s not haute cuisine, for sure, but it’s better than many. This may well be my new standard cheesy pasta bake.

**
Delia Smith - coverDelia Smith’s Complete Cookery Course (Classic Edition)
BBC Books, 1978 (revised 1992)
ISBN 978-0-563-362494
Paperback, 640 pages, black and white with colour plates. RRP £9.99.

[Full disclosure: This is my book, which I bought. I have received no payment or sponsorship for this post, nor have I accepted a review copy. I do not have an amazon affiliate account and do not profit from any links provided.]

I honestly don’t know what to say about this book. If any book has a claim to be my ‘Kitchen Bible’, this is it. Mum has a copy, my Grandma had a copy, I bought my own copy in my first term of university because I couldn’t work out how to live – how to eat – without one. We have two at home, because when I discovered that my then-boyfriend (now-Hubby) didn’t have it, I bought one for him, too.

This particular dish is new to me. It’s classic Delia – simple home cooking that works first time, well tested and reliable, but still interesting despite being, really, pretty humble! I know this cookbook more or less inside out (just look at the state of it!) and I’ve never yet found a bad recipe. I have such faith in this book that I’m happy to try recipes first-time-out for dinner guests. This is where I come to time and time again to refresh my memory on times and temperatures for roasts and pot roasts. It’s my reference for basic pastry. It practically falls open on the well-splattered page for the classic All-In-One sponge cake.

Delia Smith - page viewYes, this book shows it’s age – actually, this is particularly the case when it comes to pasta, which to be fair had barely been ‘invented’ in the UK when this book first came out. But all of English cookery is here. This book has been in my life for as long as I can remember – in many respects it’s been the cornerstone of my culinary life.

All the fundamentals are here, and if you sent me to a desert island – obviously one equipped with a good kitchen and a full pantry! – with just one cookery book, it would have to be this one, hands down. What more is there to say, really?

‘Cooking the Books’ is my self-imposed blog challenge for 2014 – I’ll be trying to cook a new recipe from one of my (rather extensive!) collection of cookbooks once a week, write it up and review it. Wish me luck!

Read more from the Country Skills blog >>

Indian-Style Kebabs with Yoghurt Sauce, from The Complete BBQ Book – Cooking the Books, week 23

BBQ weather returned this weekend (hurray!). This challenge is getting really difficult just now, because we’re due to move in just under a fortnight so not only is there stacks of other stuff I should be doing, but I’m trying really hard not to buy anything that’s going to be wasted when we go. So we really are down to store cupboard staples and creative substitution!

These kebabs are actually kabobs, in the recipe, as it’s a US-published cookbook. ‘Kabob’ is one of those words that just makes me laugh. I don’t know why! But let’s get on.

To serve two (four kebabs), you will need –

  • Kebab ingredients300g of good minced beef
  • 1 clove of garlic
  • 1″ length of fresh ginger
  • 1/2 tsp paprika
  • 1 tbsp curry powder
  • 1/2 tsp ground coriander
  • Pinch of chilli powder
  • 1 egg
  • Salt and pepper

Complete kebab mixMince the garlic, peel and grate the ginger, and add these with all the dry ingredients to your beef and mix well. Then add the egg, and mix this in. It will look to start with like there’s far too much egg, but keep mushing the mixture with your fingers and eventually any wetness from the egg will be absorbed it will all combine into an even dough-like mixture.

If you’re worried about this, you can always beat the egg first and add it in increments, but I suspect you’ll end up adding less than the mix would have taken – and if your egg is particularly large, or your minced beef particularly un-absorbant, you can always throw in a handful of breadcrumbs to rescue the situation, should it come to that!

Shaped kebabsSet aside your mixture in the fridge for 5 – 10 minutes to firm up a little, and then split into four even portions, and form each of these these around a BBQ skewer. The disposable wooden kind is just fine, I’ve long since given up on soaking them before use. I find rolling the mix around the stick doesn’t work very well and tends not to seal back up properly, so I form a sausage shape in my hands, first, insert the skewer into the centre, and then squidge the mixture around the stick to spread it out evenly. There’s no polite-looking way of doing this job, so feel free to giggle as you work!

Wrap up your kebabs and return them to the fridge for an hour or more before cooking – you could make these much earlier in the day, if you’re having a party.

Once the kebabs are made, prepare the yoghurt sauce, for which you require –

  • Yoghurt sauce ingredients2/3rd cup of plain greek-style yoghurt (conveniently, this is about 160ml, or give or take 1/3rd of a standard 500ml pot – eyeball it, the exact quantity is pretty unimportant here)
  • A sprig of fresh mint (about four leaves)
  • 1 tbsp of chopped fresh celery leaves (this replaces 1 tsp of dried fenugreek leaf from the recipe)
  • 1 clove of garlic
  • Yoghurt sauce mix1/4 tsp of honey
  • 1/2 tsp dried coriander
  • 1/2 tsp paprika (plus extra to garnish)
  • 1 tbsp olive oil
  • Salt and pepper

Chop the mint and celery leaf finely, and mince the garlic. Mix all of the ingredients together and cover and refrigerate until it’s time to cook.

Kebabs after turningWe ran out of charcoal, so these were cooked on the BBQ over wood, which is a nice treat anyway! Be very gentle with the kebabs as they’re quite soft-textured and could easily fall apart if you handle them too soon after putting them on the grill. They cook nice and quickly – three or four minutes per side should be enough, depending on the heat of your BBQ and the thickness of your kebabs! You could do these indoors under an electric grill, if you preferred.

I served my kebabs with a crunchy salad and fresh home-made pitta bread, a big dollop of the yoghurt sauce and a couple of wedges of lemon.

Indian kebabs, served

These are decent recipes, by and large. I’d like to try the yoghurt sauce again without the celery-for-fenugreek substitution. I also think it would really benefit from perking up with a little bit of lemon or lime zest and / or juice.

The kebabs had a lovely flavour and aroma but could have taken a little more heat. Whether you agree with this will depend very much on your palate and on the precise characteristics of the spices you use. I thought mine was a hot paprika, but tasted it later and discovered it wasn’t. My curry powder was a medium madras type – again, a hotter curry powder would have done the trick I think. I suspect next time I make these, I’ll use the same spices but add a finely chopped fresh red chilli to the mix, as this will add some good fresh flavour as well as the extra heat.

For a BBQ party, these would be great served in a toasted pitta or wrapped in a flatbread with just a squeeze of lemon and a dollop of yoghurt sauce, which makes them great standing-up food!

Complete BBQ - cover**
‘The Complete BBQ Book’
Chancellor Press (Octopus Publishing Group Ltd), 2003
ISBN 978-0-753-708088
Hard cover with spiral binding, 368 pages, black & white. No RRP.

[Full disclosure: This is my book, which I bought. I have received no payment or sponsorship for this post, nor have I accepted a review copy. I do not have an amazon affiliate account and do not profit from any links provided.]

What can I say about this book? Well, it’s a collection, again. I hunted front and back and I can’t find an authorial or editorial credit at all, which is rather sad for the poor folk who put it together! I also can’t trace it on Amazon, so presumably it’s gone out of print now.

With over 500 recipes here, they’re inevitably going to be a bit hit-and-miss. The two I tried were competent, but could both do with some gentle refining. I suspect that’s likely to be the tone throughout. Then again, with this many recipes to choose from you’re probably going to find something to suit your tastebuds and the contents of your store cupboard!

Complete BBQ - page viewThere are a couple of highlights – a good section at the front contains a wide array of marinades which could easily be pressed into service for all kinds of different uses, on and off the BBQ, and there is a good selection of side dishes.

As it’s a US book, a set of American cup measures will save you a fair amount of mental arithmetic! Overall, I would rate it as competent but a bit uninspiring. I’ll keep it, but I don’t think you should all dash out and buy it at once.

‘Cooking the Books’ is my self-imposed blog challenge for 2014 – I’ll be trying to cook a new recipe from one of my (rather extensive!) collection of cookbooks once a week, write it up and review it. Wish me luck!

Read more from the Country Skills blog >>

A Summer Fling – my new favourite gin, apple and elderflower cocktail

Being able to mix a decent drink is a very useful country skill – it brings a splash of sophistication to life when you don’t live somewhere where you only need to chuck a rock to hit three decent cocktail bars.

Anyway, I had to share this one with you – it was suggested to me by an old school friend (who, fortunately for him, is safely on the other side of the world where I can’t hold him responsible for the consequences!) and it’s such a beautiful, fresh taste of summer, that I’ve fallen rather in love with it.

You will require –

  • Your cocktail ingredientsGin – whichever nice one you usually drink (beggars can’t be choosers at the moment at our house, so it’s Aldi’s London Dry Gin, which is surprisingly decent!)
  • Home-made elderflower cordial (or bought, if you really must – but they’re in full flower right now, so what a perfect excuse to make a batch!)
  • Really good cloudy apple juice, the best you can get, ideally quite a crisp, dry one.
  • Ice

In a tumbler, place three or four cubes of ice. Pour in a measure of gin (or why not a double – go on, you’ve earned it!). Now add a splash of elderflower cordial – only a little one! Finally, top up with apple juice.

Go on, have a sip!

There, how easy was that?

This is absolutely gorgeous (and one to try even if you don’t think you like gin). The apple juice is the star here, and really defines the character, so the better your apple juice, the better the cocktail (anyway, I’m sure it counts as one of your five-a-day). The elderflower adds a subtle sweetness and a gorgeous floral bouquet, and the gin just sits discretely in the background with a delicate waft of juniper and a little citrus zing. Be warned, though, it does go down very easily!

A sinister thought has occurred to me, which is that it might be possible to concoct a related drink, made with Plymouth gin, Cornish cider and hedgerow elderflower cordial, and call it a ‘Westcountry Wrecker’… Some experimentation may be required!

Read more from the Country Skills blog >>

Mustard and Rosemary Chicken, from Chicken Meals in Minutes – Cooking the Books, week 20

Hurray! I’ve rescued the pictures from the faulty memory card, so we can skip back and catch up with The Missing Episode!

This is rather a neat little recipe, which makes a great quick supper. It’s full of flavour, quick, fresh, and (whisper it) healthy.

To serve two, you will require –

  • Mustard chicken ingredientsTwo chicken breasts, skin on (my preference)
  • A whole lemon
  • 2 tsp grain mustard
  • 2 tsp chopped fresh rosemary (you could substitute about 1 tsp of dry)
  • 1 clove of garlic
  • 300g potatoes (small new-type potatoes would be ideal)
  • 125g baby spinach leaves
  • Butter
  • Olive oil
  • Salt and pepper

A quick note on chicken, first – if you buy chicken portions from the supermarket, stop it right now. Dividing a whole chicken into portions is so easy, with a little practice it can be done in a minute or two. You will save money, and get better portions (the chicken breast portions you buy are woefully under-sized and over-priced compared with buying a whole roasting chicken), and also not be participating in the stupidity that sees the UK import white chicken meat from places like Thailand and Vietnam, while at the same time we’re net exporters of chicken leg meat. Madness. Right, rant over, and on with the recipe!

Make marinadeIn a bowl, coat the chicken breasts with the mustard, rosemary, crushed garlic, a pinch of pepper, a squeeze of lemon juice, and a little glug of olive oil, and set aside to marinade for half an hour or so, if you have the time – don’t worry if you’re in a rush, though, you can go ahead and cook straight away. I had two wings from my portioned whole chicken, so I put those in, too.

Chicken in roasting dishThe recipe calls for cooking the chicken on the BBQ (it’s an Australian recipe, after all), but for UK convenience, on a slightly drizzly evening, I chose to roast it in the oven. Preheat your oven to 180C. In a roasting tin or tray, arrange your chicken pieces. Once the oven is up to temperature, slide in the chicken, and roast for 35 – 40 minutes.

Buttered boiled potatoesAfter about 10 minutes, cut your potatoes into bite-sized pieces (or use small new or salad-type potatoes, which you might just want to halve) and boil until tender. Drain, and mix in a good dollop of butter. Your potatoes can wait now with a lid on until the chicken is ready, which shouldn’t be long.

Once the chicken is done, remove from the oven, and rest, covered loosely with foil. Pop the buttered potatoes back on the hob, and add the spinach to the pan with a tiny splash of boiling water. It will look like far too much spinach, but don’t worry, it will wilt down quite dramatically. Shake & mix the veggies from time to time, with the lid on, until the spinach is all wilted down. Season with plenty of black pepper, and a little salt to taste.

That’s it, it’s ready to serve, with a slice of lemon on the side.

Mustard and rosemary chicken - serve

There are some peculiar features to this recipe. Presumably they can be explained by the whim of the publisher, which is The Australian Women’s Weekly. I’m the last person to over-season with salt – I find it quite intrusive, if done to ‘cheffy’ levels – but the recipe mentions seasoning nowhere, and if you skip the black pepper, particularly, I think the flavours will be the weaker for it. I presume there’s a salt-avoidance rationale behind it somewhere. Likewise the recipe expects skinless breast fillets, which is bound to be down to fat-reducing, but compromises on flavour and texture for me. Make up your own mind!

The combination of mustard and rosemary flavours works really well – I say this as someone who is not historically a great fan of mustard as a dominant flavour – and the chicken does go very well with the potato and spinach side dish. It was quick and simple to prepare but the flavours are big, fresh, and quite bold without being overpowering or unbalanced. This is healthy everyday food that doesn’t set off ‘diet food’ alarm bells. I recommend you try it!

Chicken Meals in Minutes - cover**
Chicken Meals in Minutes, The Australian Women’s Weekly Cookbooks
ACP Publishing Pty Ltd, 2002
ISBN 978-1-863-962605
Soft cover (magazine binding), 120 pages, full colour. RRP £5.99.

[Full disclosure: This is my book. I have received no payment or sponsorship for this post, nor have I accepted a review copy. I do not have an amazon affiliate account and do not profit from any links provided.]

This is an odd little book, and one of a series. I can’t rightly remember how it came into my possession, whether it was a gift or a bargain bin purchase, but unlike many ‘collection’ books, it’s rather better than you might expect from the outside!

Chicken Meals in Minutes - page viewAs you might suspect from an Australian mass-market recipe collection around the turn of the millenium, it’s quite heavy on asian-influenced dishes without requiring a larder full of specialist ethnic ingredients; this makes it refreshinly easy to shop for in our local village Co-op! The food is light, fresh, and very suitable for summer eating. There are a variety of BBQ dishes which I will definitely return to during the course of the summer.

The lack of seasoning follows through all the recipes, and can only have been an editorial decision. Fat and kJ values are given for the recipes, but the collection doesn’t appear to have been selected on this basis, which is refreshing! All in all, it’s a nice surprise, then. Better than expected. I wouldn’t suggest you all dash out and buy it, but if it happens to be hanging out on your bookshelf, perhaps give it another look?

‘Cooking the Books’ is my self-imposed blog challenge for 2014 – I’ll be trying to cook a new recipe from one of my (rather extensive!) collection of cookbooks once a week, write it up and review it. Wish me luck!

Read more from the Country Skills blog >>