Like a Rocket – summer glut-busting: wild rocket pesto

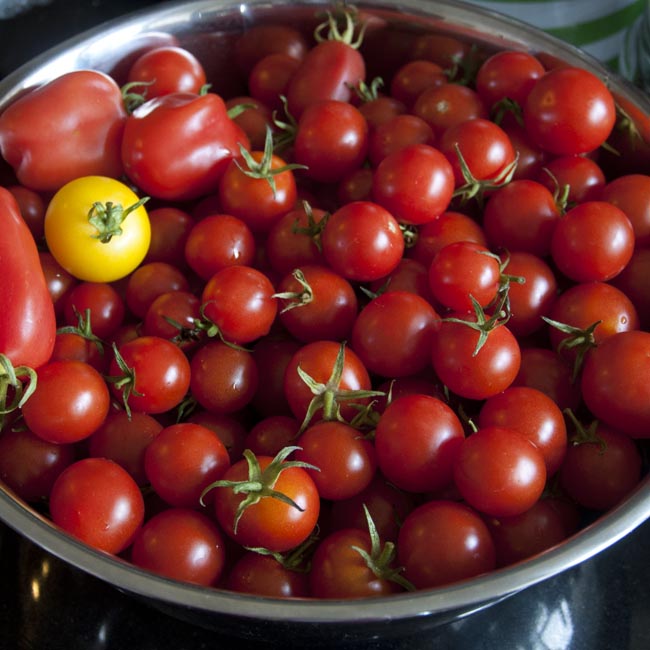
Summer days are here at last, and for those of us who grow our own fruit and vegetables, that means the summer gluts are starting, too. Wild rocket is really very easy to grow, which is great, as the sad little plastic salad bags at the supermarket cost a small fortune! Even if you only have space for a window box or a pot on a sunny doorstep, you’re quite likely to be able to grow more of this really punchy, peppery salad leaf than you can bear to eat in salad. Even better, wild rocket is perennial, which means that you only have to plant it once and it will come back, year after year. In the garden of our last house, we ended up with a big clump of wild rocket growing at the edge of the lawn which served us for many years.

A few weeks ago, I transplanted three rather sad looking overwintered plants from an exhausted grow-bag into one of the raised beds in my poly-tunnel. And look what happened!

Wild rocket

There you go, straight away – more rocket than I can possibly eat! And then, I thought – I wonder if I can make pesto with this stuff? It’s punchy, peppery, and in many respects quite like basil, so I was hopeful. A quick search around the internet confirmed my suspicions that it should be possible, so I got picking.

For my batch of pesto, which filled an average-sized jam jar with a little to spare, I used –

  • 120g of freshly picked wild rocket leaves. To give you a rough idea of how much rocket that is, the supermarket packs of rocket leaves are usually between 50g and 70g.
  • Washed & dried rocket3 large cloves of garlic
  • 50g pine kernels, lightly toasted in a dry frying pan
  • 50g good quality parmesan cheese
  • Plenty of good extra virgin olive oil
  • One lemon
  • A pinch of salt

Wash your rocket, removing tougher stems and any flower stalks, and dry it in a salad spinner (or give it a really good shake in a colander with a plate over the top).

You can make this pesto in a pestle and mortar (in fact, it’s my favourite way of making small batches of basil pesto, as you keep closer control over the texture and you’re much less likely to over process) but given the quantities I used my food processor for this batch. First, blitz the garlic cloves with a pinch of salt until they’re finely chopped down. Then add the parmesan, and reduce to crumbs, before adding the pine kernels. Aim to retain some texture in the pine kernels, you’re not trying to purée them!

Once that’s done, add the rocket, a handful at a time, adding some olive oil as you go if the mix gets a bit dry. Aim to retain a little texture in the mix.

Rocket pesto after processing

Once it looks like this, squeeze in the juice of half a lemon, mix well, and add oil until it reaches the texture you prefer. Taste – you’ll find it punchy, peppery, and pungent – and add more lemon juice if you feel it’s needed. You won’t need to add pepper – trust me on this! – but you may want to add a little more salt at this stage, too.

The pesto will store for a few days in a screw-top jar in the refrigerator. Keep the surface covered with a layer of olive oil to prevent oxidation. If you want to store your pesto for longer, you can freeze it in an ice cube tray, and take it out in single-serve portions. How clever is that?

Pesto in jar

Use your rocket pesto any way you would use the basil kind. It’s wonderful stirred through pasta or, particularly, gnocchi. Add a few little dabs to the top of your pizza before baking. Or spread it on burger buns as a punchy, peppery relish.

Read more from the Country Skills blog >

Taming the Tomato Glut – Part 7: finally, putting it on ice!

Now that's what you call a glut!

In the end, there’s always the freezer…

At the end of October, I had the last few bowls of tomatoes I hadn’t managed to preserve, eat, or give away, and we were on our way to Cornwall for a week. They weren’t going to survive until our return, so it was time for desperate measures.

Freezing is a great food preservation technique – maintaining all the freshness and nutritional value of your home-grown fruit and vegetables. This comes at some cost to texture, undoubtedly, but usually in ways that are irrelevant if you’re going to cook the veggies anyway. Preparation is generally quick and straightforward – certainly compared to preserving, bottling or pickling. Of course the limiting factor is always the space available in the freezer, which for me, despite the obvious advantages, tends to make freezing my preserving technique of last resort.

Wash & trim tomatoesI needed to get these tomatoes stored with as little faff as possible – I had a holiday to get started! – so I chose the simplest of all solutions.

Wash your tomatoes and discard any which are spoiled, trimming any minor damage. Remove their little green hats. Then, a batch at a time, just pulse them very quickly in a food processor enough to break them up.

Chop in food processorYou’re not trying to reduce them to pulp, just roughly chop to release enough juice that they will freeze as a solid ‘brick’ of tomato flesh and juice.

This leaves the skins and seeds in, which I know some will disapprove of. Personally I struggle to be offended by tomato skins – really, life’s too short to be peeling tomatoes! You will hear that chopping tomatoes in a food processor will break up the seeds and release a bitter flavour – while this may be the case if you’re trying to blend to a smooth texture, I’m pretty sure hardly any of seeds are damaged with such a short chop.

Pint measureDecide on your freezing volume – I chose to freeze these a pint at a time, in retrospect that was too much for us, since I’m usually just cooking for me and Hubby, and when I do this again in future I will probably freeze at least some in half-pint volumes for greater convenience.

Bag up your tomatoes, excluding all the air when you seal the bag, label the bags and tuck away in the deep freeze until you need them.

Ready for freezing

You can use these for more or less anything, to be honest. Allow them to thaw out, and use them in place of fresh tomatoes, for example in the recipe for roasted tomatoes with chicken and pasta. Passed through a mouli, you have a batch of fresh passata ready to go straight away – and thus remove the skins and seeds, if they offend your delicate sensibilities! You can also use them directly as a substitute for chopped tinned tomatoes in chillies and pasta sauces – I used some in the puttanesca sauce I made recently, and they were excellent. I can’t however recommend trying to eat them raw – the texture is altered by freezing and while the flavour is lovely and fresh, it would be a bit like putting tinned tomatoes in your salad!

Serve!

Well, folks, that’s it for last year’s tomato glut (I know, I know…)! It’s taken me a while to finish writing these posts up – hopefully they’ll be of use to my Southern hemisphere readers pretty soon, at least! But I still have jars and bottles of passata, tomato and chilli chutney, and green tomato chutney in the larder, ‘sun dried’ tomatoes in a jar in the kitchen, and a couple more bags of frozen tomatoes in the freezer. Even in the depths of winter, I can enjoy my summer’s produce, a genuine taste of bottled sunshine, and that makes it all utterly worthwhile!

Read more from the Country Skills blog >>

Taming the Tomato Glut – Part 6: Grandma’s green tomato chutney

I remember my grandmother making her green tomato chutney, towards the end of the summer holidays, when it was clear that the best of the ripening days for the tomatoes she lovingly grew outdoors, on the patio, were over. After her death, my mother transcribed some of her hand-written recipes for my sister and I – including the green tomato chutney recipe.

Now that's what you call a glut!

Back at the end of last summer, I had rather a lot of green tomatoes.  So I went and had a dig around the darker, dustier recesses of my laptop hard disk, and retrieved the text files containing Grandma’s recipes, and hidden among them, sure enough, was this –

GREEN TOMATO CHUTNEY

3lb green tomatoes, 2lb cooking apples, 3/4lb sultanas. 1oz ground black pepper, 4 tbs salt, 1 quart malt vinegar, 1lb Demerara sugar, 1/2 oz mustard seeds, pinch cayenne pepper

Peel and slice tomatoes. Cut up apples. Chop sultanas. Put in enamelled saucepan with remaining ingredients. Boil gently for 2 hours, stirring constantly until chutney gets dark and tomatoes and apples are well cooked. Bottle when cool.

The main thing that struck me about this recipe was the lack of any onions – honestly, I can’t remember whether Grandma used them or not, but I expect onions in a chutney recipe! I made a couple of other, more minor modifications, too (Sorry, Grandma!), and scaled the recipe up to use as many of the green tomatoes as possible.

This, it turns out, was a mistake – the quantity I made was totally impractical, took forever to cook down, and almost ended in disaster, more of which later. Really, I can’t recommend making more than half this batch size. Even if, like me, you have a really big stock pot. Don’t say I didn’t warn you!

For my chutney, I used –

  • Cooking apples3 kg green tomatoes
  • 2 kg cooking apples
  • 1 kg onions
  • 1 kg Demerara sugar
  • 2 l malt vinegar
  • 750g dried vine fruits (I used a mix of raisins & sultanas)
  • 2 tbsp freshly ground pepper
  • 1 tbsp sea salt
  • 1 tbsp yellow mustard seeds
  • 1 tsp cayenne pepper

Life is too short to peel tomatoes (especially 3kg of them!) and I was cooking on a work night, so it was too short to lovingly chop them by hand, too! Out with the food processor, and rough-chop all the tomatoes, onions, and apples, before putting them in the stock pot with the rest of the wet and dry ingredients.

Chopped green tomatoes  Chopped onions  Ingredients mixed at start of cooking

And now, just simmer it, slowly, for what – with a batch of this size! – will be a very very long time! I had to give up and go to bed, fitting a tight lid to the pan, and finished cooking the chutney the following evening. This is one very good reason not to make such a giant batch at once.

The other, of course, is that you will require an enormous quantity of jars (with plastic lined lids, or they’ll corrode from the vinegar – mind you, I can’t remember the last time I was an un-lined jar lid!). While I was sorting these out, I took my eye off the pot, and the inevitable  happened – the chutney caught on the bottom of the pan, and started to burn.

Finished chutneyDisaster! I panicked a bit, and then with Hubby’s help, decanted most of the chutney into any available container, leaving the burned stuff on the bottom of the pan. After a damn good scrub, we were back in business, though I remained convinced for the rest of the cooking time that I could taste the burnt flavour in the chutney. This paranoia wasn’t helped by the highly visible flecks of black pepper in the mix, which my brain kept insisting on seeing as burnt bits.

I very nearly threw the whole lot in the bin, but a bit of gentle encouragement that I’d done all the work now anyway convinced me to bottle it anyway and hope for the best. I deviated from Grandma’s instructions again here and bottled hot, into hot oven-sterilised jars, as I usually do. Now all that was left to do was to leave the chutney to mature for a couple of months.

Served-up

This (and wanting to make sure this tale had a happy ending!) is the reason for the delay in writing up this recipe. I’m really pleased with the result – after maturing I’m pretty sure it doesn’t taste burnt, and is a lovely gentle fruity chutney, with a lovely black pepper warmth, which goes brilliantly with cheese, ham, and even curries!

So this year, at the end of the home-grown tomato season, why not make a batch? But, promise me, make it a smaller one?

As for me, I’m still really curious about the outcome of making the recipe as written – so perhaps this year I’ll make a test batch of the onion-free version. Who knows, it may be a revelation?

Read more from the Country Skills blog >>

Taming the Tomato Glut – Part 5: roasted tomato sauce

With apologies now, to all but my antipodean readers – the tomato glut, and the long hot days of summer, seem a long way behind us, but there were a couple of recipes that fell through the cracks, for one reason or another. Hopefully they’ll be of use to you later this year!

Lay out on baking trayThis is a great little recipe for using up those slightly over-ripe tomatoes that inevitably start to pile up once the harvest really gets going.

You will need –

  • Home grown tomatoes (about 1kg here)
  • Three garlic cloves
  • Two or three bay leaves
  • Sea salt, mixed dried italian-type herbs

Trim out any obvious damage and discard any that are really ‘over’, cut the tomatoes into even pieces, and lay the tomatoes out in a single layer on a baking sheet.

After roastingTuck the cloves of garlic in amongst them, and snuggle the bay leaves underneath, sprinkle over a little sea salt and a few mixed herbs, and roast in the oven at 180 C for 30 to 40 minutes until you’re starting to see some browning to the skins.

Pass through a mouliDiscard the bay leaves and put the rest through a mouli with the fine filter fitted (or push through a sieve with the back of a spoon, if you don’t mind the labour!). This will hold back the skins and seeds and allow just the beautiful smooth sweet tomato pulp through.

Done! How simple is that?

I started with around 1kg of lovely ripe home-grown tomatoes, and ended up with about 350ml of sauce, which may not seem like much but all the flavour and sweetness is concentrated right down into that sauce. I asked Hubby to taste a spoonful and he thought it tasted like tomato soup – and certainly you could let it down with a little bit of vegetable stock, maybe add a sprinkle of fresh basil, and enjoy it just as it is! I made lasagne with it, and it was perfectly wonderful.

Finished sauce

If you wanted to make a big batch, for keeping into the winter, you could bottle and pasteurise for storage just like the fresh passata. I wish I had, now! I could just do with some roasted bottled sunshine!

Read more from the Country Skills blog >>

Courgette or Zucchini – this is a pickle you will relish!

Not so very long ago, though it’s hard to believe it now, the long hot days of summer were with us and the vegetable garden was in full flood. As well as the tomato glut, I did end up with a few more courgettes than I knew what to do with.

Garden-fresh courgettes

Now, I absolutely abhor the idea of wasting food I’ve gone to the trouble of growing – but I struggled a little to work out what to do with a kilo of courgettes all needing using up at once! Pickles, of course, are the almost-universal solution to making tasty preserves from gluts of vegetables. So I had a flick through some of my cookbooks, and when that didn’t turn up anything I particularly fancied, I did what we all do and turned to the blogosphere. The pickled courgettes I eventually made are based on this recipe for zucchini pickles, from Lottie + Doof.

For my quantities of courgettes,  I used –

  • 1kg of garden courgettes, mixed sizes (smaller ones are better, but use what you have!)
  • Two small onions
  • 6 tbsp sea salt
  • 1l of cider vinegar
  • 300g of golden caster sugar
  • 3 tsp of mustard powder (Colman’s, of course)
  • 3 tsp whole mustard seeds, lightly crushed in a pestle and mortar
  • 2 tsp of powdered turmeric

The dreaded mandolinYou will also need a mandolin (unless you’re both very patient and a remarkably precise slicer of vegetables), a mixing bowl, sterilised jars with plastic-lined lids (my quantities filled two 1lb jars perfectly), and a salad spinner (if you have one) or a clean tea-towel.

Sliced courgettesSet the mandolin about 1.5mm thick, and then use it slice up all the courgettes, lengthways or slightly on the diagonal, using the guard and taking great care not to also slice your fingers! I’m quite terrified of my mandolin (reasonably, I think!) and I really have to psych myself up to use it, but for a recipe like this there really is no alternative.

Sliced vegetables with saltThen peel the onions, and put them through the mandolin on the same setting. Once all your vegetables are sliced, mix them together in a bowl with the 6 tablespoons of sea salt (yes, I know it seems like a lot, don’t worry, it’s not staying in the finished product!), and top up with ice cold water, mixing gently until the salt is all dissolved. Add some ice cubes if needed to keep the temperature down, and put to one side for about an hour.

Pickling vinegarWhile the sliced courgettes are marinading in their brine, prepare the pickling vinegar, combining the vinegar, sugar, mustard powder, mustard seeds and turmeric powder in a saucepan, and bring to a simmer for two or three minutes.  Then allow the vinegar to cool to room temperature (you can speed this process up by immersing the pan in a sink of cold water). It’s a rather ghastly colour, but don’t be put off!

In the salad spinnerBack to our courgettes – once they’ve sat in the salt water for an hour or so, you can taste one of the pieces, which should be quite crisp and gently salted.  Drain off the salt water and then, using the salad spinner if you have one, finish getting them as dry as possible. If you haven’t got a salad spinner, dry them carefully in small batches in a folded tea towel, trying not to damage or break them if possible.

Mix the vinegar and vegetablesFinally, combine the cold vinegar with the courgette and onion in a bowl and mix carefully, before packing the mixture into sterilised jars. There may be extra vinegar, which you can discard (unless you can think of something really creative to do with it!).  Refrigerate for at least a day before tasting, but longer is better.

I started the first jar more or less straight away, in the spirit of experimentation, but the second I kept unopened for Christmas. It’s a very good pickle, pretty much immediately after making. It has a definite sweetness and I think I might reduce the sugar a little in future batches. The mustard flavour is present, but quite soft and subtle. The onion, too, is clearly present but not overwhelming, and tastes less ‘raw’ as the pickle matures. I don’t know whether I would bother with quite so much turmeric, next time, but it does give a very pretty colour to the finished pickle. It’s great with burgers and sausages, and goes particularly well in a salt beef sandwich.

Pickled courgettes on toasted sandwich

I must admit, writing up this recipe had rather fallen through the cracks until I had some yesterday with a wonderful grilled ham and cheese open sandwich. It is *just* fabulous, the icing on the cake of a wonderful lunch made from wonderful things – home-made sourdough, home-cured ham, and even our homegrown ‘sundried’ tomatoes. The mustard note takes this from comfort food to pure gourmet delight.  It’s quite wonderful.

So next summer, when you’re faced with a courgette glut, or find some lovely fresh courgettes in your local market, grab them and make this pickle. You won’t regret it!

Read more from the Country Skills blog >>

Taming the Tomato Glut – Part 4: fresh tomato passata

Passata is a great, versatile store-cupboard ingredient. In bottles or cartons, stashed at the back of the shelf, it comes out to save the day in soups, sauces, anywhere you want lovely fresh tomato flavour but without the texture of seeds and flesh that accompanies tinned tomatoes.  Until this year, I’d never made any of my own. And then, along came the tomato glut…

This is a really really simple passata process, but does require a couple of slightly unusual bits of kitchen equipment. If you haven’t got them, though, you can work around without them – they will just save you quite a lot of time and trouble.

To make this fresh tomato passata, you will require –

  • Fresh, ripe, home-grown tomatoesA quantity of perfectly ripe tomatoes (this batch was about 2kg)
  • A few fresh basil leaves
  • A saucepan, a colander, and a slotted spoon
  • A mouli* (hand-cranked mincer / puree mill) with the fine puree plate installed, and a bowl to go under
  • Beer bottles, cleaned & dried, a crown capping tool and enough new crown caps to seal all your bottles**. (To give you a sense of the storage capacity you’ll need, 2kg of tomatoes produced about 1.7l of passata. I bottled 1.5l and used the extra fresh.)
  • A large stock-pot, big enough to contain your bottles or jars.

* If you haven’t got a mouli, you can get the skin and seeds out by pushing it through a fine-ish metal sieve, by hand. You can easily make enough for one meal, but it’s not a useful technique if you’re making in any quantity, unless you have helpful kitchen-slaves to hand!

** If you’re not a home-brewer like me and haven’t got bottles, crown caps and a capping device, you can always store your passata in jam jars. As with the bottles, no need to sterilise, just make sure they’re clean and dry, and the lids are in perfect condition. When you come to process them later (we’ll get to that bit), keep them upright in the water.

Simmer tomatoes to split skinsWash your tomatoes carefully. Now, in the saucepan, get a couple of inches of water simmering gently. A handful at a time, add your tomatoes into the simmering pan. Watch them carefully – as soon as the skins split, fish them out again straight away, into your colander. This will probably take between 30s and a minute, but will depend on your tomatoes. Watch carefully – you’re not trying to cook them!

With skins split, drainingAllow them a couple of minutes resting in the colander to drain away any excess water. Now put them into the mouli, a few at a time, and process them through. The seeds (most of them, anyway!) will be retained on the top-side of the puree plate, along with the skins, while the beautiful fresh tomato pulp passes through into the bowl below.

Pass through the mouliI should say, I *adore* my mouli. It’s a new kitchen gadget for me this year, bought with our home-grown veggies in mind, and I already can’t imagine how I did without it. I’d love to say it was my Grandma’s (in fact, I don’t remember her having one), but it’s exactly the same design as much older ones I’ve seen – if it ain’t broke, don’t fix it, eh?

Rinse and repeat until you’ve processed all of your tomatoes through this very simple two-step chain. You may find you need to disassemble your mouli every so often to wash off the plate if it gets clogged with tomato skin – you could of course peel your tomatoes by hand before you start, to avoid this problem, but really, life’s too short. Just be careful, when you’re doing this, that you don’t waste any beautiful puree or drop skins or seeds into the bowl underneath.

Passata produced, along with 'waste'By the end of the process, you’ll have a surprisingly good yield, as you can see from this picture, the total ‘waste’ in seeds and skins amounted to about half a pint, with the rest of the tomatoes processed very efficiently into gorgeous fresh tomato passata. It’s orangey in colour, compared to what you might expect from a commercial tomato product, but that’s because it hasn’t been cooked down at all, or coloured artificially! Taste some, it’s beautiful, fresh, fragrant tomato nectar. You could drink this stuff.

Fill your bottlesSo now you have some lovely fresh passata you could certainly use to make bolognese or lasagne this evening. The final step is bottling & pasteurisation to allow it to be stored for a considerable time in a cool dark place. Using a funnel and ladle – or a jug, or whatever suits you really! – transfer your passata into your beer bottles, leaving about 5cm airspace in the bottle necks. Into each bottle, also add a single, carefully washed fresh basil leaf.

Seal the bottles carefully with your crown caps, using a capping tool. If you’re using jam jars, ensure they’re in perfect condition with no cracks, chips, or faults in the lids (consider buying new lids, if necessary) and seal them carefully.

Seal bottles with crown caps

Fill your big saucepan or stock pot half to two-thirds full of cold tap water. Place a tea towel in the bottom, and then put in your bottles, in layers, lying on their sides. If you’re using jars, they can sit ‘upright’.

Bottles in the stock potMake sure the water completely covers the bottles or jars. Now get some heat under the pot, and slowly it to a gentle boil, bottles / jars and all, and keep it boiling for 30 minutes before turning off the heat. Leave the bottles in the pot until everything has cooled back down to room temperature. This boiling process essentially sterilises the contents of the sealed bottle or jar, rendering it shelf-stable. Once cool, you can fish out your bottles, dry, label them, and stash them in your pantry until needed.

[I based my passata process, in great part, on this lovely blog about traditional family passata-making by Italian-Australian cooks – it’s well worth a read!]

Read more from the Country Skills blog >>

Taming the Tomato Glut – Part 3: ‘sun’ dried tomatoes

Today we decided to call ‘time’ on the tomato growing season, and clear out the greenhouse. As a result, I have a kitchen quite literally overflowing with tomatoes. Don’t believe me? Here they are!

Now that's what you call a glut!

But, sun-dried tomatoes? In the UK? In *October*? Some kind of witchcraft, surely?

A couple of weeks ago, I finally caved in and bought a dehydrator.  Some of those little beauties you can see there will be making their way into it very soon. I’ve made two batches already, and I’m extremely pleased with the results. The process is a little time-consuming, and slightly faffy in the preparation, but the final product is amazing, and hugely rewarding.

To make these ‘sun’ dried beauties, you will require –

  • Some lovely ripe tomatoesA glut of home-grown tomatoes, perfectly ripe but not over-ripe and going soft. I used cherry-sized tomatoes and above, since they’ll shrink anyway.
  • Sea salt
  • Mixed dried Italian herbs
  • Citric acid
  • A large bowl, colander, slotted spoon, measuring jug, and a sharp paring knife
  • A dehydrator. I selected mine on the basis of extensive background research. Erm,  hang on, no, that’s not right. I bought the cheapest one on Amazon.

Halved tomatoesWash all your tomatoes carefully and remove their little ‘top-hats’. Now, get a really sharp little paring knife, and slice the tomatoes in half. Honestly, this is my single important top tip here, if you’re slicing tomatoes, you want a really really sharp knife. Otherwise it’s all nasty hard work, and if you’re unlucky the knife will slip on the tomato skin and you’ll lose a finger. Don’t say I didn’t warn you!

Tomatoes soaking in acidulated waterIn your large bowl, put a litre of fresh cold tap water and add a teaspoon measure of citric acid, and dissolve by stirring energetically. The citric acid improves the preservation of the tomatoes, and enhances their colour retention as they dry. If you don’t have any, you can sometimes get it from pharmacies, and always from home-brew suppliers.

Acidulated tomatoes, dryingPlace your halved tomatoes in this acidulated water and leave them for ten minutes (you can get on with chopping the next lot meanwhile) and then remove them with the slotted spoon and place them in the colander to drip for a bit.

Arrange halved tomatoes on traysOnce you’re happy they’ve stopped dripping, arrange them on the dehydrator tray, with the skin sides down. Just touching is fine but don’t overcrowd them or let them overlap.  This takes a bit of time first time and is really fiddly, but once you’ve done it a few times you’ll find a technique which makes it a lot faster. Carry on until all your dehydrator trays are filled. Mine seems to take about 2-3kg of fresh tomatoes.

Sprinkle with salt & herb mixBefore ‘firing her up’, sprinkle a mix of sea salt and dried herbs sparingly over the cut surfaces of your tomatoes. I used a half-and-half mix, and just an ordinary dried herb mix from the shops, but if you have gorgeous fresh herbs then by all means chop those up finely and use them! Sprinkle over sparingly, but do try to make sure each piece of tomato has at least a flake of salt and a piece of herb on it.

Stacked up in dehydratorNow stack the trays up in the dehydrator, set your temperature if your dehydrator has a thermostat – I used 55C, but consult any instructions that come with your machine. While the dehydrator is running, rotate the position of the trays every few hours so that they dry evenly (the bottom of my machine, where the warm air comes out, was about 20C hotter than the top, when I checked it with a temperature probe, so this is a real factor).

As they dry, the house will fill with a beautiful sweet tomato smell. (Hubby dislikes this because he says it makes him think of pizza. Takes all sorts!) You’ll notice the tomato pieces shrinking, wrinkling, and darkening in colour.

At the end of the drying processMy tomatoes were dry after about 36 hours, but this will vary hugely depending on the temperature you use, the characteristics of your machine, size of your tomatoes… You get the idea!  Aim for the smaller pieces being really, plasticky-dry, the larger pieces will still have a bit of flex in the flesh but shouldn’t have any wetness (check for this in the middle, under the seeds).

Now remove your greatly-shrunken tomatoes and put them in a large Kilner jar, or something similar. Whether you’re planning to keep your tomatoes as they are, freeze them for longer storage, or store them in oil, you’ll still want to put them in a jar for a few days, as this helps them ‘condition’ – effectively, it allows the less-dry pieces to donate their excess moisture to the more dried out ones, so that the humidity of the dried tomatoes evens out.  Give the jar a shake a few times a day for three or four days. Of course, you’re not going to be able to resist having a taste, so dig in.  They’re amazing, sweet, little flavour-bombs. I’ve been munching on them like sweeties!

Finished 'sun' dried tomatoes


From a glut-busting point of view, you’ve transformed a massive bowl of fresh tomatoes 2 – 3 kg in weight, into less than a litre volume of dried tomatoes, *and*  they’re going to keep. Really, what’s not to like?

That’s it, simple, no? Of course, there’s so much else you can do with the dehydrator, too..!

Read more from the Country Skills blog >>

Taming the Tomato Glut – Part 2: tomato and chilli chutney

The home-grown tomato glut continues apace, and after yesterday’s harvest, I had over 1.5kg (about 3lb) of lovely ripe tomatoes in bowls on my kitchen counter. Obviously even the most energetic eater of fried tomatoes couldn’t make much of a dent in that with their full English breakfast (though, believe me, I tried!). I wasn’t planning to do any preserving today, but the idea of them going to waste was more than I could bear – so I decided to whip up a batch of tomato chutney, with chillies, since I have a few of those from the greenhouse, too!

This is a bit of a chutney of opportunity / necessity, made out of what I had in the fridge and cupboard, loosely based on this recipe for ‘sweet chilli and tomato chutney‘ from the Pink Whisk blog.

To make this chutney, you’ll need to get together:

  • Fresh ingredients1.5kg of fresh, ripe (home-grown) tomatoes – all shapes and sizes are fine
  • 5 onions (varying sizes)
  • 2 red peppers
  • 4 cloves of garlic (I used half smoked, half fresh)
  • 1 rather over-grown courgette (optional – I had one that had ‘got away’ a bit in the vegetable garden)
  • A few fresh chillies. I chose four large mild red ones (variety ‘Vampire’) and two small-but-fiesty ones (variety ‘Twilight’) which I’ve been growing this year. If you’re in doubt about the properties of a particular chilli, for goodness sake slice off a very small piece and taste it before cooking with them!
  • 800ml of malt vinegar (I used what I had in the cupboard, which was about 400ml dark malt vinegar, 200ml of white malt vinegar and 200ml of spiced preserving vinegar left-over from pickling beetroot – use whatever you have / fancy. Wine or cider vinegar would also be fine, but probably a bit of a waste of money.)
  • Variety of sugars600g of dark sugar (again, this was a cupboard-clearing effort, I used a mixture of demerera, soft dark sugar and golden caster sugar)
  • 4 tsp of whole yellow mustard seeds
  • 1 tsp cayenne pepper
  • 1 tsp paprika
  • 2 tsp sea salt
  • A chopping board, good sharp knife, large stainless steel cooking pot and enough jars to contain your chutney. Also helpful, a ladle and a bottling funnel.

Now, there are a few strongly held beliefs that I try to live by, and not least of these, I’m afraid, is the view that life is far to short to spend it peeling tomatoes – particularly when there’s 1.5kg of them, and many of them are tiny, sub-cherry size. I looked up my grandmother’s green tomato chutney recipe this afternoon, just to check (more on which later, with a little luck!), and it turns out she didn’t peel her tomatoes either. Well, if it was good enough for Grandma, it’s good enough for me! Of course, if you find the idea of tomato skin in your chutney offensive, do feel free to blanch and peel them before you start.

Wash your tomatoes and chop them into roughly even pieces (halves, quarters, or smaller portions depending on the size of the tomato). I left the tiniest toms – those smaller than 1cm – whole. Chuck these into the pan, then chop your onions and peppers (deseeded, and with the white pith removed) into smallish pieces and add them, too.

Peel the courgette and slice it up as finely as you can – I chopped mine pretty roughly, expecting that it would break down to a nice soft pulp during cooking, but it didn’t – probably because the sugar and vinegar in the mix firmed it up nicely! – and I ended up fishing the bigger bits back out to chop them up more finely towards the end of cooking, which is a task I’m sure you can all live without!

Chillies and spicesChop up your fresh chillies very finely (you may want to remove the pith and seeds, where some of the heat is hiding!) and remember to wash your hands very carefully afterwards, including under your fingernails!

Add your chopped chillies to the pan with the sugar, vinegar, crushed garlic and dry spices. Get some heat under it and bring it to a good rolling boil before turning it down a little. Leave it simmering gently, uncovered, and stir occasionally.

Chutney at start of cookingNow, you have time to sort out your jam jars and lids. Wash them carefully in hot soapy water, dry them, then lay them out in a cold oven and set it to 150 degrees C. Make sure that the lids you’re planning to use are plastic-coated, as the vinegar in the chutney will corrode exposed metal. I tend to turn the oven off once it’s been up to temperature for about 20 minutes, and just leave the door closed until I need the jars.

It will take about an hour and a half to cook the chutney – mine took a bit longer than that, so follow your judgement. It’s ready when you can catch a glimpse of the shiny bottom of the pan when you stir the mixture. It will have lost a fair bit of volume (perhaps up to half) and darkened to a rich dark red colour, with no watery liquid left. Once you’re happy it’s done, bottle directly into your hot sterilised jars. These quantities made a little under 2 litres for me, but this will vary depending on your precise ingredients – how watery your tomatoes are and so on. And please, don’t be too hung-up on the details of the recipe – be creative and use what you have, or vary it to your own taste!

My quantities filled whole jars just perfectly (six small ones, and three larger ones), so I haven’t got any ‘left overs’ to enjoy in the next few days from the fridge – a bit of a shame, as I was looking forward to some with a nice cheese sandwich! But this will just heighten the anticipation as the flavours develop over the next month or so. The sneaky tastes I took during cooking (quality control, right?) certainly promise very good things – a lovely sweet-sour background with a gentle chilli heat.

Lovely jars of chutney

Chutney will keep in a cool dark place for ages (I’ve opened – and eaten, and lived to tell the tale – jars of home-made chutney with dates that would make some people’s eyes come out on stalks!). It’s probably best, though, to aim to let it mature it for a month, and then eat it at it’s best within a year. As with all home-made preserves, it’s best to keep it in the fridge after opening. And of course, like any home-made jam or preserve, they will make great gifts!

Read more from the Country Skills blog >>

Taming the Tomato Glut – Part 1: roasted tomatoes with chicken and pasta

The tomato glut has started!  I picked all these gorgeous red beauties in a single session a few days ago. I’m growing that old stalwart, ‘Gardener’s Delight’, along with ‘San Marzanno’, the traditional Italian cooking-type large plum tomato, and two small bush cherry tomato varieties, ‘Lizzano’ and ‘100s and 1000s’.

The tomato glut is here!

Nothing beats a freshly picked home-grown tomato – the sweet flavour, and the delicate perfume so completely lost in fruits picked green half way around the world and ripened artificially in a dark warehouse full of ethylene gas – and up ’till now we’ve been getting through all of them lovely and fresh. We’ve eaten a lot of tomato salads the last few weeks! But with this sudden upsurge in ripening fruit, we’re not keeping up any more.

There are the classics of glut-busting – preserving recipes like passata, chutney, and ketchup – and of course they have their place. Depending on how the fruit output keeps up, I may well make some or all of them in the next few days and weeks. But while preserving allows us to capture a taste of summer in the depths of winter, nothing really beats enjoying fresh, home-grown, seasonal produce at the peak of it’s freshness. Which is why, as well as preserving recipes, every good glut-busting effort needs a few great meals in it, too.

This is my very favourite way of enjoying lots of gorgeous, fresh, ripe tomatoes, simply cooked. You could make this recipe with shop-bought tomatoes, but they’re unlikely to be really lovely and ripe, and you’ll need a lot of them – a decent sized punnet of cherry tomatoes at least for two people. But if you have a local market, you may be able to get hold of lovely ripe tomatoes at this time of year for not much money, so it’s definitely well worth a look.

To make this great chicken dish for two people, you will need –

  • Fresh ingredientsLots of lovely ripe home-grown tomatoes – about a bowl-full
  • Chicken breasts, skin on, one per person if you’re hungry, half per person is fine if you’re not so ravenous. If you’re buying packed chicken breasts, it’s well worth learning the simple skill of butchering a whole chicken into portions – you’ll get much nicer meat, and save money in the process!
  • One small or half a large white onion
  • A nice large clove of garlic or two small ones, (smoked, if possible)
  • A good handful of fresh basil (if you’re growing enough tomatoes to have a glut, and not growing your own basil, you’re doing something wrong!)
  • Hard cheese of your choice. I used mature cheddar because it was what I had, but almost anything would work just fine, I think.
  • Olive oil & balsamic vinegar (or even better, elderberry vinegar)
  • Salt and pepper

Optionally, for the pasta side-dish:

  • Enough good quality Italian dried pasta for two people – linguini would be great, I had spaghetti so that’s what I used. I used to buy supermarket own-brand dry pasta, but the decent Italian stuff is barely more expensive and is streets ahead in terms of cooking quality.
  • A couple of spoonfuls of fresh homemade green pesto, or alternately a generous glug of good spicy olive oil.

Chicken breasts, after fryingSlice up all your tomatoes so they’re about even sized pieces. Tiny ones can be left whole. While you’re doing this, heat a little bit of olive oil in a frying pan. Season the chicken breasts lightly with salt & pepper (be more generous on the skin side) and fry quickly until slightly coloured. Then place the chicken breasts in an oven dish big enough to contain them reasonably snugly with a small gap around.

Prepared fresh ingredientsAdd the onion, garlic and shredded basil to your chopped tomatoes in a bowl, and toss to mix. Season lightly with salt and more generously with pepper, and add a generous glug of oilve oil and a drizzle of balsamic or elderberry vinegar, as if dressing a tomato salad. To give a sense of scale & quantity, this is a large wide bowl of the kind often used to serve pasta.

Ready to go in the ovenSpread the tomatoes around and over the chicken breasts in the oven dish, and grate about a handful of cheese over the top. Now wrap the dish tightly with tin-foil (or put on the lid, if it has one) and snuggle it into an oven at 180 degrees for about an hour.

After an hour has passed, take the lid or foil off your dish and return it to the oven. I love to serve this with pasta, so now’s the time to get a big pan of water to a rolling boil, with a generous pinch of salt and a glug of olive oil, and get your pasta cooking.

When the pasta’s done to a nice ‘al dente’, strain it and stir in a small amount of pesto, if you like, or just toss it generously in good peppery olive oil. You’re not aiming for ‘pasta in pesto’, here, just a very delicate sprinkling of basil and pine kernel pieces through your cooked spaghetti.

Out of the oven!Get your roasted tomatoes and chicken out of the oven. It should be a gorgeous golden caramelised colour on top, and will smell just amazing.

I served the chicken breasts whole, but you could just as easily pick them out at this point and slice them cross-ways into bite-sized pieces, which would make it easier to eat this as a traditional pasta dish with a spoon and fork!

Don’t waste a drop of what’s in this roasting dish – serve up a chicken breast per person, with all the tomatoes and any pan juices spooned over the top. The juice is pure, concentrated, tomato sweetness, and is the absolute highlight of the dish, in my opinion.

Ready to eat!

You’re all very lucky there *is* a photo of the finished dish, as Hubby was looking on as if I’d lost my mind when I got the camera out again. We were both starving after a very busy day, and just wanted to dig right in!

So, if you have a glut of home-grown tomatoes on your hands, please do give this recipe a try. It’s a fabulous taste of late summer, and I promise you wont’ be disappointed!

Read more from the Country Skills blog >>

When Life Gives You Lemons – Part 5: sweet lemon pickle [Guest Blogger]

Lemon TreeOur Guest Blogger is Ross, from Christchurch, NZ.  

You may recall the lovely series of lemon-glut busting recipes which Ross shared with us back in November last year.  He’s back today, with another lovely lemon preserve.  He says of this one “This recipe is a keeper! Much, much nicer than the hot oily one.”

Sweet lemon (or lime) pickle

The hot lemon pickle recipe is, well, hot. Great if that’s what you’re looking for, but sometimes you want something sweeter, less oily and less incendiary. This pickle is easier to make, too.

Prep time: 20 mins
Maturing time: 3-4 weeks

This makes somewhere over 1kg of pickle (I didn’t think to weigh it).

  • About 500g of lemons. (Or limes. Confusingly, the two words seem to often be used interchangeably in Indian English. I haven’t tried this recipe with limes but I expect it’ll be just as great.)
  • 100g salt
  • 500g white sugar
  • 250g demerara sugar (Note: Some recipes call for grated jaggery. If you can get hold of some, great!)
  • 1 tsp turmeric
  • 1 tbsp chilli powder of your desired heat

This recipe is almost entirely jar-based. You need space to throw the salt and sugar around, so it’s back to our old friend the large kilner jar – sterilised, of course.

Wash and dry the fruit. As usual, make sure you’ve removed any wax.

Squeeze a few fruits until you’ve collected about 125ml (1/2 cup) of juice. Keep the skins!

Cut the skins, and the remaining whole fruit, into pieces that are the right sort of size that you want to find in your pickle. This might be eighths or quarters, depending on your taste and the size of the fruit. Put all the chopped pieces into the jar.

Mix the juice, salt and turmeric, pour it over the fruit.

Compress the fruit in the jar so that it’s all covered by liquid.

When you add the sugar, it sinks.Put the lid on and leave the jar in a warm sunny place. While it’s ‘cooking’, give the mixture a good shake-up every couple of days. You’re waiting until the fruit has softened; expect this to take about a week and a half, longer if it’s cold.

Throw in the sugar and mix well.

Put the jar in a safe place (doesn’t have to be sunny this time) for another week and a half or so. The sugar sinks, so give it a good stir every couple of days. Before adding the chilli.When most or all of the sugar has dissolved, it’s ready. I found three distinct layers – floating lemon pieces, the denser sugary syrup, and the undissolved sugar.

After adding the chilliFinally, add the chilli powder and stir well.

It’s now ready to bottle and/or eat immediately. If you bottle it later, be sure to stir well as the fruit tends to rise in the sugary mixture.

No need to refrigerate. Apparently it keeps for over a year if you leave it in a cool dry place – but it’s so yummy, I’m not sure it’ll be around that long!

The finished product

Afterword:

I’ll be making more of this, it’s awesome with poppadoms or as a side with a curry.

You could probably try this recipe to good effect with other citrus fruit, but the combination of the sour lemons and sugar really works well on the taste buds.

Ross is an expat thirtysomething Brit who went to the Shakey Isles in search of adventure. Works in technology, enjoys creating, has a love-hate relationship with his kitchen.

If you’ve enjoyed this recipe, have a look at Ross’s other lemon glut-busting recipes for lemonadelemon liqueur, and lemon sorbet (which you might be needing, if you decide to experiment the hot pickle!).

Read more from the Country Skills blog >>