Taming the Tomato Glut – Part 5: roasted tomato sauce

With apologies now, to all but my antipodean readers – the tomato glut, and the long hot days of summer, seem a long way behind us, but there were a couple of recipes that fell through the cracks, for one reason or another. Hopefully they’ll be of use to you later this year!

Lay out on baking tray
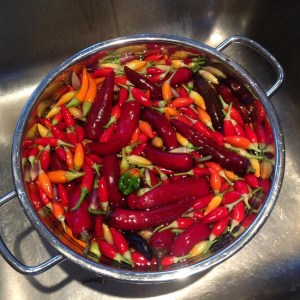
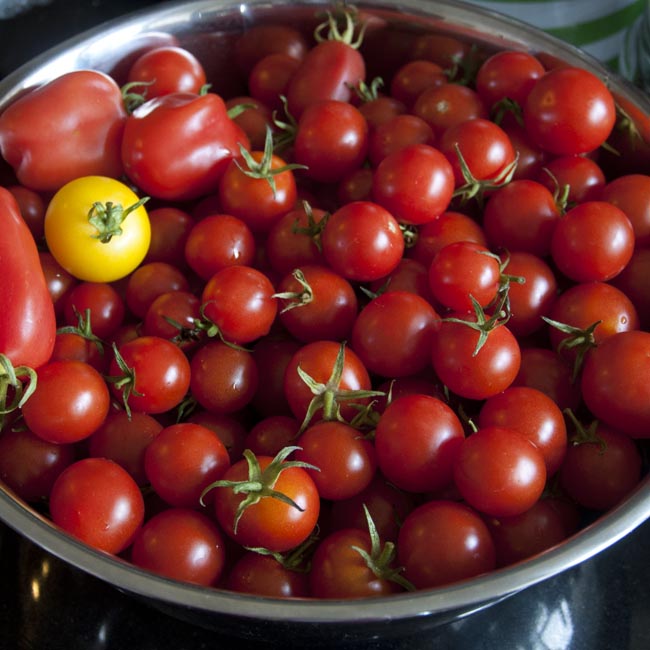
This is a great little recipe for using up those slightly over-ripe tomatoes that inevitably start to pile up once the harvest really gets going.

You will need –

  • Home grown tomatoes (about 1kg here)
  • Three garlic cloves
  • Two or three bay leaves
  • Sea salt, mixed dried italian-type herbs

Trim out any obvious damage and discard any that are really ‘over’, cut the tomatoes into even pieces, and lay the tomatoes out in a single layer on a baking sheet.

After roastingTuck the cloves of garlic in amongst them, and snuggle the bay leaves underneath, sprinkle over a little sea salt and a few mixed herbs, and roast in the oven at 180 C for 30 to 40 minutes until you’re starting to see some browning to the skins.

Pass through a mouliDiscard the bay leaves and put the rest through a mouli with the fine filter fitted (or push through a sieve with the back of a spoon, if you don’t mind the labour!). This will hold back the skins and seeds and allow just the beautiful smooth sweet tomato pulp through.

Done! How simple is that?

I started with around 1kg of lovely ripe home-grown tomatoes, and ended up with about 350ml of sauce, which may not seem like much but all the flavour and sweetness is concentrated right down into that sauce. I asked Hubby to taste a spoonful and he thought it tasted like tomato soup – and certainly you could let it down with a little bit of vegetable stock, maybe add a sprinkle of fresh basil, and enjoy it just as it is! I made lasagne with it, and it was perfectly wonderful.

Finished sauce

If you wanted to make a big batch, for keeping into the winter, you could bottle and pasteurise for storage just like the fresh passata. I wish I had, now! I could just do with some roasted bottled sunshine!

Read more from the Country Skills blog >>

Pain de Savoie, from Paul Hollywood’s ‘Bread’ – Cooking the Books, week 2

We seem to have ended the Christmas season with rather a lot of lovely cheese in the fridge! So today’s challenge was to find a recipe in my cookbook collection which would let me use some of it to make something absolutely scrummy. I haven’t baked any bread for a couple of weeks and remembered that Paul Hollywood might have something that would suit… So I dug out ‘Paul Hollywood’s Bread’, which accompanied last year’s popular BBC TV series.

Bread inner page view

And there it was – Pain de Savoie – a lovely looking loaf stuffed with cheese (yes!) and bacon (even better!). Savoie is an alpine region, and as everyone knows, mountain folk have all the best gorgeous stodgy winter comfort food. I had high hopes!

To make this loaf, I used –

  • White & rye flour400g of strong white bread flour
  • 100g of organic rye flour
  • 1 small tsp of sea salt (I can’t bring myself to put more than this into a loaf)
  • 7g pack of fast action dried yeast (oddly, the recipe wanted 8g)
  • 150g of home-cured smoked streaky bacon, rind removed, and cut into lardons
  • 200g of wonderful aged Gruyère
  • Olive oil
  • 330ml of tepid water

Start by weighing your flours and combining in a large mixing bowl, add the salt, yeast, a generous tablespoon of olive oil, and then mix in about two thirds of the water, using your fingers.

Roughly mixed ingredientsThis should roughly combine the dry ingredients but leave them a little dry, so add the remaining water progressively until all the dry ingredients come together as a ball, leaving the sides of the bowl reasonably clean. I found I had just over 50ml left over, but this will depend on the characteristics of your flours. The dough should look a little like this before kneading.

Now knead for 5-10 minutes until it becomes smooth and elastic. You’ll notice the difference – it may take longer than this if you’re not accustomed to kneading, but you’ll get there! I have wholeheartedly adopted Paul’s recommendation of kneading dough on an oiled surface, after a lifetime of using flour – I don’t think it makes very much difference to the dough, but it doesn’t half reduce the mess you make of your kitchen!

After kneadingOnce you’re done, the dough ball will look like this. [You’re supposed to add the fried & cooled lardons at this stage. I suffered an unfortunate spot of reading comprehension fail, and didn’t.] Oil the mixing bowl and put the dough ball back inside, cover with a piece of oiled PVC-free cling film, and set aside for a couple of hours until it’s doubled or more in size.

Ignore anything you might have heard about putting dough to rise somewhere warm like an airing cupboard, just sitting out on the kitchen counter should be fine, unless it’s very very cold, in which case I’ve done well with putting the bowl in the oven with just the oven light turned on. Letting bread rise in a warm environment certainly will speed the process up, but at the expense of the flavour that develops with a slower, lower temperature rise – and if you wanted tasteless bread, you’d just eat the junk from the supermarket.

Fried bacon lardonsIf like me you’ve forgotten to include your lardons, now is the time to fry them until golden. I used my home-cured black pepper bacon, which is lightly smoked. Incidentally, this is what really good dry-cured bacon should look like, when you’re frying it. See that lovely, clear bacon fat in the pan? That’s all that should ever leak out. And because it’s not wet, and doesn’t leach phosphate water, it fries to a beautiful golden caramelised surface. Fabulous. Once it’s cooked, set aside to cool. And try not to sample too many pieces in the name of ‘quality control, eh?

Combine with baconI turned the dough out onto the work surface, knocked it back into a rough rectangle, and sprinkled over the cooled bacon pieces before rolling it up into a rough sausage and cutting it into three (very roughly) equal sized pieces. Each of these pieces I kneaded a little to get the bacon well combined and formed into balls. [If you had already added the bacon before the dough proved for the first time, you could just cut the dough into thirds, knock them back gently and form into balls, and go straight ahead to assembling the loaf in the loaf tin. But I hadn’t, so…]

Dough balls and cheese cubesAfter kneading the little dough balls, they were a bit tight, so I gave them a little time to relax before moving on to the next stage. About half an hour did the trick. In the meantime, cut your cheese up into ~1cm cubes. The original recipe calls for Comté, which would be glorious. This Gruyère, which happened to be what I had in the fridge, and will be a pretty good match, but really any good firm well flavoured cheese will do very nicely – I think a decent mature cheddar would work a treat!

Assemble the breadOil your tin – the recipe calls for a 20cm ‘springform’ tin. I haven’t got one of those, but I do have an 8″ loose-bottomed cake tin I usually use for Christmas cake. Paul says to roll out the dough with a rolling pin into tin-sized rounds. I just pushed it out with my fingertips, which seemed to work fine. After putting the first circle of dough in the bottom of the oiled tin, spread out half the cheese cubes over the surface, repeat with the second ball of dough, and then finally press the third circle of dough over the top. Sprinkle the top with a little bit of rye flour, and cover with the clingfilm for another hour or so until it’s nicely risen.

Before rising  Nicely risen  Fresh from the oven

Once you’re happy, pre-heat your oven to 220 and, once it’s up to temperature, slide the tin into the oven and bake for half an hour. It should come out a lovely rich mid-brown colour on top.

Rest in the tin for 10 minutes before turning out onto a wire rack to cool for as long as you can bear it, before carving off a thick slice, adding a bit of lovely unsalted butter, and cramming it in your mouth.

Cooling

This is really really good bread. The rye flour gives it a lovely nutty flavour without making it heavy. The cheese has melted during baking to leave quite striking square holes in the dough. Hubby compared it to a really good cheese and bacon sandwich, and I suppose that’s it, really. It’s a thing of great simplicity, but simple things can be fabulous and this really is. But of course the simpler the dish, the more it depends on the quality of the ingredients. So, make it! But be sure to use really good cheese and bacon, m’kay?

Share and enjoy!

Technically, it’s not difficult, though having a ‘feel’ for bread dough will obviously be helpful. Not much equipment required and relatively minimal washing up – kitchen scales, a large mixing bowl, and a deep round cake tin are essential. A dough scraper is useful but not actually necessary. If you don’t have a wire cooling rack, it’s perfectly reasonable to use a (cold!) oven rack

**
Bread cover shot‘Paul Hollywood’s Bread’
Bloomsbury Publishing PLC, 2013. ISBN 978-14088-4069-6
Hardcover, full colour, 224 pages. RRP £20.

[Full disclosure: This is my book, which I bought in the traditional way! I have received no payment or sponsorship for this post, nor have I accepted a review copy. I do not have an amazon affiliate account and do not profit from any links provided.]

This is a really great book for anyone interested in bread baking, whether you’ve never baked a loaf before and just want to know how to get started, or have a fair amount of baking experience, there’s something for you here. I would definitely recommend it to any keen but inexperienced home-bakers, as the techniques are well explained and the book is quite lavishly illustrated with step-by-step photography.

Sourdough baking is even covered a little, though after my experiences with getting a sourdough starter going a couple of years ago, I think the process given for this may be a tad on the optimistically simple side! (Incidentally, if you’re just taking up baking, and particularly if you’re interested in sourdough, I would also recommend ‘River Cottage Handbook No. 3 – Bread’ by Daniel Stevens)

There are some lovely unusual bread recipes, such as this one, and one or two ‘extras’ to accompany them, and there should be something new to try here even if you’re already a confident baker!

‘Cooking the Books’ is my self-imposed blog challenge for 2014 – I’ll be trying to cook a new recipe from one of my (rather extensive!) collection of cookbooks once a week, write it up and review it. Wish me luck!

Read more from the Country Skills blog >>

Venison Pie, from Darina Allen’s ‘Forgotten Skills of Cooking’ – Cooking the Books, week 1

“Hi, my name is Kate, and I have a cookbook problem…”

Some of my library

I just can’t resist them. A nice cookbook is such a marvellous object, it’s a thing of beauty, solidly bound and gloriously illustrated, as well as containing the promise – such promise! – of tasty food to come. So, I buy cookbooks (and people buy them for me, too, of course), and continue to buy them until they overflow our bookshelves and end up living in piles under coffee tables and stacked against the walls of our little cottage. As I said, it’s a problem. Last year sometime, I had a quick count up – and stopped counting when I got close to 100.

All those books – all those different recipes – and yet it’s relatively rare that I cook something completely new. For all the usual reasons – busy lives, habit, and having a really good set of family-staple recipes we come back to time after time. But it’s good to push out of your culinary comfort zone – for how else do we learn? – and with such a wonderful resource at my fingertips (and, sometimes, underfoot!) I really have no excuses!

So to welcome in 2014 – and in lieu of a New Year’s resolution – I’ve decided to set myself the challenge, once a week if I possibly can, to cook a brand new recipe form one of my cookbooks, and write it up for the blog, adding a little review of the book itself. Obviously such a silly endeavour needs a name, so I think we’ll call it ‘Cooking The Books’.

Inside-page viewToday’s recipe is Venison Pie, and was chosen because Hubby found some lovely wild venison at the Farmers’ Market. The recipe is from Darina Allen’s beautiful big hardback cookbook ‘Forgotten Skills of Cooking’, which came to me as a gift from my Dad last year.

I’ve scaled down the quantities because there are only two of us (the original recipe serves 8), and made a couple of minor modifications to account for ingredient availability. In general I’m trying to stay as close to the original recipes as I can – or what’s the point, really? This will, inevitably, affect my choice of recipes  – I really don’t want this challenge to end up filling my kitchen cupboards and fridge with half-used packs of ingredients that just go to waste! Actually, thinking about it, this is a big factor in why I don’t often cook from cookbooks. But enough housekeeping – let’s get on with the cooking!

Start by preparing your venison. Darina’s recipe calls for venison shoulder, cut into pieces, but I had a ~1lb pack of already-cut stewing venison. It’s worth taking a little time to trim out any particularly obvious gristly bits from your meat at this stage. Also try to pull out any deer hairs you discover in your meat (which isn’t a particularly unusual thing to find with wild venison, because of the way it’s shot, handled and butchered).

Now mix the meat into a marinade consisting of –

  • IngredientsA small glass of red wine (use something you’ll want to drink – not only is this always excellent advice for cooking with wine, but there’ll be another 5 glasses left in the bottle!)
  • A small onion (I used a red one, but a yellow one, or even a couple of shallots would be fine) halved and sliced.
  • A bouquet garni consisting of a bay leaf, sprig of thyme and some parsley stalks
  • A tablespoon each of brandy and olive oil
  • Salt and cracked black pepper to season (I used two big pinches of pepper and one of salt)

In the marinadeIdeally you might allow this to marinade overnight, but even a few hours will make a big difference. Cover the bowl and place it in the fridge. If, like me, you’re going to use frozen prepared puff pastry to finish the pie, now would be a good time to take it out of the freezer, and either place in the fridge to defrost overnight, or out on the side in the kitchen if it needs to defrost faster than that. Pastry is always better worked reasonably cold,so once it’s defrosted, put it in the fridge so it’s nice and firm.

Once your meat has marinaded to your satisfaction (I gave it three hours), drain the meat in a colander over a bowl, retaining the marinading liquid.  While it’s draining, get together the ingredients and equipment you’ll need for the next stage –

  • Home-cured bacon lardons80-100g of dry cured streaky bacon or pancetta, chopped into lardons or cubes. I used my home-cured ‘Christmas’ bacon (with bay, juniper, allspice and molasses in the cure, lightly smoked), which I happen to have around at the moment. It’s really worth seeking out good dry cured bacon if you’re not going to make your own!
  • A small onion, chopped reasonably finely
  • Half a carrot, diced reasonably small
  • A small clove of garlic
  • 200ml of beef stock (I used a stock cube – I know, I know…)

Venison coated in flourPat the pieces of meat dry with kitchen paper and coat them in seasoned flour (I needed about 2 tablespoons). I picked the meat out of the sliced onions, but this probably isn’t necessary. This bit of the process is pretty faffy, to be honest, and is something I tend not to bother with when making stews. Let me just say, though, it produces the most wonderful, silky, rich gravy, so I may be using this trick a lot more in the future!

Meanwhile, in a frying pan, fry off the bacon until it starts to brown and donates some of that lovely bacon fat. Once it’s done, transfer the bacon to a big saucepan.  Now brown the floured venison in the bacon fat. You may need to add a little extra olive oil. Transfer this to the pan once there’s some nice colour, and fry off the onions, carrot and garlic for a few minutes before adding them to the pan as well.

Ready to simmerI couldn’t see why I’d waste the nice sliced onion from the marinade (and the recipe doesn’t appear to specify what should be done with it), so into the frying that went until it softened nicely, and joined the rest of the ingredients in the saucepan.

Now we’re called to deglaze the pan with the wine marinade, and transfer this to the saucepan with all the meat and vegetables before topping up the pan with the beef stock (pre-heated, if it’s proper stock) until the meat and vegetables are just covered. I added a bit of extra water and a slosh more wine to make up the volume. Finally add back the bouquet garni from the marinade, cover the pan and simmer very gently on a low heat for about an hour and a half (or a bit longer if required), until the venison is beautifully tender. Keep a reasonably close eye on it, stirring occasionally, and make sure it doesn’t catch on the bottom of the pan.

Once you’re happy the venison is perfectly cooked, you can take it off the heat. Time to add the last few bits, which are –

  • Saute sliced mushroomsA good handful of mushrooms. Darina wants wild ones if possible. I managed to get some oyster mushrooms and something a little bit cep-looking calling itself a ‘king oyster’ at our local supermarket, I added a couple of chestnut button mushrooms.
  • A handful of cooked chestnuts – these were the vaccuum-packed sort, left over from Christmas. The recipe says these should be omitted if you’re making a pie rather than a stew, but I couldn’t miss the opportunity to use them up!
  • A few teaspoons of homemade apricot jam. The recipe wanted redcurrant jelly, but I didn’t have any. I have a feeling crab apple jelly would work very well here, too.
  • Olive oil
  • Salt and pepper if required to season.
  • And not forgetting your block of defrosted puff pastry!

Wash out your frying pan and heat up a couple of spoonfuls of olive oil. Saute the mushrooms until colouring slightly, and once they’re done, add them to the pan with the chestnuts, cut in halves. Now taste to check your seasoning. The recipe suggests you might slike to add some redcurrant jelly, or a pinch of sugar, or possibly even some lemon juice at this stage depending on how things are coming together.

Filling in the dishI did find there was a slightly lacking sweet / acid note so substituted about three teaspoons of my homemade French apricot jam (avoiding the whole bits of fruit), one at a time and tasting carefully in between. It’s slightly miraculous, actually – makes such a huge difference to the final flavour. Add a bit more salt and pepper at this stage if required.

Edged with pastryYou could serve it now and call it a venison stew, and it would be wonderful with mashed potatoes on a cold winter’s night. But we’re going the whole hog and turning it into a pie, so transfer the filling into your chosen pie tin – I’ve used my gorgeous, very traditional, white and blue enamelware dish. Get your block of puff pastry out of the fridge and roll it out.

Finished pastry lidThe book suggests a way of attaching the pie crust in a two-stage process, fist attaching a strip of pastry all around the edge brushing with  water beneath and on top, before adding the pastry lid, trimming the excess, scalloping the edge with the handle of a spoon, and egg-wash the surface, adding some decoration if you wish.

Pierce the centre of the crust and put into a piping hot oven for 10-15 minutes before turning the heat down to about 190C until the crust is golden and the contents bubbling hot. If your oven has a hot-spot (most do) don’t forget to turn the pie around at some point to keep the colour even.

Hot from the oven

That’s it – isn’t it beautiful? Time to serve with your choice of accompaniments. Hubby requested roast potatoes, so we had those and steamed broccoli to go with it.

'Serving suggestion'What can I say? It looks pretty spanking, and tastes glorious. I love the way the late addition of the sauteed mushrooms means they retain their separate flavour, texture and identity in the dish. The venison is perfectly tender, the gravy is rich and thick and full of  beautifully balanced flavour. These quantities will feed four, I would say.

I heartily recommend you make this pie!

This is undoubtedly a time-consuming and relatively labour intensive recipe, with four separate preparation stages. Consequently it generates quite a bit of washing up, too – I counted a saucepan & lid, a frying pan, a pie dish, two mixing bowls, a colander, chopping board and knives, garlic crusher, pastry board (or your kitchen worktop), rolling pin, an assortment of spoons of different sizes, a spatula, and I’m sure I’ve forgotten a few bits. But nothing unusual and no gadgets or gizmos required. I started marinading the venison just after lunch, and we eventually ate around 7.

Serving timeIt’s a reasonably complex recipe, but no part of it is particularly technically demanding and no special skills are required – anyone who can follow a slightly complicated set of instructions should be able to cope! While there are a lot of ingredients, they’re quite ‘standard’ ones and pretty much all of them were already in my fridge and kitchen cupboards, which was a big bonus.

Perhaps something a bit quicker and simpler for next week..?

**
Cover shot‘Forgotten Skills of Cooking’ by Darina Allen.
Kyle Cathie Ltd, 2009. ISBN 978-1-85626-788-5.
Hardcover, full colour, 600 pages.

[Full disclosure: This is my book, which was a gift from my Dad. I have received no payment or sponsorship for this post, nor have I accepted a review copy. I do not have an amazon affiliate account and do not profit from any links provided.]

This is a fabulous book, full of unexpected surprises – I only realised after I’d written about the copper-cleaning power of salt and lemon juice the other day that this is one of the tips in the back of this wide-ranging tome! As well as a really good range of hearty traditional recipes, both sweet and savoury, with a focus on quality local seasonal ingredients, there are – amongst many other things! – instructions for buttermaking and producing your own clotted cream, curing and smoking techniques for meat and fish, yeasted and sourdough bread baking, and even advice on choosing livestock. It’s also a beautiful book, richly illustrated and nicely printed, which never hurts.

I would say that it deserves a place on any cookbook shelf, particularly so if, like me, you’re more interested in traditional farmhouse, country food and techniques  than in ‘cheffy’, restaurant-style cooking.

‘Cooking the Books’ is my self-imposed blog challenge for 2014 – I’ll be trying to cook a new recipe from one of my (rather extensive!) collection of cookbooks once a week, write it up and review it. Wish me luck!

Read more from the Country Skills blog >>

Courgette or Zucchini – this is a pickle you will relish!

Not so very long ago, though it’s hard to believe it now, the long hot days of summer were with us and the vegetable garden was in full flood. As well as the tomato glut, I did end up with a few more courgettes than I knew what to do with.

Garden-fresh courgettes

Now, I absolutely abhor the idea of wasting food I’ve gone to the trouble of growing – but I struggled a little to work out what to do with a kilo of courgettes all needing using up at once! Pickles, of course, are the almost-universal solution to making tasty preserves from gluts of vegetables. So I had a flick through some of my cookbooks, and when that didn’t turn up anything I particularly fancied, I did what we all do and turned to the blogosphere. The pickled courgettes I eventually made are based on this recipe for zucchini pickles, from Lottie + Doof.

For my quantities of courgettes,  I used –

  • 1kg of garden courgettes, mixed sizes (smaller ones are better, but use what you have!)
  • Two small onions
  • 6 tbsp sea salt
  • 1l of cider vinegar
  • 300g of golden caster sugar
  • 3 tsp of mustard powder (Colman’s, of course)
  • 3 tsp whole mustard seeds, lightly crushed in a pestle and mortar
  • 2 tsp of powdered turmeric

The dreaded mandolinYou will also need a mandolin (unless you’re both very patient and a remarkably precise slicer of vegetables), a mixing bowl, sterilised jars with plastic-lined lids (my quantities filled two 1lb jars perfectly), and a salad spinner (if you have one) or a clean tea-towel.

Sliced courgettesSet the mandolin about 1.5mm thick, and then use it slice up all the courgettes, lengthways or slightly on the diagonal, using the guard and taking great care not to also slice your fingers! I’m quite terrified of my mandolin (reasonably, I think!) and I really have to psych myself up to use it, but for a recipe like this there really is no alternative.

Sliced vegetables with saltThen peel the onions, and put them through the mandolin on the same setting. Once all your vegetables are sliced, mix them together in a bowl with the 6 tablespoons of sea salt (yes, I know it seems like a lot, don’t worry, it’s not staying in the finished product!), and top up with ice cold water, mixing gently until the salt is all dissolved. Add some ice cubes if needed to keep the temperature down, and put to one side for about an hour.

Pickling vinegarWhile the sliced courgettes are marinading in their brine, prepare the pickling vinegar, combining the vinegar, sugar, mustard powder, mustard seeds and turmeric powder in a saucepan, and bring to a simmer for two or three minutes.  Then allow the vinegar to cool to room temperature (you can speed this process up by immersing the pan in a sink of cold water). It’s a rather ghastly colour, but don’t be put off!

In the salad spinnerBack to our courgettes – once they’ve sat in the salt water for an hour or so, you can taste one of the pieces, which should be quite crisp and gently salted.  Drain off the salt water and then, using the salad spinner if you have one, finish getting them as dry as possible. If you haven’t got a salad spinner, dry them carefully in small batches in a folded tea towel, trying not to damage or break them if possible.

Mix the vinegar and vegetablesFinally, combine the cold vinegar with the courgette and onion in a bowl and mix carefully, before packing the mixture into sterilised jars. There may be extra vinegar, which you can discard (unless you can think of something really creative to do with it!).  Refrigerate for at least a day before tasting, but longer is better.

I started the first jar more or less straight away, in the spirit of experimentation, but the second I kept unopened for Christmas. It’s a very good pickle, pretty much immediately after making. It has a definite sweetness and I think I might reduce the sugar a little in future batches. The mustard flavour is present, but quite soft and subtle. The onion, too, is clearly present but not overwhelming, and tastes less ‘raw’ as the pickle matures. I don’t know whether I would bother with quite so much turmeric, next time, but it does give a very pretty colour to the finished pickle. It’s great with burgers and sausages, and goes particularly well in a salt beef sandwich.

Pickled courgettes on toasted sandwich

I must admit, writing up this recipe had rather fallen through the cracks until I had some yesterday with a wonderful grilled ham and cheese open sandwich. It is *just* fabulous, the icing on the cake of a wonderful lunch made from wonderful things – home-made sourdough, home-cured ham, and even our homegrown ‘sundried’ tomatoes. The mustard note takes this from comfort food to pure gourmet delight.  It’s quite wonderful.

So next summer, when you’re faced with a courgette glut, or find some lovely fresh courgettes in your local market, grab them and make this pickle. You won’t regret it!

Read more from the Country Skills blog >>

Very Berry – elderberry vinegar

This foraged hedgerow vinegar is just fabulous. Hubby was unconvinced when I first made it last year, but very quickly the simple vinaigrette I made from it, with just the addition of olive oil and a little spoon of wholegrain mustard, was such a favourite he started calling it ‘my dressing’. Success!

It’s a sweet, fruity, unctuous vinegar, and makes a perfect substitute for even the very best balsamic vinegar, at a fraction of the cost – I’ve yet to find an occasion I can’t make the substitution, and find I prefer the elderberry vinegar pretty much universally, which is quite a result given how attached I’ve been to balsamic vinegar in my cooking and salads for many many years now!

ElderberriesThe elderberries are finished now, sadly, so unless like me you had a cache stashed in the deep freeze from earlier in the year, it’s probably too late to make any wonderful elderberry vinegar this year.  That said, I saw dried elderberries the last time I was in my favourite home-brew supplies shop – I have no idea how using dried berries would work out, but it might well be worth a try, at a push!

I pick my elderberries when I get the chance, strip the berries from their stems, wash them, and then freeze them in ziplock bags (I get about 700g per bag). Then, stashed in the freezer, they’re ready for when I eventually get around to using them.  If you happened to pick too many for your elderberry wine or preserve-making plans, then this is a great way to use up any leftovers!

The original recipe and inspiration, incidentally, come from Mark Williams’ Galloway Wild Foods blog, which I can heartily recommend to you!

To make this year’s batch of elderberry vinegar – which I cannot now imagine living without in my store cupboard – I used:

  • A 2l Kilner jar
  • A large stainless steel saucepan
  • 700g of frozen elderberries. If you’ve just picked these fresh, you’ll need to remove them from the stems. I find using a fork to ‘comb’ through the umbels is the easiest approach, but it can be a messy process!
  • 1.4l of white wine vinegar
  • 1.5kg of golden caster sugar

Elderberry vinegar infusingPut the elderberries in the jar and top up to the brim with white wine vinegar.  Keep the vinegar bottles you’ve just emptied – you’ll want them to store the finished vinegar later! Give the jar a good shake and set aside for 5 – 7 days. You can give it a bit of a shake when you think about it during this time. You’ll notice the vinegar almost immediately start to turn the most amazing dark purple colour.

Strain the vinegarAfter about a week, pour the vinegar into a large saucepan, retaining the elderberries using a reasonably fine sieve. Give the elderberries a good squeeze to get as much juice out of them as you can, and then discard the remains.

Roughly measure out the liquid – it will be a bit more than the volume of vinegar than you started with.  Mine was a little over 1.5l (I’ll admit I didn’t try to measure it accurately!).

I’m happy with a vinegar sweetened with about 1kg of sugar per litre of vinegar, but your tastes may be different to mine – perhaps try this the first year and adjust in the future if it turns out too sweet or too tart for your tastes!

Bring to the boilIn a large pan, mix the vinegar and sugar, and slowly bring up to boiling point, stirring to dissolve the sugar.  Be aware, this stuff *stains*. My wooden spoon is still purple!

Safely bottledOnce at the boil, turn the heat down and simmer for about 10 minutes. Then, while still piping hot, use a funnel to fill your bottles and seal tightly. My quantities gave a final volume of  about two and a half litres, and filled seven 350ml vinegar bottles (luckily I had extras left over from the pickled chillies I’d made earlier in the day!).

Store in a cool dry place. It will keep for at least year, if you manage to save any that long!

And as if all the cooking substitutions you can think of aren’t exciting enough, you can also enjoy it as a fruity sweet warm cordial, diluted with hot water. Elderberries are even said to be good for seeing off the winter season’s cold and ‘flu bugs, not that you need the excuse when something tastes so very very good!

Read more from the Country Skills blog >>

Pick a Peck of Pickled Peppers – home-grown pickled chillies

The blog has been a bit neglected the past month! There’s been a lot going on just recently – most of it good, but which I can’t really talk about at the moment (The mystery! The suspense!).

two-candlesA few weeks ago, the blog’s second birthday passed entirely un-marked, a fact which will come as no surprise at all to my close friends and family, who are all well used to their birthdays and significant anniversaries passing equally without notice! Anyway, a huge thank you to all of you who read and comment, thank you for taking the time and bearing with us though this quiet interlude!

Right oh, back to the hot and spicy business at hand!

Last weekend, we admitted the arrival of the colder weather and stripped the greenhouse chilli plants of all their fruit.  The result was almost exactly 1 kg of mixed home-grown chillies, mostly ‘Vampire’, a mild flavoured mid-sized dark purple to red variety with beautiful purple-green foliage and purple flowers, and ‘twilight’, a fiendishly-hot small chilli which ripens from purple to red via white & yellow on a small-leafed plant.

The home-grown chilli harvest!

Aren’t they gorgeous? Even I can’t eat that many fresh chillies before they go off, though.  I considered making chilli sauce, but in the end settled on pickled chillies as more versatile to use down the line. And with all these gorgeous colours and varieties, it would have seemed a bit of a crime to put them in a food processor!

This recipe is based on one attributed to Michael Symon, from Michael Ruhlman’s blog, with a few modifications to suit the ingredients I had available. It’s really straightforward, and the results *look* stunningly pretty – it’s too early to say how they taste yet!

Pack chillies in jarsWash your chillies carefully, inspect them and set aside any which are damaged or imperfect (you can always cook with these fresh, or process them and freeze in small batches) and then pack them into cold sterilised jars. Then fill each jar full of water, before tipping the water back out into a bowl or jug. Measure this volume – this will give you a good accurate estimate of the volume of pickling liquid required. In my case, using eight small jars and one large one, the volume was a bit over a litre.

For the brine, I combined –

  • 700ml white wine vinegar
  • 500ml water
  • 2 1/2 tbsp sea salt
  • 2 1/2 tbsp golden caster sugar (any sugar will do)

Obviously these volumes can be adjusted depending on how much pickling liquid you need! Mix these in a saucepan and start to warm, dissolving the sugar and salt, then add the following herbs and spices and bring to a good rolling boil –

  • Herbs and spicesTwo bay leaves – you can leave these whole if only making one or two jars, but I broke them up into smaller pieces
  • Three cloves of garlic, sliced up likewise
  • 2 tbsp whole coriander seed
  • 2 tbsp whole black peppercorns
  • 1 tsp whole cumin seed
  • 1 tsp dried oregano

Boiling brineOnce the brine is boiling, turn the heat down and simmer for 10 minutes.

Then, if you’re making a single large kilner-type jar of pickled chillies, you could just pour the whole volume of brine, spices and herbs over the top and seal up the jar.

I wanted to make sure the spices were evenly distributed between my eight small and one large jar, so I first strained the solids out and returned the brine to the saucepan to keep simmering.

Strained-out spices Share spices between jars Fill to the brim with boiling liquor

This made it easy go share the spices and garlic out evenly between the jars with a spoon. Then just ladle the boiling hot brine into the jars, filling them all the way to the brim before sealing tightly with plastic-lined lids.

Filled jars of pickled chillies

Once cool, refrigerate until use, or at this time of year in Northern climes you should be fine to store them in an unheated outbuilding, garage or shed. They’re ready to eat within a day or two but a few weeks in the pickle will only help develop the flavours. When you’re ready to use them, just slice or mince the chillies and use in cooking as you would fresh – obviously only in dishes that will tolerate a little bit of added acidity from the vinegar, most will – but beware, these are going to be an unpredictable bunch, and the little ones bite!

Read more from the Country Skills blog >>

Taming the Tomato Glut – Part 4: fresh tomato passata

Passata is a great, versatile store-cupboard ingredient. In bottles or cartons, stashed at the back of the shelf, it comes out to save the day in soups, sauces, anywhere you want lovely fresh tomato flavour but without the texture of seeds and flesh that accompanies tinned tomatoes.  Until this year, I’d never made any of my own. And then, along came the tomato glut…

This is a really really simple passata process, but does require a couple of slightly unusual bits of kitchen equipment. If you haven’t got them, though, you can work around without them – they will just save you quite a lot of time and trouble.

To make this fresh tomato passata, you will require –

  • Fresh, ripe, home-grown tomatoesA quantity of perfectly ripe tomatoes (this batch was about 2kg)
  • A few fresh basil leaves
  • A saucepan, a colander, and a slotted spoon
  • A mouli* (hand-cranked mincer / puree mill) with the fine puree plate installed, and a bowl to go under
  • Beer bottles, cleaned & dried, a crown capping tool and enough new crown caps to seal all your bottles**. (To give you a sense of the storage capacity you’ll need, 2kg of tomatoes produced about 1.7l of passata. I bottled 1.5l and used the extra fresh.)
  • A large stock-pot, big enough to contain your bottles or jars.

* If you haven’t got a mouli, you can get the skin and seeds out by pushing it through a fine-ish metal sieve, by hand. You can easily make enough for one meal, but it’s not a useful technique if you’re making in any quantity, unless you have helpful kitchen-slaves to hand!

** If you’re not a home-brewer like me and haven’t got bottles, crown caps and a capping device, you can always store your passata in jam jars. As with the bottles, no need to sterilise, just make sure they’re clean and dry, and the lids are in perfect condition. When you come to process them later (we’ll get to that bit), keep them upright in the water.

Simmer tomatoes to split skinsWash your tomatoes carefully. Now, in the saucepan, get a couple of inches of water simmering gently. A handful at a time, add your tomatoes into the simmering pan. Watch them carefully – as soon as the skins split, fish them out again straight away, into your colander. This will probably take between 30s and a minute, but will depend on your tomatoes. Watch carefully – you’re not trying to cook them!

With skins split, drainingAllow them a couple of minutes resting in the colander to drain away any excess water. Now put them into the mouli, a few at a time, and process them through. The seeds (most of them, anyway!) will be retained on the top-side of the puree plate, along with the skins, while the beautiful fresh tomato pulp passes through into the bowl below.

Pass through the mouliI should say, I *adore* my mouli. It’s a new kitchen gadget for me this year, bought with our home-grown veggies in mind, and I already can’t imagine how I did without it. I’d love to say it was my Grandma’s (in fact, I don’t remember her having one), but it’s exactly the same design as much older ones I’ve seen – if it ain’t broke, don’t fix it, eh?

Rinse and repeat until you’ve processed all of your tomatoes through this very simple two-step chain. You may find you need to disassemble your mouli every so often to wash off the plate if it gets clogged with tomato skin – you could of course peel your tomatoes by hand before you start, to avoid this problem, but really, life’s too short. Just be careful, when you’re doing this, that you don’t waste any beautiful puree or drop skins or seeds into the bowl underneath.

Passata produced, along with 'waste'By the end of the process, you’ll have a surprisingly good yield, as you can see from this picture, the total ‘waste’ in seeds and skins amounted to about half a pint, with the rest of the tomatoes processed very efficiently into gorgeous fresh tomato passata. It’s orangey in colour, compared to what you might expect from a commercial tomato product, but that’s because it hasn’t been cooked down at all, or coloured artificially! Taste some, it’s beautiful, fresh, fragrant tomato nectar. You could drink this stuff.

Fill your bottlesSo now you have some lovely fresh passata you could certainly use to make bolognese or lasagne this evening. The final step is bottling & pasteurisation to allow it to be stored for a considerable time in a cool dark place. Using a funnel and ladle – or a jug, or whatever suits you really! – transfer your passata into your beer bottles, leaving about 5cm airspace in the bottle necks. Into each bottle, also add a single, carefully washed fresh basil leaf.

Seal the bottles carefully with your crown caps, using a capping tool. If you’re using jam jars, ensure they’re in perfect condition with no cracks, chips, or faults in the lids (consider buying new lids, if necessary) and seal them carefully.

Seal bottles with crown caps

Fill your big saucepan or stock pot half to two-thirds full of cold tap water. Place a tea towel in the bottom, and then put in your bottles, in layers, lying on their sides. If you’re using jars, they can sit ‘upright’.

Bottles in the stock potMake sure the water completely covers the bottles or jars. Now get some heat under the pot, and slowly it to a gentle boil, bottles / jars and all, and keep it boiling for 30 minutes before turning off the heat. Leave the bottles in the pot until everything has cooled back down to room temperature. This boiling process essentially sterilises the contents of the sealed bottle or jar, rendering it shelf-stable. Once cool, you can fish out your bottles, dry, label them, and stash them in your pantry until needed.

[I based my passata process, in great part, on this lovely blog about traditional family passata-making by Italian-Australian cooks – it’s well worth a read!]

Read more from the Country Skills blog >>

Taming the Tomato Glut – Part 3: ‘sun’ dried tomatoes

Today we decided to call ‘time’ on the tomato growing season, and clear out the greenhouse. As a result, I have a kitchen quite literally overflowing with tomatoes. Don’t believe me? Here they are!

Now that's what you call a glut!

But, sun-dried tomatoes? In the UK? In *October*? Some kind of witchcraft, surely?

A couple of weeks ago, I finally caved in and bought a dehydrator.  Some of those little beauties you can see there will be making their way into it very soon. I’ve made two batches already, and I’m extremely pleased with the results. The process is a little time-consuming, and slightly faffy in the preparation, but the final product is amazing, and hugely rewarding.

To make these ‘sun’ dried beauties, you will require –

  • Some lovely ripe tomatoesA glut of home-grown tomatoes, perfectly ripe but not over-ripe and going soft. I used cherry-sized tomatoes and above, since they’ll shrink anyway.
  • Sea salt
  • Mixed dried Italian herbs
  • Citric acid
  • A large bowl, colander, slotted spoon, measuring jug, and a sharp paring knife
  • A dehydrator. I selected mine on the basis of extensive background research. Erm,  hang on, no, that’s not right. I bought the cheapest one on Amazon.

Halved tomatoesWash all your tomatoes carefully and remove their little ‘top-hats’. Now, get a really sharp little paring knife, and slice the tomatoes in half. Honestly, this is my single important top tip here, if you’re slicing tomatoes, you want a really really sharp knife. Otherwise it’s all nasty hard work, and if you’re unlucky the knife will slip on the tomato skin and you’ll lose a finger. Don’t say I didn’t warn you!

Tomatoes soaking in acidulated waterIn your large bowl, put a litre of fresh cold tap water and add a teaspoon measure of citric acid, and dissolve by stirring energetically. The citric acid improves the preservation of the tomatoes, and enhances their colour retention as they dry. If you don’t have any, you can sometimes get it from pharmacies, and always from home-brew suppliers.

Acidulated tomatoes, dryingPlace your halved tomatoes in this acidulated water and leave them for ten minutes (you can get on with chopping the next lot meanwhile) and then remove them with the slotted spoon and place them in the colander to drip for a bit.

Arrange halved tomatoes on traysOnce you’re happy they’ve stopped dripping, arrange them on the dehydrator tray, with the skin sides down. Just touching is fine but don’t overcrowd them or let them overlap.  This takes a bit of time first time and is really fiddly, but once you’ve done it a few times you’ll find a technique which makes it a lot faster. Carry on until all your dehydrator trays are filled. Mine seems to take about 2-3kg of fresh tomatoes.

Sprinkle with salt & herb mixBefore ‘firing her up’, sprinkle a mix of sea salt and dried herbs sparingly over the cut surfaces of your tomatoes. I used a half-and-half mix, and just an ordinary dried herb mix from the shops, but if you have gorgeous fresh herbs then by all means chop those up finely and use them! Sprinkle over sparingly, but do try to make sure each piece of tomato has at least a flake of salt and a piece of herb on it.

Stacked up in dehydratorNow stack the trays up in the dehydrator, set your temperature if your dehydrator has a thermostat – I used 55C, but consult any instructions that come with your machine. While the dehydrator is running, rotate the position of the trays every few hours so that they dry evenly (the bottom of my machine, where the warm air comes out, was about 20C hotter than the top, when I checked it with a temperature probe, so this is a real factor).

As they dry, the house will fill with a beautiful sweet tomato smell. (Hubby dislikes this because he says it makes him think of pizza. Takes all sorts!) You’ll notice the tomato pieces shrinking, wrinkling, and darkening in colour.

At the end of the drying processMy tomatoes were dry after about 36 hours, but this will vary hugely depending on the temperature you use, the characteristics of your machine, size of your tomatoes… You get the idea!  Aim for the smaller pieces being really, plasticky-dry, the larger pieces will still have a bit of flex in the flesh but shouldn’t have any wetness (check for this in the middle, under the seeds).

Now remove your greatly-shrunken tomatoes and put them in a large Kilner jar, or something similar. Whether you’re planning to keep your tomatoes as they are, freeze them for longer storage, or store them in oil, you’ll still want to put them in a jar for a few days, as this helps them ‘condition’ – effectively, it allows the less-dry pieces to donate their excess moisture to the more dried out ones, so that the humidity of the dried tomatoes evens out.  Give the jar a shake a few times a day for three or four days. Of course, you’re not going to be able to resist having a taste, so dig in.  They’re amazing, sweet, little flavour-bombs. I’ve been munching on them like sweeties!

Finished 'sun' dried tomatoes


From a glut-busting point of view, you’ve transformed a massive bowl of fresh tomatoes 2 – 3 kg in weight, into less than a litre volume of dried tomatoes, *and*  they’re going to keep. Really, what’s not to like?

That’s it, simple, no? Of course, there’s so much else you can do with the dehydrator, too..!

Read more from the Country Skills blog >>

Very Cheesy – baked camembert with garlic and thyme

My local co-op has had those little wooden boxed camembert cheeses on special offer recently.  I bought one a couple of weeks ago, planning to bake it, but of course life intervened and it was only this week that I finally got around to it.  This is no problem, of course, as it just gave the cheese a chance to mature and ripen nicely.

I think it’s probably a side effect of my early upbringing in Switzerland, but I have to admit to being a teeny bit obsessed with melted cheese. And this is one of the quickest, simplest, and most self-indulgent melted cheese suppers of them all.

Baked camembert with bread & chutney

Who could ask for more after a long day at work? You will need –

  • Unwrapped camembertA whole camembert, in a wooden box. The cheaper ones tend to have cardboard bottoms. This isn’t a problem as long as at least one half of the box has wooden top and sides.
  • A clove of garlic, minced.
  • A few sprigs of fresh thyme (dried, at a push).
  • A tot of dry white wine.
  • To serve, a fresh crispy baguette (or other bread if you prefer – some home-made sourdough would be wonderful, of course!) and some chutney (I chose my spiced plum chutney, but choose whatever you like!).

Open the box and unwrap the cheese, taking off any plastic or paper surrounding the cheese itself. Return it to half of the wooden box, and place the box on a baking tray. Set the oven to heat at 180C.

Prepared camembert with garlic and thymeCut four our five parallel slices through the top skin of the cheese. I’ve seen some recipes call for cutting this off entirely, but I really can’t see the point. Mince up your clove of garlic, and rub it into the top of the cheese, making sure you get some into the slices you’ve made. Strip the leaves from the fresh thyme sprigs, and sprinkle these over. Finally, pour over a tot of wine (about a single spirit measure, or a good ‘glug’).

Tuck in!That’s it, really. Could it be simpler? Slide the prepared cheese into the oven, and pour yourself a well-deserved glass of that nice dry white wine. After about 10-15 minutes, put the bread in alongside it to warm through and get all crispy and gorgeous and leave it all for another five minutes.

Then serve, with some chutney on the side. Go ahead and dig straight into the silken melted heart of the cheese with a big piece of crispy baguette.

I think it would be great served with a crisp green salad with a nice sharp vinaigrette, perhaps using some gorgeous chive flower vinegar, but it had been a long day at work, so I just settled for totally indulgent bread and cheese!

All gone!

As you can see, it went down a treat. Make this, you won’t be disappointed!

Read more from the Country Skills blog >>

Taming the Tomato Glut – Part 2: tomato and chilli chutney

The home-grown tomato glut continues apace, and after yesterday’s harvest, I had over 1.5kg (about 3lb) of lovely ripe tomatoes in bowls on my kitchen counter. Obviously even the most energetic eater of fried tomatoes couldn’t make much of a dent in that with their full English breakfast (though, believe me, I tried!). I wasn’t planning to do any preserving today, but the idea of them going to waste was more than I could bear – so I decided to whip up a batch of tomato chutney, with chillies, since I have a few of those from the greenhouse, too!

This is a bit of a chutney of opportunity / necessity, made out of what I had in the fridge and cupboard, loosely based on this recipe for ‘sweet chilli and tomato chutney‘ from the Pink Whisk blog.

To make this chutney, you’ll need to get together:

  • Fresh ingredients1.5kg of fresh, ripe (home-grown) tomatoes – all shapes and sizes are fine
  • 5 onions (varying sizes)
  • 2 red peppers
  • 4 cloves of garlic (I used half smoked, half fresh)
  • 1 rather over-grown courgette (optional – I had one that had ‘got away’ a bit in the vegetable garden)
  • A few fresh chillies. I chose four large mild red ones (variety ‘Vampire’) and two small-but-fiesty ones (variety ‘Twilight’) which I’ve been growing this year. If you’re in doubt about the properties of a particular chilli, for goodness sake slice off a very small piece and taste it before cooking with them!
  • 800ml of malt vinegar (I used what I had in the cupboard, which was about 400ml dark malt vinegar, 200ml of white malt vinegar and 200ml of spiced preserving vinegar left-over from pickling beetroot – use whatever you have / fancy. Wine or cider vinegar would also be fine, but probably a bit of a waste of money.)
  • Variety of sugars600g of dark sugar (again, this was a cupboard-clearing effort, I used a mixture of demerera, soft dark sugar and golden caster sugar)
  • 4 tsp of whole yellow mustard seeds
  • 1 tsp cayenne pepper
  • 1 tsp paprika
  • 2 tsp sea salt
  • A chopping board, good sharp knife, large stainless steel cooking pot and enough jars to contain your chutney. Also helpful, a ladle and a bottling funnel.

Now, there are a few strongly held beliefs that I try to live by, and not least of these, I’m afraid, is the view that life is far to short to spend it peeling tomatoes – particularly when there’s 1.5kg of them, and many of them are tiny, sub-cherry size. I looked up my grandmother’s green tomato chutney recipe this afternoon, just to check (more on which later, with a little luck!), and it turns out she didn’t peel her tomatoes either. Well, if it was good enough for Grandma, it’s good enough for me! Of course, if you find the idea of tomato skin in your chutney offensive, do feel free to blanch and peel them before you start.

Wash your tomatoes and chop them into roughly even pieces (halves, quarters, or smaller portions depending on the size of the tomato). I left the tiniest toms – those smaller than 1cm – whole. Chuck these into the pan, then chop your onions and peppers (deseeded, and with the white pith removed) into smallish pieces and add them, too.

Peel the courgette and slice it up as finely as you can – I chopped mine pretty roughly, expecting that it would break down to a nice soft pulp during cooking, but it didn’t – probably because the sugar and vinegar in the mix firmed it up nicely! – and I ended up fishing the bigger bits back out to chop them up more finely towards the end of cooking, which is a task I’m sure you can all live without!

Chillies and spicesChop up your fresh chillies very finely (you may want to remove the pith and seeds, where some of the heat is hiding!) and remember to wash your hands very carefully afterwards, including under your fingernails!

Add your chopped chillies to the pan with the sugar, vinegar, crushed garlic and dry spices. Get some heat under it and bring it to a good rolling boil before turning it down a little. Leave it simmering gently, uncovered, and stir occasionally.

Chutney at start of cookingNow, you have time to sort out your jam jars and lids. Wash them carefully in hot soapy water, dry them, then lay them out in a cold oven and set it to 150 degrees C. Make sure that the lids you’re planning to use are plastic-coated, as the vinegar in the chutney will corrode exposed metal. I tend to turn the oven off once it’s been up to temperature for about 20 minutes, and just leave the door closed until I need the jars.

It will take about an hour and a half to cook the chutney – mine took a bit longer than that, so follow your judgement. It’s ready when you can catch a glimpse of the shiny bottom of the pan when you stir the mixture. It will have lost a fair bit of volume (perhaps up to half) and darkened to a rich dark red colour, with no watery liquid left. Once you’re happy it’s done, bottle directly into your hot sterilised jars. These quantities made a little under 2 litres for me, but this will vary depending on your precise ingredients – how watery your tomatoes are and so on. And please, don’t be too hung-up on the details of the recipe – be creative and use what you have, or vary it to your own taste!

My quantities filled whole jars just perfectly (six small ones, and three larger ones), so I haven’t got any ‘left overs’ to enjoy in the next few days from the fridge – a bit of a shame, as I was looking forward to some with a nice cheese sandwich! But this will just heighten the anticipation as the flavours develop over the next month or so. The sneaky tastes I took during cooking (quality control, right?) certainly promise very good things – a lovely sweet-sour background with a gentle chilli heat.

Lovely jars of chutney

Chutney will keep in a cool dark place for ages (I’ve opened – and eaten, and lived to tell the tale – jars of home-made chutney with dates that would make some people’s eyes come out on stalks!). It’s probably best, though, to aim to let it mature it for a month, and then eat it at it’s best within a year. As with all home-made preserves, it’s best to keep it in the fridge after opening. And of course, like any home-made jam or preserve, they will make great gifts!

Read more from the Country Skills blog >>