Rhubarb Cocktails, from The River Cottage Year – Cooking the Books, week 15

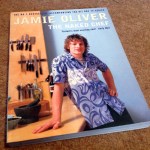
Against the grain of this blog series, the recipe for this week is actually one that has been a regular pleasure going back all the way to my university days! I remember treating myself to this book, at about this time of year. It was an indulgence on my student budget, and a distraction, I suspect, from upcoming exams!

Love it or hate it (this is a bone of contention in my marriage – Hubby thinks it’s the Devil’s vegetable), it’s rhubarb season! This rhubarb syrup is delicate and fruity with subtle floral notes, and makes a glorious cocktail ingredient. It’s simplicity itself to make, too, and will keep in a jar or bottle in the fridge for longer than it will take you to drink it all (about a month, according to the recipe, but I’ve never managed to test this!).

You will need –

  • Rhubarb syrup ingredients400 – 500g of trimmed rhubarb (the pale pink forced rhubarb is fine, if that’s what’s available locally, and will produce a lovely syrup with a more delicate colour)
  • ~100g of sugar (I used golden granulated, but white sugar would be fine)
  • 2 oranges

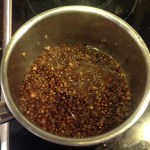
Chop your rhubarb into ~1″ chunks and put them in a saucepan. Add the juice of your oranges (I ended up using three because they were disappointingly un-juicy ones) and four tablespoons of sugar.

Stew the rhubarb until soft

Stew the rhubarb gently until soft, then strain it. You can eat the rhubarb after straining if you like – it’s very tasty with ice cream, and waste not want not! Pour the syrup into a clean bottle or jam jar and stick it in the fridge to chill until you’re ready to use it.

Strain the stewed rhubarb  Strained syrup  Store in a jam jar in the fridge

My favourite way of using this syrup is mixed with sparkling wine to make a rhubarb bellini – a ratio of syrup to fizz of about 1:4 seems perfect for me, and makes a fresh, cheerful cocktail with one of the unmistakable tastes of spring. It would make a lovely little aperitif, I think – how about making it this Easter?

Rhubarb Bellini

Through my student years I’ve taken little bottles of this nectar to a few parties, and experimented with some different (and, indeed, ‘different’!) variations. I can report it’s good with almost everything, but do beware, mixed with ice cold vodka, this is glorious, and far more quaffable than is really good for anyone!

River Cottage Year - cover**
The River Cottage Year, by Hugh Fearnley-Whittingstall
Hodder and Stoughton, 2003
ISBN 978-0-340-828212
Hardcover, 256 pages, full colour. RRP £18.99.

[Full disclosure: This is my book, which I bought. I have received no payment or sponsorship for this post, nor have I accepted a review copy. I do not have an amazon affiliate account and do not profit from any links provided.]

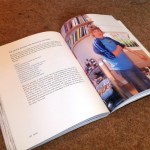
Full of highly seasonal recipes for garden produce and hedgerow ingredients, of course I was going to be drawn to this book. It’s a smaller book than many of the River Cottage tomes, but none the worse for it in my opinion.

River Cottage Year - page viewIf you grow your own, or shop at farmers markets, then this will give you some great inspiration for how to use your produce at it’s best and freshest, month by month. It’s not a vegetarian book, but with veggies the really obvious seasonal ingredients, there’s inevitably a fruit and veggies bias to the recipes, which, in a world where we’re now supposed to be eating seven-a-day, is probably no bad thing!

If you’re vegetarian, or cook for one regularly, I would definitely recommend you give this book a look. An honourable mention for fresh seafood dishes, too, which look stunning – unfortunately, living in the Midlands, these are of limited use to me at the moment. You never know, this may change..!

Really, what’s not to like?

‘Cooking the Books’ is my self-imposed blog challenge for 2014 – I’ll be trying to cook a new recipe from one of my (rather extensive!) collection of cookbooks once a week, write it up and review it. Wish me luck!

Read more from the Country Skills blog >>

Milk Loaf, from ‘How To Bake’ by Paul Hollywood – Cooking the Books, week 14

This bread, I have to tell you, is a revelation – a genuine flavour of my continental childhood. The first taste was one of those ‘madelaine’ moments, where time peels away and you’re no more than five or six years old again, standing in your childhood kitchen with a slice of bread and butter in your hand. Heaven.

Of course, milk bread may not have the same associations for you as it does for me. Still, I would suggest you give this bread a go, because, childhood memories or not, it’s marvellous.

For one large loaf, I used –

  • Milk loaf ingredients500g strong white bread flour
  • 30g unsalted butter (softened before use, if you keep it in the fridge)
  • 25g caster sugar
  • 320ml semi-skimmed milk
  • a 7g sachet of instant yeast
  • 1 tsp salt
  • Olive oil
  • Some extra milk for a milk wash before baking

In a large mixing bowl, rub the butter roughly through the flour until no large lumps remain. Then add the sugar, salt and yeast to the bowl, keeping the yeast and salt on opposite sides of the bowl. Add about two thirds of the milk, and mix gently using your fingers.

The recipe calls for the addition of warmed milk. To save on wastage, I warmed 250ml of milk to blood heat in the microwave, and used this for the initial addition. The rest of the milk, I added straight from the bottle. Add it a little at a time until you form a nice soft dough. My favourite way of judging this is to add the milk (or water, in a traditional bread recipe) until the dough is *just* getting a bit too wet, then add back a sprinkle of extra flour to compensate. That way, you know your dough is as well hydrated as it can be.

Before provingOil your work surface and knead the dough until it is soft, smooth, silky, and elastic. I love kneading bread, there’s something deeply therapeutic and – dare I say it? – sensual about it. Then return your dough to an oiled mixing bowl and cover loosely with cling film, and leave it to rise for a couple of hours.

Risen doughI find that this dough goes off like a rocket – it must be the sugar in the mix, the little yeasty beasties really set to and it rises like a balloon being inflated. Still, give it time (which develops flavour, too) and let it tripple or more in size.

For me, milk bread has to be in the form of a plaited loaf. It’s just traditional. This dough is remarkable, elastic stuff, something I learned to my cost the first time I made it. If you work it too much during knocking back, before trying to form your loaf, you will end up with tight springy little balls of dough that resist stubbornly any attempt to shape them into the long sausage-shapes you need to make your plait.

So, turn the risen dough out onto an oiled work surface, and divide it by eye into three even portions (they won’t end up even, but don’t worry about this too much!). Taking each one, knock it back gently and then immediately start folding the sides towards the centre to form your sausages. You may need to roll these a little, using your hands as if the dough is a rolling pin, to get the length you need.

Turn out your dough  Divide into three  Form into sausage shapes

Once you have your three pieces, join them together at one end, make a plait, and turn both ends under to make it tidy. Place your plaited loaf on a lined baking sheet, cover loosely again (I prefer oiled cling film), and set it aside to rise. Allow it to at least double, just be careful it doesn’t rise so fast it tries to escape from your baking sheet!

Place the plait on baking sheet  Cover loosely with oiled cling-film  And allow to rise!

Once it’s well risen, pre-heat your oven to 210 C. Brush the loaf gently all over with a little extra milk, and then slide it straight into the oven and bake it for 25 minutes until the crust is quite a dark brown colour and the loaf sounds hollow when tapped underneath. Cool on a wire rack (or on a cold oven shelf, which used to serve me perfectly well for cooling loaves and cakes before I bought a ‘proper’ one).

Brush with milk  Fresh from the oven!

What can I say about this loaf that isn’t unbearably mawkish? Well, it’s pretty perfect. That dark, shiny crust conceals a wonderful soft even white crumb. It’s not sweet, despite the sugar addition, but has a rich smoothness from the milk. It’s wonderful on its own, with butter and jam, but also makes a quite marvellous soft bacon sandwich. I commend this loaf heartily to you.

Slice, and enjoy!


**
How to Bake - cover‘How To Bake’, by Paul Hollywood
Bloomsbury Publishing PLC, 2012
ISBN 978-1-4088-1949-4
Hardcover, 304 pages, full colour. RRP £20.

[Full disclosure: This is my book, which was a lovely recent birthday gift! I have received no payment or sponsorship for this post, nor have I accepted a review copy. I do not have an amazon affiliate account and do not profit from any links provided.]

I reviewed ‘Paul Hollywood’s Bread’ earlier in this series, and this book is it’s immediate predecessor, on the same imprint. As you’d expect, then, pretty much everything I said then also applies here – with lavish illustration throughout and good ‘step by step’ photography of the basic processes.

How to Bake - inner page viewThe scope of this book is a little wider than ‘Bread’, with chapters on basic and flavoured breads, an extensive section on sourdough baking, as well as good coverage of enriched doughs (croissants, pastries and brioche), and a decent selection of cakes, biscuits, puddings, pies and tarts, too. This additional breadth may or may not be a benefit, depending on your specific interests! This book lacks the accompanying ‘serving-suggestion’ recipe for each of the loaves that was a feature of ‘Bread’.

Overall I would definitely consider adding this book to your library if you’re at all interested in expanding your home baking repertoire. I can see myself experimenting with a lot more of these recipes in the future, and this milk loaf has jumped straight onto the ‘house standards’ list.

‘Cooking the Books’ is my self-imposed blog challenge for 2014 – I’ll be trying to cook a new recipe from one of my (rather extensive!) collection of cookbooks once a week, write it up and review it. Wish me luck!

Read more from the Country Skills blog >>

Banner320-260

Salmon with Leeks and Cream, from ‘Two Fat Ladies Full Throttle’ – Cooking the books, week 13

It was with great sadness that I heard of the death of the indomitable Clarissa Dickson Wright last month. She, and her Two Fat Ladies co-star Jennifer Paterson, who died in 1999, were in many ways quite the best sort of eccentric British women. They just don’t make them like that any more!

Two Fat Ladies - coverIt seemed right to choose a recipe from the Two Fat Ladies cookbook on my shelf – an Oxfam bookshop find a couple of years ago. The dust-jacket notes describe Clarissa and Jennifer ‘visiting the far corners of the British Isles in their continuing mission to rescue us from food fads and philistinism’ and really, wasn’t that always the point of the Two Fat Ladies?

The recipe I chose, as titled in the book, is ‘Salmon Cutlets with Leeks and Cream’ – and this immediately caused me a problem which would have Jennifer and Clarissa either spinning in their graves, or, I hope, chuckling gently to themselves.

Salmon cutletsThe humble salmon cutlet – or salmon steak portion – sliced straight across the fish with the backbone in the centre, and which I remember being a regular feature of the special-occasion dinner table while I was growing up has, it would appear, gone so far out of fashion that it’s no longer available from supermarket fish counters. Here in the Midlands, supermarket fish counters are they’re more or less our only fresh fish option.

The fishmonger shrugged apologetically as she explained that unless they had a whole salmon to sell off, it just wasn’t a cut they sold these days. Apparently fish with bones in isn’t the done thing any more.

And so, with profound apologies to Jennifer (for it is her recipe), salmon fillets it had to be. To serve two, you will need –

  • Slice & fry leeks Two salmon portions. Cutlets / steaks if you can get them, fillets if, like me, you can’t.
  • Two mid-sized leeks
  • 150ml double cream
  • Unsalted butter
  • ~100g of cooked prawns (mine were frozen, and defrosted before use)
  • A lemon
  • Salt and pepper

Preheat your oven to 190C. Slice the leeks reasonably thinly and fry until softened with a large knob of butter.

Whip creamWhile the leeks are cooking, whip your cream until it reaches ‘dolloping’ consistency. This is remarkably hard work to do by hand, especially if like me you’re carrying an old wrist injury, so I suggest you don’t follow my example and instead use an electric whisk if you have access to one!

Spoon the remaining leeks overLightly butter or oil two pieces of aluminium foil, large enough to enclose each salmon portion generously. Start with about half the softened leeks in the centre, lay the salmon portion on top of these, and then spoon the rest of the leeks over.

Ready for the ovenFinally add a generous dollop of whipped double cream and half the prawns to each portion. Squeeze over about a teaspoon of lemon juice and season with salt and pepper. Now carefully fold up your foil parcels, place these in an oven proof dish, and put in the pre-heated oven for about 25 minutes.

Fresh from the ovenOnce they’re cooked, unwrap your little packages, and serve with your choice of accompaniments (I made some boulangère potatoes, which were a good match). Squeeze over a dash more lemon juice, if you like.

This is a really nice dish – probably a bit swish for a weekday supper but actually, apart from the cream whipping palaver, pretty quick and straightforward. It feels a little bit like food from another era – and in some respects, of course, it’s just that – but the flavours are fresh, distinct, and complement each other nicely. I wasn’t initially convinced by the idea of the prawns, but they do add a sweetness and a different texture to the dish.

And serve!

**
Two Fat Ladies Full Throttle, by Jennifer Paterson and Clarissa Dickson Wright.
Ebury Press, 1998.
ISBN 978-0-091-865-016
Hard cover, 192 pages, single-colour printing with full colour plates. RRP £17.99.

[Full disclosure: This is my book, which I bought second-hand from a charity bookshop. I have received no payment or sponsorship for this post, nor have I accepted a review copy. I do not have an amazon affiliate account and do not profit from any links provided.]

This book accompanied the third (and penultimate) series of Two Fat Ladies. The recipes are contributed equally by Jennifer and Clarissa and seem to leap off the page in their original voices, which is lovely. Yes, these are recipes full of sugar, butter and cream, offal, game and red meat. Really, what did you expect?

Two Fat Ladies - inner pageA lot of the recipes are highly seasonal or call for rather unusual ingredients (seafood and game feature strongly) and you may struggle to find all the bits and pieces on a trip to an average provincial supermarket! This is no bad thing in my opinion – too many recipe books these days seem to be compiled with one eye on the contents of the shelves of the local Tesco (I can’t help but think Jennifer in particular would have been appalled by how far the hegemony of the supermarkets has progressed in the last decade and a half).

The book, in both its content and presentation, couldn’t be more of a contrast to Jamie Oliver’s ‘Naked Chef’ reviewed here a few weeks back – it’s a bit startling to realise that the Two Fat Ladies and The Naked Chef overlapped on UK television in 1999 (and indeed shared a production company, Optomen Television) – they feel so much like food culture from different eras. The publication date, 1998, is just a year before Jamie’s first blockbuster book offering hit our shelves.

If Jamie was the first in the vanguard of the young, cool, celebrity chefs, then Jennifer and Clarissa were undoubtedly part of the culture of old-school cooks. As a reminder, then, that it serves us to look backwards to our own traditional food culture, as well as outward to that of other countries, these recipes deserve a place in all of our collections.

‘Cooking the Books’ is my self-imposed blog challenge for 2014 – I’ll be trying to cook a new recipe from one of my (rather extensive!) collection of cookbooks once a week, write it up and review it. Wish me luck!

Read more from the Country Skills blog >>

Spaghetti with Red Onions, Sun-dried Tomatoes, Balsamic Vinegar and Basil, from ‘The Return of The Naked Chef’ – Cooking the Books, week 12

We’re running behind again! So a quick little recipe to catch us up today. This is a great little store cupboard dish, quick, simple, satisfying and tasty. Vintage Jamie Oliver, in other words!

To serve two –

  • Pasta ingredients~200g of good quality dried spaghetti (I used linguini, since it was what I had)
  • 1 small red onion
  • A large handful of sun-dried tomatoes in olive oil (probably about 8 – 10 pieces)
  • A handful of fresh basil
  • Balsamic vinegar
  • Olive oil
  • Salt and pepper
  • Parmesan or pecorino, to serve

To make this extra special, you could serve it with fresh home-made roasted garlic and rosemary bread!

Get a big pan of well salted water boiling briskly, and start cooking your pasta. I’m a big advocate of buying proper Italian dried pasta – it’s a classic example of where spending your money on upgrading ‘basics’ pays massive dividends in terms of quality. The difference between cheap own-brand supermarket pasta and good dried pasta will only be a pound or so, and the difference in eating quality is really significant. Try it if you don’t believe me!

Cook gently in frying panIn a frying pan, heat a glug of olive oil. Chop your red onion reasonably chunky, and fry this gently until soft, sweet, and just taking a little bit of colour. After about five minutes, add the sun-dried tomatoes, roughly chopped, and about a tablespoon and a half of the balsamic vinegar, and warm through. Add the basil just before the pasta.

Once the pasta is cooked, drain and add to the frying pan with the onions, tomatoes and basil, season (you may not need extra salt as there will be some with the tomatoes) and mix through well. Serve, sprinkled with a little grated cheese.

And serve!

This is really solid, simple, 10-minute supper fare. It tastes great, too – there’s sort of a deconstructed-pesto feeling about it. You could add a little handful of chopped black olives, if you wanted, or a little pancetta (cooked in the pan with the onions) or parma ham if the lack of meat worries you, but I think it’s great as it is!

**
Return Naked Chef - coverThe Return of the Naked Chef, by Jamie Oliver
Penguin Books, 2002 (first published in 2000, this has since been reprinted in 2010 with a new cover and an increased RRP of £16.99)
ISBN 978-0-140-29261-6
Soft cover, 288 pages, full colour. RRP £12.99.

[Full disclosure: This is my book, which I bought. I have received no payment or sponsorship for this post, nor have I accepted a review copy. I do not have an amazon affiliate account and do not profit from any links provided.]

Return Naked Chef - inside viewWhat’s to say about this little book that I didn’t already cover with my review of the original ‘Naked Chef’ a few weeks back? Well, it’s much the same sort of beast, really. But that’s not to say that it’s in any sense redundant. My feeling, leafing through this book looking for something to cook, is that it’s very much a ‘summer’ book – full of lovely fresh salads, pasta dishes, and BBQ ideas.

The Italian flavour is very obvious again, but then that’s expected. But as well as the pasta and risotto dishes, there are plenty of roast meat and fish ideas – all full of simple, clean flavours, and which would be wonderful when the fresh ingredients are in season from the garden!

‘Cooking the Books’ is my self-imposed blog challenge for 2014 – I’ll be trying to cook a new recipe from one of my (rather extensive!) collection of cookbooks once a week, write it up and review it. Wish me luck!

Read more from the Country Skills blog >>

Spicy Crab Cakes, from ‘The River Cottage Fish Book’ – Cooking The Books, week 11

The weekly market in our local town features a chap who comes up from the South coast with lots of chiller boxes full of fresh fish and seafood. Living as we do in the deep Midlands, good fresh fish can be quite hard to come by – we’re really limited to the fish counters of the local supermarkets, where we prefer not to spend money if we can avoid it, and where we’ve had more than a few disappointing experiences over the years!

Last week, little packs of dressed Selsey crab were up for grabs, so of course I had to buy some. Hubby expressed a desire for crab cakes, so we swung by the little Thai supermarket at the top of town and gathered up the obvious fresh additions – lime, coriander, ginger, and lemon grass. Then, I went to the recipe books to see what I could turn up. (This, you will note, is the wrong way round to chose a recipe and shop for ingredients, but never mind!)

The most promising choice was this one from ‘The River Cottage Fish Book’, a big chunker of a book which I bought for Hubby’s birthday a couple of years back, and which we don’t cook from anything like often enough. I had to make a couple of minor modifications to account for the ingredients I had available, and scale down to serve just the two of us.

To make four fishcakes (serves two) –

  • Crab cake ingredients125g mixed white and brown crab meat (simple scaling of the recipe uses 250g of white crab meat here, but 125g was all I had)
  • 50g homemade breadcrumbs (heavy on the sourdough)
  • 1 small hot dried home-grown chilli
  • 1 large garlic clove
  • About half-a-thumb’s worth of fresh ginger (why, for the love of all that is holy, do we measure ginger in ‘fingers’ and ‘thumbs’?)
  • 1 stem of fresh lemongrass (if you have any leftover lemongrass, why not propagate it so you can grow your own in the future!)
  • 1 tbsp of chopped fresh coriander
  • 1 egg (from your own garden hens, ideally!)
  • Some extra breadcrumbs for finishing

Combine ingredients

Finely chop the chilli, ginger, garlic, lemongrass (removing tough, fibrous outer leaves first) and coriander. I used a very sharp chopping knife, and kept going until I’d achieved what was more or less a minced consistency, but if you’re feeling lazy and have one to hand – or you don’t trust your knife skills! – you could definitely use a food processor for the lemongrass and ginger (and possibly the chilli, for that matter) and a press for the garlic. Failing that a pestle and mortar might also do the job!

Combine into a ballIn a bowl, combine the crab well with the breadcrumbs, and then add the ginger, lemongrass, chilli, garlic and coriander, along with the egg, and mix thoroughly. Season with a little salt, if you like. The mixture should come together as a good ball, if it seems too wet, add a some extra breadcrumbs.

Form into cakesDivide evenly into four parts and form each into a nice round crab cake patty, about 1cm thick. Pop these on a plate in the fridge – covered – for an hour to firm up a little.

Coat with breadcrumbsAfter an hour, make a layer of breadcrumbs on a small plate and gently press the crab cakes into them, so that they form a crust on both sides (you could equally use sesame seeds, as the original recipe suggests, if you have these).

Fry in a little hot oil

To cook, heat a little oil in a frying pan (I chose English cold-pressed rapeseed oil, which I’m using a lot lately, but any neutral flavoured oil which takes heat well will do). You can test whether it’s up to temperature by adding a breadcrumb or two – if they start frying immediately, you’re ready. If the oil is too cold, it will just soak into the breadcrumb coating, which isn’t really the idea.

Fry for about 4 minutes on each side, so that a good crunchy golden brown crust develops. Handle the crab cakes very gently and ideally, leave them alone in the pan for the first 3-4 minutes as they might try to fall apart unless a good crust has formed.

I served these with dressed noodles, and a mixed leaf salad picked from our greenhouse. The dressing for the salad was made with rapeseed oil, lime juice, and a little honey. The noodles were so excellent in their own right that they quite deserve their own blog post!

Serve with side dishes of your choice

Doesn’t it make a pretty supper? I do recommend you try these fishcakes, which are really excellent – well balanced, aromatic flavours, with a good solid chilli kick (obviously this will vary depending on the viciousness of your chillies – mine were home-grown last year, and dried, variety ‘Twilight’, which are seriously hot little blighters!). The crab flavour comes through really clearly, despite the reduced quantity – personally I find the brown crab meat adds a lovely rich flavour, and there’s enough of the white meat there for the texture to be appreciable. There’s a lovely crunch from the breadcrumbs, offsetting the soft but not at all pappy interior.

One criticism, which was essentially irrelevant because of the flavours in the noodle dressing, is that they lack the citrus / lime / kaffir lime leaf flavour and aroma that I would expect in a Thai crab cake. This is easily explained, I think – the recipe as presented in the book is ‘Spicy crab cakes with citrus salsa’ – I didn’t make the salsa because I hadn’t got the ingredients (one of the consequences of shopping first, and choosing recipes second!). In any case, while the combination looks like it would make a fabulous starter, it wasn’t really what I had in mind for supper, but I think the citrus deficit would be more than counteracted if you served it as suggested! Regardless, when I make these again, I would include some lime zest in the crab cake mix and serve them with a wedge of lime to squeeze over.

**
River Cottage Fish - coverThe River Cottage Fish Book, by Hugh Fearnley-Whittingstall and Nick Fisher
Bloomsbury Publishing PLC, 2007 (2nd edition published 2011)
ISBN 978-1-4088-1429-1
Soft cover, 604 pages, full colour. RRP £20.

[Full disclosure: This is my husband’s book, which I bought him as a birthday gift. I have received no payment or sponsorship for this post, nor have I accepted a review copy. I do not have an amazon affiliate account and do not profit from any links provided.]

This is, as I mentioned earlier, a bit of a doorstop of a book, weighing in at over 600 pages. It’s a pretty comprehensive guide to catching (or buying), storing, preparing, cooking and eating fish and shellfish, along with the usual (and important!) River Cottage message about sustainability. The back 1/3rd of the book is set aside to a natural history of british fresh and saltwater fish and shellfish, which I really must sit down and read properly one day.

River Cottage Fish - inner viewI’ve cooked a couple of times from this book recently (the crab linguine is also very good, and almost pipped the crab cakes to the post for the recipe to write up today) and the quality is consistently good.

There are recipes for all sorts of cooking techniques – including a good variety of open fire and BBQ options – as well as more exotic options including sashimi, curing, smoking, and pickling. I look forward to a time when we’ll be closer to the coast so that I can easily get my hands on a wider variety of really fresh sea food, and when that day comes, I can see this book being promoted from occasional use to being one of our kitchen regulars!

‘Cooking the Books’ is my self-imposed blog challenge for 2014 – I’ll be trying to cook a new recipe from one of my (rather extensive!) collection of cookbooks once a week, write it up and review it. Wish me luck!

Read more from the Country Skills blog >>

Apple and Carrot Dumplings, from ‘Doggie Biscuits’ by Ingeborg Pils – Cooking the Books, week 10

We’ve been eating very well this year – with a new dish at least once a week, a wonderful side-effect of this blog series! So it was undoubtedly Dave the dog’s turn.

Today’s recipe is from ‘Doggie Biscuits – healthy homemade treats seasoned with affection’, which we were given a few years ago. Dave can be a fussy little chap, and has some dietary restrictions as a result of his serious illness last year (in particular, his diet has to be very low in fat), but a flick through the book turned up a couple of possible candidate recipes which looked like they should suit him.

I settled on the apple and carrot dumplings, because he loves eating carrots (I know, it’s a little strange!). Whether he’d like them, of course, was anyone’s guess!

To make a batch of these dumplings (~20), you will need –

  • Ingredients - apple carrot dumplingsOne small apple (or half a medium to large one)
  • Two very small carrots (one small carrot or half a large carrot)
  • One egg
  • 75g rolled oats
  • 75g mixed dark rye and wholemeal wheat flour (this substitutes for the spelt flour in the recipe)
  • Large tablespoon of black treacle

Mix ingredientsGrate the apple (I left the skin on) and the carrots (well scrubbed or peeled). Then combine all the ingredients and mix well.

Spoon out onto baking sheetPreheat the oven to 180C. Using a teaspoon, spoon out the mixture onto a lined or non-stick baking sheet.

After bakingBake for 30 minutes (turning during cooking if your oven has hot spots). After 30 minutes, turn off the oven but allow the dumplings to cool slowly in the oven. They should come out looking a little like this.

But what will Dave think?

Taste test!

Well, he seems quite pleased with them! (Frankly, I’m delighted he agreed to eat them at all – he’s like that!) They’re quite firm in texture, and seem to take a little bit of chewing, which is good as it adds to the feeding interest.

Dave's cookie jar!I tried one (well, I had to really, didn’t I?) and what can I say… There’s a good firm texture to the outside, but they retain a little softness in the centre. The dominant flavour is molasses, from the black treacle, but it’s not overhwelming. They’re not sweet, but the molasses prevents them seeming savoury. There’s an oaty back-note and a good chewiness. They’re really not unpleasant – I finished a whole one!

Tucking in!

Actually, they remind me of the sort of thing a really ‘right-on’ hippy whole-food parent might feed small children as a healthy snack!

But they’re not for me, and Dave’s verdict is a firm ‘Yes, thank you!’ and who am I to argue?


Doggie Biscuits cover

**
Doggie Biscuits, by Ingeborg Pils
Parragon Books Ltd, 2009.
ISBN 978-1-4075-5236-1
Hardcover, 80 pages, full colour. RRP £7.99.

[Full disclosure: This is my book, which was a gift. I have received no payment or sponsorship for this post, nor have I accepted a review copy. I do not have an amazon affiliate account and do not profit from any links provided.]

Doggie Biscuits page view

This slightly odd little books contains 30 recipes for dog biscuits of one kind and another (but no cake recipes, despite what the cover image might lead you to believe). From a nutritional point of view they seem pretty sound, and don’t contain anything I would regard as ‘problem’ ingredients – there’s a bit of a fad at the moment for cereal-free dog foods, to my mind it’s just that and not relevant for the vast majority of dogs, but if you’ve been sucked into it, then this isn’t a book for you.

It gives the impression of having been carelessly ‘localised’ for UK publication – several of the recipes call for ‘quark’ for instance (here I was, I thought that was a subatomic particle or a desktop publishing tool – but wikipedia tells me it’s a Germanic sort of cottage cheese). Internet reviews suggest some testing / proofing problems with some of the recipes, too, though I didn’t find a problem with this one.

Appreciative Dave!Overall, there are a few cute ideas here but I probably wouldn’t have bought it myself – it may be a novelty cookbook but that doesn’t excuse poor proofing (the recipe for ground beef biscuits, for example, doesn’t appear to contain any ground beef!). Many of the recipes use quite expensive ingredients, too! It’s an interesting concept, but the reality is a little disappointing. I wouldn’t suggest you rush out and buy it.

Dave’s pleased, though, which is what matters, surely?

‘Cooking the Books’ is my self-imposed blog challenge for 2014 – I’ll be trying to cook a new recipe from one of my (rather extensive!) collection of cookbooks once a week, write it up and review it. Wish me luck!

Read more from the Country Skills blog >>

Puy Lentils Braised with Rosemary and Garlic, from Jamie Oliver’s ‘The Naked Chef’ – Cooking the Books, week 9

Lentils tend to divide opinion – and Hubby sits on the ‘unconvinced’ side of the fence, by and large. These braised lentils seem to have changed that opinion, so – particularly if you expect lentils to be a bit floury and tasteless – I suggest you give this cooking method a try.

I prepared these lentils for Sunday evening dinner, and served them with roast confit duck legs and potatoes roasted in duck fat, but they would make a great accompaniment to all sorts of roast meats and game. The duck confit came in a tin, brought back from France for us, which has been sitting in the cupboard waiting for a suitable occasion. The lentils make a very traditional accompaniment – the roast potatoes, admittedly, less so!

To serve two –

  • Braised lentils - ingredients120g of dried Puy lentils
  • Half an onion
  • A clove of garlic
  • 2-3 sprigs of fresh rosemary
  • 40g of pancetta or dry cured streaky bacon (I used the last of my Christmas spiced home-cured bacon from the freezer).
  • Half a pint / 300ml of vegetable or chicken stock
  • Half a glass of white wine (optional)
  • Olive oil
  • Red wine vinegar
  • Salt & pepper

Accompanied with –

  • Two confit duck legs – ours were tinned, but they’re easy (if a little time consuming) to make at home!
  • Potatoes, suitable for roasting

Opened tin of duck confitPreheat the oven to 200C. Open the tin or jar of duck confit and spoon a couple of tablespoons into a roasting tin, and pop this in the oven to heat. Peel (and halve, if appropriate) your roast potatoes and toss these in the melted duck fat, along with a sprinkle of chopped fresh rosemary, salt and pepper, and put in the oven.

In a saucepan, heat a slug of olive oil (about a tablespoon). Slice your dry cured streaky bacon into small pieces, and fry gently until just taking some colour. Add half an onion and a clove of garlic, both finely chopped, and a good big teaspoon of chopped fresh rosemary, and fry until nicely softened. Rinse your lentils (Puy lentils don’t need pre-soaking) and add these to the pan and stir for a minute or two. The quantity of lentils will look tiny for two portions, but don’t worry!

Bring to a simmerNow add your stock (and wine, if using – I had a little bit left over in the bottom of a bottle, it seemed a shame not to throw it in – it’s not part of the original recipe) and bring up to a simmer. I used vegetable bouillon powder as my stock – due to lack of alternatives – but I think this recipe would be really improved by using real home-made, unsalted stock.

There’s some salt in the bacon already, and lentils tend to cook better in an unsalted solution – a bit like plums if you stew them with sugar, the skin tends to harden up a bit in a salted cooking liquor. Remember the confit duck legs are salted in preparation, too. It’s not the end of the world if, like me, you have to use packet / cube stock, but you may find the whole meal just marginally over-seasonned if you do.

Cover the pan and keep cooking at a gentle simmer, stirring occasionally, for about 40 to 45 minutes. You’ll probably find about 15 – 20 minutes have now passed since you put the potatoes in the oven.

Confit duck legs - before roastingRemove two duck legs from the tin, scrape off most of the fat from their surface, place them in a roasting tin, skin side up – sprinkle a little coarse salt over the skin – and put these in the oven with the roast potatoes. For the next three quarters of an hour or so, check on them occasionally, turning the dish if your oven has hot spots. I find roasting them for about 40 minutes gives crisp rich golden brown skin and falling-apart meat without any dryness.

Lentils - end of cookingAbout an hour after the potatoes went in the oven, everything should be more or less done. Check on the lentils, which should have absorbed essentially all of their cooking stock. Taste them for doneness – if they still seem a little hard or floury, turn the heat up for a final five minutes, but do keep an eye on them to make sure they don’t run dry and burn!

Once you’re happy they’re well cooked, taste for final seasoning. It’s unlikely you’ll need to add any salt, but a big pinch of pepper and a little splash of red wine vinegar (start with a teaspoon, then taste to see if you need any more) really brings up the flavours.

You’re done! Spoon the lentils onto your plates with a slotted spoon to leave behind any surplus cooking liquid. Add the roast duck and potatoes, and enjoy!

And serve!

This is a splendid winter dinner, and would work well for entertaining, too. The lentils really compete with the duck to be the stars of this dish, full of wonderful complex aromatic, earthy flavours which complement the succulent, tender, crispy and slightly sweet duck absolutely perfectly. And potatoes roasted in duck (or goose!) fat are just the very best – these had an amazing surface crunch with soft fluffy insides. Perfect.

**
Naked Chef - coverThe Naked Chef, by Jamie Oliver
Penguin Books, 2001
ISBN 978-0-140-277814
Paperback, 250 pages, full colour. RRP £12.99.

[Full disclosure: This is my book, which I bought. I have received no payment or sponsorship for this post, nor have I accepted a review copy. I do not have an amazon affiliate account and do not profit from any links provided.]

‘The Naked Chef’ hit the shelves last century – the hardcover edition came out in 1999! – so this is a bit of a period piece now, I suppose. It’s been on my shelf for nearly all that time. A (startlingly young-looking) Jamie Oliver was in the vanguard of what became a veritable tidal wave of celebrity chefs gushing from screen to bookshelf, throughout the ‘noughties’.

Naked Chef - pageThis is a tricky book for me to review. It’s been with me such a very long time –  one of the first books that Hubby and I bought and cooked from together, it played its part in cementing our shared love of food and cooking. Coming back to it now with a fresh eye, it hasn’t dated badly, despite the decade and a half that has passed since publication. Fewer exotic ingredients than are fashionable now, certainly, but very much ‘on-message’ with a focus on fresh good quality ingredients and simple, pared down preparation.

I particularly love the extensive chapter on home-made pasta. It’s funny, I used to make my own pasta all the time – I have a great collection of accumulated pasta-paraphenalia to show for it! – but like so many simple, worthwhile food preparation habits, it’s depressingly easy for them to fall by the wayside, victims to our busy lives. There’s a recipe for borage, nettle and marjoram ravioli which I definitely need to try, come the summer! The whole book has an overall Italian flavour to it, lots of olive oil, fresh herbs and garlic, without feeling like an ‘Italian’ cookbook as such.

It looks like the book may even be out of print now, though it should be widely available second hand. Despite its vintage, it’s aged very well. If you enjoy clean, fresh flavours, and fancy a bit of millennial nostalgia, I can wholeheartedly recommend it to you. And if you bought it at the time – lots of us did! – and it’s been gathering dust on your shelf, rather neglected for the last few years, like my copy, perhaps it’s a good time to dig it out, and give it a fresh look?

‘Cooking the Books’ is my self-imposed blog challenge for 2014 – I’ll be trying to cook a new recipe from one of my (rather extensive!) collection of cookbooks once a week, write it up and review it. Wish me luck!

Read more from the Country Skills blog >>

Banner320-260

Oat Biscuits, from ‘The Complete Traditional Recipe Book’ by Sarah Edington – Cooking the Books, week 8

I wanted to bake something yesterday to bring with me on a elevenses visit today – it had to be quick and simple, and I didn’t want to go shopping for ingredients.

Now, I’m not that much of a ‘sweet treats’ baker, so my standard store cupboard ingredients collection is a bit basic – plain and self-raising flour, a few different sorts of sugar (but no icing sugar), unsalted butter (but no lard or margarine), golden syrup and treacle, eggs of course, and some baking powder and bicarb of uncertain vintage.  Add to that a few leftover part bags of dried fruits and nuts, some rolled oats and wheat bran, and that, really, is about it. We’re a bit low on fresh fruit, there’s no cream in the fridge, and I haven’t got any cooking chocolate. So, what to make?

This took a good bit of cookbook mining. I had in mind making muffins, but struggled to find an interesting recipe to make with the ingredients to hand. I didn’t really want to make a cake which would require icing, and struggled to find an interesting tea loaf that matched my baking supplies. Finally, I came across this rather lovely simple little recipe for oat biscuits (these are sweet biscuits, very much like cookies, and not to be confused with the savoury oat cakes eaten with cheese!), in this National Trust published book of over 300 traditional British recipes.

Set the oven to 200C before you start measuring your ingredients, as this recipe comes together very quickly.

To make 12 large biscuits –

  • 110g  unsalted butter
  • 2 tsp golden syrup
  • 110g granulated sugar
  • 100g rolled oats
  • 75g plain flour
  • bicarbonate of soda
  • salt (optional)

Melt the butter and golden syrup in a saucepan. Meanwhile, weigh out the dry ingredients and mix these together, adding a pinch of salt if you like. In a small ramekin or cruet, mix 1/4 teaspoon of bicarbonate of soda into a dessertspoon of hot water and dissolve. When the butter and syrup are melted and combined, take the pan off the heat and stir in the dissolved bicarb, and then add dry ingredients and mix fully.

oat biscuits - tile

Line a large baking sheet with greaseproof paper, and spoon the biscuit mix as evenly as you can onto the baking sheet. Using a heaped dessert spoon gave me 12 even sized measures. Then slide the baking sheet into your pre-heated oven, and don’t be tempted to wander away and forget about it. The recipe called for 10 minutes but mine were done in 7, so it’s worth staying put and watching carefully. If like mine, your oven has hot zones, turn the baking sheet around after about 5 minutes to even things out.

The biscuit mix will spread out a lot during cooking – mine essentially filled the baking sheet edge to edge. If you care about having perfect round biscuits, then spread out your mix over two cookie sheets leaving acres of space between them, but really, does it matter? Take them out of the oven when you see an even warm brown colour around the edges.

They will be very soft when you first remove them from the oven, so leave them on the baking sheet for a few minutes while they start to cool. Once they’re just cool enough to handle, carefully separate them and place on a wire rack to finish cooling. You probably won’t be able to resist tasting one though…

Biscuits on cooling rack

From start to cooling on the wire rack, these took about half an hour – they’re quick and straightforward, and taste as you’d expect – quite flapjacky, with a lovely texture and crunch. They went down well with their recipients this morning, but I did have to guard them quite enthusiastically against Hubby’s attentions to have any left to take with me!

**
The National Trust Complete Traditional Recipe Book, by Sarah Edington
National Trust Books, 2006 (there is a more recent, 2010 edition)
ISBN 978-1-905400423
Hardcover, 336 pages. Single colour printing with coloured plates. RRP £25.

[Full disclosure: This is my book, which I received as a gift a couple of years ago. I have received no payment or sponsorship for this post, nor have I accepted a review copy. I do not have an amazon affiliate account and do not profit from any links provided.]

National Trust Complete Traditional - coverThis is a slightly odd little book, with recipes assembled by the author from National Trust properties and collections, as well as historic recipe books and more recent publications. I’m not sure these oat biscuits are particularly representative, but then again I’m not sure what would be – the recipes run the gamut from historic entertaining dishes to regional stews, cakes and puddings, soups and salads.

Some of these recipes, inevitably, are for well-worn family favourites, and while I may not be about to give up my tried and tested cauliflower cheese for the one in this book, I may just borrow the suggestion of adding a little pinch of cayenne pepper! These are (as it says on the cover) very traditional recipes, but thoughtfully and respectfully presented without excessive re-invention, and I will definitely be coming back to it to try some of the savoury dishes soon – the recipe for Fidget Pie looked particularly tempting.

National Trust Complete Traditional - inner pageIt makes an interesting counterpoint to the Ginette Mathiot book I reviewed a few weeks ago, packed with traditional French dishes –  a useful reminder that we have a wide and diverse traditional food culture in the UK of which we should be justly proud.

This book would make a good primer for cooks from a different food culture who want to get to grips with traditional British food, but there are enough regional and historical goodies here that even if you’re British born and raised, and still have your grandmother’s kitchen notebooks, you’re bound to find something new to try.

‘Cooking the Books’ is my self-imposed blog challenge for 2014 – I’ll be trying to cook a new recipe from one of my (rather extensive!) collection of cookbooks once a week, write it up and review it. Wish me luck!

Read more from the Country Skills blog >>

Roast Lamb, from ‘The River Cottage Meat Book’ by Hugh Fearnley-Whittingstall – Cooking the Books, week 7

Who doesn’t love a proper traditional Sunday roast? We have some beautiful lamb in the freezer at the moment, sourced from an organic farmer who we know, and this small leg of lamb deserved nothing but the very best treatment.

Meat book - cover viewI have to admit, it’s been a very long time since it occurred to me to consult a cookbook for a recipe for a roast joint of meat – I’ll look up timings occasionally, but essentially, when it comes to roast dinner, whether it’s beef or lamb, pork or poultry, I know what I like and I like what I know. So, for lamb – leg or shoulder – my roasts have been done much the same way for years now – studded with little slivers of garlic, tufted with fresh rosemary, drizzled with oil, salt and pepper, and simply roasted until just pink in the middle.

You could say, then, that this recipe for roast lamb from The River Cottage Meat Book didn’t take me far out of my comfort zone! Then again, sometimes it’s the little variations on a theme, those small additions and tweaks, that take a good meal and turn it into something simply sensational.

My small leg of lamb was about 1.5kg in weight and served four with no leftovers. In addition to the lamb, you will require –

  • Roast lamb ingredientsA tin of anchovies
  • Two decent sprigs of fresh rosemary
  • Two or three nice juicy cloves of garlic
  • A couple of glasses of dry white wine
  • A spoonful of crab apple and chilli jelly (or other fruit jelly – redcurrant would be a great alternative)
  • Your choice of accompaniments – I served this with roast potatoes, mixed roast vegetables (sweet potato, parsnip and carrot – other great options include swede, pumpkin or squash, and beetroot, if you have them), and steamed winter greens
  • Salt and pepper

Garlic rosemary and anchoviesUsing a sharp paring knife, open up a pocket around the bone, as deeply as you can. In a pestle and mortar mash up a couple of the anchovies with a clove of garlic and some of your rosemary, chopped roughly, and stuff this into the pocket you have made, to help infuse flavour from the inside of the joint.

Lamb prepared for ovenTake four or five anchovies and cut them into quarters. Slice the garlic cloves into quite thick slices, and break up the rosemary into individual ‘tufts’ of leaves. Using the sharp paring knife, make stab incisions into the lamb and stuff a piece of anchovy, a slice of garlic and a tuft of rosemary into each one. Drizzle over some of the oil from the anchovy can and sprinkle over a little salt and pepper.

That’s the lamb all prepared. Slide it into a very hot oven (about 230C) for an initial half hour.

While the lamb is starting to sizzle, prepare your roast potatoes & roast vegetables.  These can go in when you turn the oven down to 160C after half an hour – or wait a while before putting them in, if it’s a big joint. When you turn the oven down, pour a glass of white wine over your lamb. Your timings will depend on the size of your joint and how pink you like your lamb – my small joint needed about another hour. I’m a big fan of my meat thermometer, just remember the centre of the joint will keep heating up while you rest your joint, which you should do, and allow at least 20 minutes resting before you even think about carving it.

Take the lamb out to restAbout 10 minutes before the joint is ready, pour a glass of water into the roasting tin. This will start to loosen the baked on meat juices from the bottom of the tray. When the meat comes out to rest, check how your roast potatoes and vegetables are coming along and adjust the oven temperature accordingly.

Carved lamb returned to gravyMake the gravy directly in the roasting tin on the hob (assuming your roasting tray will survive this treatment!). Pour off any excess fat, then mix in a little bit of flour if you like your gravy thickened, releasing all the lovely tasty ‘bits’ from the bottom of the pan as you go. Pour in a splash more wine, and stir in a spoonful of fruit jelly – I used the crab apple and chilli jelly I had in the fridge – and season with salt and pepper to taste. Carve the lamb thickly and return it to the roasting tray, mixing with all the lovely juices before serving with all the trimmings. I just adore a dollop of vinegary sweet apple and mint jelly with roast lamb.

Perfect roast lamb?

This is a great *great* roast lamb recipe. It’s the addition of the anchovies, and the lovely rich winey gravy, which set it head and shoulders above my previous efforts. As it happens, I’ve just rediscovered anchovies, and a couple of tins have taken up residence in my store cupboard for the first time in years. Used here, they add a luscious salty-savouriness to the lamb without any noticeable fishiness, so don’t be afraid of them! The gravy is simply fabulous, with the addition of the fruit jelly really balancing and melding the flavours.

I can only recommend that next time you’re roasting a leg or shoulder of lamb, you do it this way. I know I will!

**
Meat book - inner page viewThe River Cottage Meat Book, by Hugh Fearnley-Whittingstall
Hodder and Stoughton, 2004.
ISBN 978-0-340-826355.
Hardcover, 544 pages. RRP £25.

[Full disclosure: This is my book, which I bought. I have received no payment or sponsorship for this post, nor have I accepted a review copy. I do not have an amazon affiliate account and do not profit from any links provided.]

I bought this book in hardback, when it first came out almost a decade ago, and it has not disappointed, becoming one of the old-faithfuls of my cookbook collection. Not simply a recipe collection, this book contains lots of information about different meats and livestock, cuts, and preparation techniques, and deserves a place on the shelf of every committed carnivore!

Fearnley-Whittingstall is a particular champion of cheaper and less fashionable cuts of meat, and a great advocate for ethical meat-eating. The Meat book, then, is a great source of information on animal welfare and farming – and in these respects, inevitably, doesn’t always make easy reading – but also a very useful resource if you’re trying to eat well on a budget without compromising on flavour or on your principles. Unless you’re a committed vegetarian, I recommend you add this book to your wish-list if you don’t own it already!

‘Cooking the Books’ is my self-imposed blog challenge for 2014 – I’ll be trying to cook a new recipe from one of my (rather extensive!) collection of cookbooks once a week, write it up and review it. Wish me luck!

Read more from the Country Skills blog >>

Banner320-260

Baked Eggs with Smoked Haddock and Grain Mustard, from ‘Eggs’ by Michel Roux – Cooking the Books, week 6

Our hens have got laying early and enthusiastically this year, despite the quite horrible weather, and we have more eggs than we know what to do with. I bought this little book fairly soon after we got our girls, anticipating the inevitable hen-keeper’s egg glut, but despite that it’s seen very little use.

This is a lovely little recipe for baked eggs (‘en cocotte’ as I’m sure M. Roux would actually have it), which makes a gorgeous starter or, serving two per person, a really decent supper dish. Now, I have to admit I have made this recipe, and variations on it, a couple of times already, so my version does vary a little bit from the original.

To make four (serves four for a starter, or two for a main course) –

  • Baked eggs - ingredientsSmall fillet of un-dyed smoked haddock (or other cold-smoked fish), about 120g
  • Half a pint of milk (approximately)
  • 6 tbsp of double cream
  • 1 tbsp grain mustard
  • 4 eggs
  • Butter, to grease the ramekins
  • A little sprinkle of parmesan cheese
  • Salt & pepper

Start preparing this dish about an hour before you intend to eat it, as there’s a certain amount of standing time involved. But this is a dish that you can prepare plenty of time in advance, and then just put in the oven when needed, which makes it a great choice for entertaining!

If you store your eggs in the fridge, get them out and let them come to room temperature.

Poach fish in milkPlace the fish in a small saucepan and just cover the fillet with milk (you might need a little more or a little less than half a pint, depending on the size of the pan and the thickness of the fillet). It’s fine to cut the fillet up into two or three pieces if this makes life easier. Bring the milk gently to the boil, and then take the pan off the heat and set to one side, and allow to cool. After 20 minutes to half an hour, it will have cooled to nearly room temperature, and the fish will have cooked through in the residual heat of the poaching liquid.

Flake your fishDrain the fish, discarding the milk. If your fish has skin on, this should now peel away really easily. Now break the cooked smoked fish up into flakes. Those observant souls amongst you may have noticed that there’s something unusual about my ‘haddock’. This is actually a home-smoked whole fillet of arctic char, made following the same technique as my home-smoked trout. I’ve made this dish with smoked trout in the past, and that’s quite lovely. To be honest, I think any cold-smoked fish would work here, so why not experiment?

Combine cream with fish and mustardIf you’re cooking your eggs straight away, pre-heat the oven to 170C. Give your pan a quick wash and dry, and heat the cream to nearly-boiling. Take it off the heat and incorporate the flaked fish, mustard, and salt and pepper to taste (I never feel the need to add extra salt, there’s plenty from the fish!). Allow to cool to room temperature – you can speed this process up by immersing the pan in cold water.

Ready to go in the ovenButter your ramekins. Now spoon the fish, cream and mustard mixture evenly between them. As you do, make a dip in the centre, this will encourage the egg yolks to settle in the centre, which makes it easier to cook them to a lovely soft texture later! Crack an egg into each ramekin. Finally sprinkle over a little bit of freshly ground pepper and a little bit of parmesan cheese.

If you’re not cooking these straight away, pop them in the fridge, but remember to get them out long enough before cooking that they come back up to room temperature before going in the oven.

Finished eggsPlace your ramekins in a flat-bottomed roasting dish, boil the kettle, and then carefully pour boiling water into the roasting dish to come about half way up the pots. Slide into your pre-heated oven. I find these take about 12 minutes to cook – you can judge how they’re getting along by the amount of ‘wobble’ on the contents of the pots when you move them gently. I try to cook mine so the yolks are still runny and silky-textured, but the white is fully set – your preferences may vary! – but it’s much easier to achieve this if you can get your yolks bedded neatly in the centre of the mixture.

When they’re ready, serve immediately and simply with the very best buttered bread – this is my sourdough – and enjoy!

Serve and enjoy!

**
Eggs - cover shot‘Eggs’ by Michel Roux
Quadrille Publishing Ltd, 2005. Paperback edition 2007. ISBN 978-1-84400-311-2.
304 pages, paperback, full colour. RRP £9.99.

[Full disclosure: This is my book, which I bought. I have received no payment or sponsorship for this post, nor have I accepted a review copy. I do not have an amazon affiliate account and do not profit from any links provided.]

This book is a little treasure trove of (unsurprisingly, given the author) predominantly French-influenced dishes, all featuring eggs, though not necessarily in a starring role.

All the stalwarts are here, of course – eggs scrambled and poached, fried, baked, and constructed into soufflés, omelettes, and so on. There are some less obvious choices too – some great traditional French deserts and sweet treats, ice creams, and even fresh pasta.

Inside page viewIf I had a criticism, it would be that this is actually a rather unhelpful book to pick up if, like me, you’re often in the position of having a lot of eggs that need eating and are in need of inspiration for what to do with them. These are, for the most part, quite sophisticated recipes and as a result tend to include ingredients which aren’t routinely in my fridge and store cupboards. That said, there a lot of wonderful-looking food here and I definitely need to make an effort to experiment further!

The book itself is a pretty medium-format paperback, the food photography (credited to Martin Brigdale) is mouthwatering, but bucks the recent trend to illustrate every dish, with some – like this little baked egg dish – not illustrated at all.

Each section of the book starts with a well illustrated guide to the essential techniques, and this is very helpful, particularly as some aspects of egg cookery – poaching, making custards, or emulsions like mayonnaise or hollandaise sauce – can sometimes seem a bit like dark culinary magic, even to the more experienced cook. This is a little book, then, which not only provides some great recipe inspiration, but could help sharpen up a few kitchen skills into the bargain!

‘Cooking the Books’ is my self-imposed blog challenge for 2014 – I’ll be trying to cook a new recipe from one of my (rather extensive!) collection of cookbooks once a week, write it up and review it. Wish me luck!

Read more from the Country Skills blog >>