The Key, The Secret? – spicy pickled ash keys

I first came across the idea of pickled ash keys in Adele Nozedar’s lovely book ‘The Hedgerow Handbook, which I reviewed last year. I was intrigued at the time, but it was the wrong time of year to forage nice young ash keys (actually, I think I may have been a little late this year, too, but more of that later).

A lovely veteran ash treeAsh trees have been in the news lately, at least in the UK, with the arrival last year of ash dieback, a fungal disease now threatening some of the great, veteran trees of the British landscape. Historically, oak, elm and ash were the ‘big three’ trees in these parts, majestic and long-lived, our elms sadly disappeared for the most part several decades ago, succumbing to Dutch elm disease, and it seems now as if the ash, too, may be at risk of all but disappearing from our landscape.

Ash keysBefore too long, ash keys (the twisted seeds of the ash tree, which hang in luxurious bunches from the branches of some – but not all – ash trees at this time of year) may be a vanishing treat, the caviar of the forager’s larder. So why not try them now, before it’s too late? Incidentally, don’t confuse the common ash with the mountain ash, or rowan tree, which produces clusters of (also highly forageable!) bright orange or red berries in autumn.

So, you’ve found a local ash tree positively dripping with lovely young, green ash keys. What now?

After pickingWell, first, you’ll need to pick some, obviously. I made rather a large batch of pickled ash keys, starting with about 800g (approximately a mean couple of pounds). The older they get, the tougher and stringier they will become, so pick them as young and tender as you can.

As well as your ash keys, you will require –

  • 1.5l / 3 UK pints of white distilled malt vinegar (spirit vinegar)
  • 3 tbsp of paprika
  • 3 tbsp of curry powder (I used a medium madras powder, because it was what I had on the shelf)
  • 1.5 tbsp of cayenne pepper
  • 4 tbsp sea salt
  • a heaped teaspoon of whole mixed peppercorns
  • a level teaspoon of whole yellow mustard seed
  • 6 – 8 garlic cloves
  • 12 small hot dried red chillies (I used my own home-grown and dried little chillies left over from last year)
  • A large stainless steel or enamel saucepan or stockpot, a smaller pan (also non-reactive), large colander, a fine sieve and a piece of muslin, and enough jam jars for your batch.

Washed ash keysPick all the ash keys free from their bunches, and wash them carefully. The first part of the process involves gently simmering your ash keys for about an hour and a half, in all, in four changes of water.  This process, while irritatingly time consuming and faffy, reduces the bitterness of the ash keys which would otherwise make them rather unpleasant to eat.

Simmering the ash keysThe smell that this process generates is not very promising – it will smell rather like you’re boiling up a pot full of bits of tree, which you are, of course. But this abates each time you change the water, and after the fourth water change the colour of the ash keys is closer to olive green than to the bright green that you started with, and if you have a speculative nibble on one (I couldn’t resist), it’s quite stringy, not particularly strong tasting, but not noticeably bitter.

Spiced vinegar steepingWhile your keys are simmering away gently, you need to make your spiced vinegar. In your smaller saucepan, combine the spirit vinegar, paprika, cayenne pepper, and curry powder, bring to the boil and then take immediately off the heat.

Strain the spiced vinegarThis smells quite marvellous. Once it’s cooled a bit (you can help it along by sitting the saucepan in a sink full of cold water), strain it through the muslin in the sieve, and if you’re not quite ready to use it, you can use a funnel to put it back inside the vinegar bottles for safekeeping. Incidentally, I’d forgotten I had some muslin and initially tried to strain the vinegar through a paper coffee filter. I can report this was very frustrating and a huge waste of time, effort and coffee filters. So, now you know not to bother!

Ash keys mixed with saltOnce the ash keys have done their four turns around the simmer 20 minutes, strain, change water circuit, they’re an olive-green colour and ready to be stewed (yes, some more!). Add the 4 tbsp of sea salt, and plenty of fresh water, and bring to a brisk boil for a quarter of an hour, before turning the heat down, covering, and simmering for another 60 minutes before finally straining again.

At the end of this, they will have softened a fair bit, and have a gently salted taste, and you will probably be royally fed up of boiling up ash keys. Don’t worry, it’s nearly done!

Strained spiced vinegar, set aside  Chillies, peppercorns, garlic & mustard  Ash keys in spiced vinegar with garlic and chillies

Now, add to the strained ash keys the spiced vinegar, along with the whole dried chillies, peppercorns, mustard seeds and peeled whole garlic cloves. Bring to a brisk boil for 15 minutes, and take off the heat. That’s it, you’re (essentially!) done, and your house probably smells like a very strange hybrid of a chip shop and a curry house. Set the pickled ash keys aside to cool. I left mine overnight, because it was pretty late by the time I finished them, and my big stock pot holds its heat quite stubbornly.

Fill your jarsWash, dry and sterilise your jam jars in the oven, then allow to cool before filling. I used 13 little ‘dumpy’ jars and two 330ml pickle jars for my batch. Assume you need at least the volume of your vinegar, and probably a bit extra, in jar capacity. Pack the ash keys, along with the chillies, garlic, peppercorns and mustard seeds, evenly but quite tightly into your jars. Once you’ve done this, fill the jars right to the brim with the spiced vinegar, and seal.

Filled jars of pickled ash keys

Don’t they make a pretty little lot? They need to be matured now in a cool, dark place for at least 2 – 3 months. But I did have a taste, and the omens are really promising – there’s a long but gentle heat from the combination of the whole chillies and the spiced vinegar, a little garlic note, and out of nowhere a subtle but noticeably ‘olive’ flavour from the ash keys themselves.  The acidity is not at all harsh, which is unexpected, there’s an almost sweet character which must come from the keys themselves as there’s no sugar in the pickle. They are, though, still a bit stringy (though much less so than earlier in the cooking process) – I think if I’d picked in May rather than leaving it until June, this may have helped! I expect they’ll continue to soften while they steep in their jars of vinegar.

All in all, then, a bit of a revelation, these ash keys! I’m not sure what I was expecting, but I don’t think it was much like this! I can’t wait to see what they’re like in a couple of months time, but I think they’ll make a very nice substitute for olives or capers, and will probably go a treat with a nice mature cheddar.

Read more from the Country Skills blog >>

Simple Summer Sewing – make a quick, cheap, pretty beach and pool cover-up

I can’t take the credit for the idea here – I’d seen a photo of something similar on Pinterest some time ago, and tracked instructions on the ‘Vie en Rose’ blog (and you should go and take a look at these, the rest of the post will make a lot more sense!) at the time. Then I more or less forgot about it until I started thinking about what to pack for our summer holiday. It seemed the perfect alternative to a sarong, easier to wear and a bit more ‘shaped’.

So I picked up some remaindered floral print cotton jersey on Ebay for about a fiver, and got started with it on my day off a week or two ago.  I’d offered up a sarong to get an idea of how wide a piece of fabric I needed, and came to the conclusion that the ‘ideal’ size was about 10cm wider than the width of fabric I had.  Slightly irritating.

Rather than chop a lengthwise section from my 2.5m length (seemed wasteful!), I decided to take a punt on the 1.6m width and hope the bit of stretch in the jersey and the inherent ‘forgivingness’ of the pattern would let me get away with it.  This decision rather forced my hand in terms of hemming – no spare fabric for this, and worse, I was going to have to use the selvedge, rather than trimming it, too. I know, I know, two cardinal sins of sewing and dressmaking just there. But do bear with me, this is quick and cheerful stuff, but the result is surprisingly good!!

Decide roughly how long you want your wrap, measuring from about armpit length downwards, and make this the width of your piece of jersey fabric.  Make sure all the edges are nice and straight as you cut your piece, as these will be your finished edges. I used a cutting mat and roller for speed and convenience, but you could manage carefully with fabric scissors.

Shape the armsThe only piece of shaping required is around the arm holes. I used a strappy top I own as a reference template. Line it up at the top of the ‘body’ and mark out the arm shape. If you fold the fabric in half, you can cut both sides together, so they’ll be symmetrical.

Cut the arm shapingMark (this is the reverse side!) with a pen or pencil. Then just cut carefully along the mark.

Now it’s just a question of working out how to attach a for each shoulder. I measured the strappy top from where I’d stopped shaping the arm hole, up to the seam at the top of the shoulder, and then back down to the seam at the underarm.

Measure for the strapsThis gave me a length of about 40cm as an estimate for the strap length. The blog tutorial I found made braided straps, and you could certainly do this.  I had my sewing machine conveniently to hand, so it was just as quick to make tubes – I cut two lengths about 2.5cm wide and 40 cm long, sewed along the length with right sides together, trimmed the seam allowance and then turned them carefully the right way out.  This was actually pretty fiddly and time consuming, but I think gives a nice finish.

Straps sewn in placeOnce your straps are ready, safety pin them in place and try on your cover up. This will allow you to adjust the strap length to suit your preferences (I shortened mine by about 5cm in the end).  Now, I can see no reason at all to post photos of myself in my bathing suit on the internet, so you’ll have to refer to the original tutorial for fitting photographs. Once you’ve decided on the right strap length, hand sew the straps in place firmly.

If you’re using a solid coloured fabric, this should give a pretty nice finish, but you can see with my contrasting print it’s all rather scruffy!  But it’s done. Try it on and flounce about in it a bit, pretending to be standing by a beach bar somewhere delightfully tropical.

Buttons!I wasn’t quite happy with the strap sewing, so I gave it some thought. Eventually it was a colleague who suggested buttons, which were an inspired solution.  I had a dig around, eventually found my button box, and excavated these four pretty little off-black beauties.

Strap with buttons in placeSewn in place over the strap joins, they completely conceal my scruffy sewing.  Hurray!

I’ve considered shaping the short edges on a slight angle to cut away the worst of the selvedge, but although I know it’s there, it really isn’t obvious, so I’ll probably leave it for now. If it annoys me later, I’ve always got the option!

Finished beach wrapWell, there it is! I’m really pleased with it, I think it’ll work beautifully as a cover-up over swim wear, for the beach of the pool this summer.  It’s such a quick ‘make’, not sure I agree with the ’20 minute’ assertion, but certainly well under an hour, all told. And all for well under a fiver. Practical summer style on a serious budget!

Fun crochet beach bagIncidentally, I’ve also finished the crochet beach bag I was working on a few weeks ago. I’ll  do a full tutorial at some stage when I re-make it (there were a few details I got wrong with this one that I’d like to do right next time!), but I’m still pretty thrilled with it, it’ll do very nicely by the pool this summer with plenty of space for a paperback, the sunscreen, sunglasses, and of course the cover up!

I’m feeling rather excited about the summer now… Bring it on!

Read more from the Country Skills blog >>

Grow A Taste of the Exotic East – propagate & grow your own lemongrass

It was James Martin, during the masterclass I attended last year, who first whetted my appetite for growing my own lemongrass. Two things were worrying me, though. Firstly, we have cold winters here – it’s usual to get nights down to well below -10C during the winter, and lemongrass is a tropical plant. Secondly, and more prosaically, was where on earth I was going to get hold of a lemongrass plant?

Some months later, with the idea still in the back of my mind, I stumbled across a blog which suggested you could propagate lemongrass successfully from stalks bought for cooking – yep, those rather dry, slightly disappointing bunches of grey-white woody stems from the supermarket. (I regret I didn’t make a note of the blog that inspired me, and I can’t find it now, so can’t give credit.) But the process was very simple.  Immerse your lemongrass stalks in a bit of water, in a vase on a bright window sill. Change the water daily, and wait for it to root. Once you’ve got good roots, plant them out. That’s it.

The lemongrass stemsWell, that sounded like a horticultural challenge at my sort of level! And what was to lose, apart from a quid or so for a bunch of lemongrass. (The observant among you will notice there are two different ‘sets’ of lemongrass stems here – the shorter bunch came from the supermarket, whereas the slightly taller ones came from our local Thai market. Neither cost more than a pound.)

The first thing you’ll see, within a few days, is some fresh green growth emerging from the top of your stems.  Then, after a week or so, with a bit of luck, root buds will appear.  Do change the water for fresh every day (I forgot for a few days and it all got a bit manky, algae-ish and unpromising-looking in there), and try to keep them in a nice bright, warm situation.

Growing nicelyFour weeks later, my stems looked like this (I separated the different sets of stems into two separate pint glasses because they looked a bit crowded as the roots started to grow) with primary and secondary roots showing, and lots of new top-growth. With secondary roots present, I felt pretty confident potting up the lemon grass.

Good root growthI’m surprised – but thrilled – to be able to report that *every single one* of the stems rooted successfully.  The Thai market lemongrass rooted a bit faster than the supermarket stuff – I suspect it was rather fresher! – but a week later, that was ready to pot up, too.

Potted up and in the greenhouseI decided to split the stems up and pot them on into three terracotta pots.  Keep these well watered especially for the first few days, since the roots are pretty puny and they’re used to having all the water they can drink. I kept them on the same sunny window sill for a couple of weeks, as the nights were still rather cold, but now they’re out on the greenhouse staging.

I’m thrilled to see some brand new stems emerging over the past few days.  Of course, I’m anticipating them coming back indoors onto a sunny window sill through the winter – like other warm climate plants like chillies, they don’t appreciate temperatures below 10C, so somehow I can’t see them surviving outside, even in the unheated greenhouse!

New stems emerging

All I can say is – propagating lemongrass like this is cheap, it’s simple, and it works – try it! If you enjoy cooking Thai or other East Asian food, or fusion dishes, there’s nothing better than your very own freshly grown and harvested lemon grass! I can’t wait!

Read more from the Country Skills blog >>

Chive Flower Vinegar – a liquid taste of summer – make this NOW!

If you have chives in your garden, and live in the northern hemisphere, it’s a good bet you’ve got chive flowers now. Please, if you do nothing else this weekend, don’t let all that beautiful chive blossom go to waste – seize the opportunity to make some chive flower vinegar!

Chive flowers growing in the garden

I made this for the first time last year, just a small batch in a 330ml jam jar, with white wine vinegar and about a dozen chive flowers from the garden. It was *glorious*.

The vinegar is somewhere between a slight blush pink and a brash almost pinky-purple, and has a lovely fresh onion flavour which complements salads and savoury dishes perfectly. I guarded my single bottle of 2012 vintage chive flower vinegar jealously, knowing it would be a year before I’d be able to make any more.

But this story, sadly, has a tragic end.  On Christmas Eve, while I was buzzing around the kitchen trying to do all of those last minute things, I opened an over-full kitchen cupboard and my precious bottle of chive flower vinegar tumbled off the shelf, bounced on the counter, and smashed into a million pieces on the slate floor. The kitchen was filled with the gorgeous fresh smell of chives. I could have cried. Instead, I mopped, not at all comforted by the fact that the floor came up absolutely *beautiful* from its vinegar rinse!

It’s fair to say that I’ve been waiting for chive flower season ever since. And now it’s here. Usually, I’d wait to blog a recipe or process like this until it was complete and I could show it to you all the way through. But you need to make this now – not in a few weeks time when the vinegar will be infused and ready to bottle – so here goes.

So, for your very own, glorious chive flower vinegar, you will need to get together the following –

  • Gather all your lovely, fresh, open chive flowers.  Even if you only have about a dozen, it’s worth making a small batch (I successfully made about a 330ml volume of vinegar in a large jam jar lat year). Pick them with as little stem as you can, and give them a good shake to dislodge any resident insect life.
  • I like to use white wine vinegar, though I know others use cider vinegar, rice wine vinegar, or even white malt vinegar. Champagne vinegar would be a ‘premium’ choice. Choose something light coloured to bring out the  lovely colour of the chive flowers.
  • A jar the right size to take all your chive flowers and vinegar. A kilner-type jar with a rubber gasket is ideal, but a large jam jar will do fine, as long as it has a plastic-lined lid. Wash and dry the jar carefully before use.
  • A colander to wash the flowers, and a salad spinner, if you have one (I don’t).

Wash and dry your chive flowersI’m going to come clean here, and admit that I didn’t grow all of these chive flowers. Hubby was able to scrounge them from a lovely kitchen garden!  After removing as much of the stalk as you can, give them a good wash to remove any bugs and insects – a few ants were all that seemed to come in on these ones – and give them a good shake to remove any water, or put them in a salad spinner for a few turns.

Put the flowers into your jarThen put all your flowers in your jar. Mine is a 2l kilner jar but use whatever you have conveniently to hand – probably not something quite this large! Mine happens to be filled but it doesn’t need to be, 1/4 to 1/3rd full will still give you a lovely infusion, though the colour won’t be so striking.

Top up with vinegarNow top up with your choice of vinegar. To give you an idea, the 2l jar filled with flowers took just over 1.5l of vinegar to fill it all the way to the top.

Keep the vinegar bottles – you can re-fill them with the infused vinegar later. As an extra bonus, the labels came off these bottles pleasingly easily!

Now, close your jar, and put it somewhere cool and dark for a couple of weeks.  I’m planning to infuse it for 3 – 4 weeks, but  keep an eye on it and have the occasional taste, as it may be that you’re happy with it earlier. Once you’re happy, strain the vinegar through a fine sieve or a muslin back into the vinegar bottles, label, and store in a kitchen cupboard or larder until you’re ready to use it.

Infusing in kilner jar

There you go – simplicity itself! It’s thrifty, too – just the price of some basic vinegar, and a little bit of time, give you this gorgeous very special condiment. Make some this weekend, I promise you won’t regret it. In a few weeks you’ll be enjoying this gorgeous, fresh, oniony-summery-savoury note with all your favourite salads and summer dishes.  But keep some back, too, for later in the year. Like elderflower cordial, it brings an amazing bottled aroma and taste of summer to your table in the colder, darker months!

Look at this amazing colour!

P.S. Just a quick update to give you an idea of the colour – this is my vinegar jar after just 48 hours infusing in the cupboard under the stairs. Gorgeous, isn’t it?

Read more from the Country Skills blog >>

The Eurovision Drinking Game – because in the country, you make your own fun!

Making your own entertainment is, most definitely, a country skill. Living out of town, you don’t have access to restaurants, bars and cinemas without resorting to the car or a rather expensive cab. There’s the pub, and village activities – a great sense of community, but necessarily limited in it’s options!

European FlagsIt’s been said that, while the rest of Europe may feel embarrassed or nonplussed, sometimes, by the cultural festival that is the annual Eurovision Song Contest, the British are the only ones who seem to think it’s a drinking game. [If you’re not European, then I’m sorry, the rest of this post is likely to be pretty confusing!].

There are many variations, of course, but this one one is *mine*. I started developing it when I was still a student, and a number of victims have ‘play-tested’ it for me over the years (you know who you are!). Some even remembered enough the next day to make suggestions for improvements, which have been incorporated over time.

So, revised and refreshed, in time for the 2013 Eurovision Song Contest, which this Saturday will come from Malmo, in Sweden, it’s time to offer it up as a game for the world to enjoy! Break out the home-brewed cider, and play along!

Introduction –

This game is based on the songs and performances that make up the Eurovision Song Contest. Features of songs and performances are identified, and carry drinking forfeits (usually ‘take a swig’ with a small number of exceptions).

Euro shot glassesEveryone at the party *could* play for every song, but that may be unwise! Better, probably, to divide up the performances between the party-goers, either by drawing lots before the contest starts, or drawing straws between the performances, which adds a more immediate sense of peril and means some people might end up amusingly and disproportionately ‘picked on’ (clustering in random distributions is a bitch!).

Obviously, if it’s a very small party, not all songs need to be allocated, and likewise, in a big group, more than one player can play for any given song. (Also see ‘variations’ suggested below.) Non-drinkers & children can still have fun by identifying and shouting out the trigger rules when they appear.

And now, the rules –

Begin any song that you’re playing with a fully-charged glass.

These are the ‘trigger’ features of songs and performances for which the player should drink. These features can appear more than once in a performance (and sadly, often do!), and ‘score’ each time they appear – so the famous ‘Bucks Fizz’ skirt removal would be a single costume change, because it happened in one go, but a song that repeatedly swaps languages or makes major-to-minor-and-back-again key transitions gets a drink on each switch.

Sheet MusicThe song itself –

  • Song is not in an official language of the country being represented
  • Change of language
  • Change of key
  • Change of tempo
  • Wordless lyrics (da dum da, mana mana mana, lalalala)

Military 'uniform'The performer, costume and performance –

  • Performer(s) not of nationality represented
  • Folk costume
  • Folk instrument
  • Folk dance
  • Weapons (with an extra-big swig if they’re ‘folk’ weapons – axes, pitchforks, flaming torches etc)
  • Uniforms – military & civil (including costume references to same – epaulettes, insignia, military-looking hats and suchlike)
  • Flags & banners
  • PyrotechnicsPyrotechnics
  • Costume change
  • Underwear as outerwear
  • Spandex, lurex, sequins
  • Leather, rubber, PVC, bondage wear
  • LEDs or other lighting incorporated into costumes
  • Fur, feathers, wings
  • Trapeze or wire-work
  • Magic, circus themes

and, last but not least

  • Performer does not appear to be human – note this rule applies whether the performer *is* human underneath or not! – This is the big forfeit. Down the remains of your drink.

Russian folk-dancersThe half-time performance (or the ‘Riverdance’ slot) –

Traditionally the host country puts on a performance on during the ‘voting gap’. Everyone plays for this one. Use the same forfeit list above, but all penalties are doubled.

Voting –

I haven’t got rules for the voting – in my experience the mood of the assembled party generally doesn’t require any further ‘lifting’ by that stage in the evening!

Variations –

Rather than allocating countries’ songs to players by ballot, the enthusiastic party host could assemble a trivia question for each country in the contest (as simple or as fiendish as they like!). Players getting it wrong would play that country’s song. Of course, this is less fun if the host was planning on playing too, as they’ll know all the answers.

Well, that’s it, folks! Have fun at all your Eurovision parties, and if you do decide to try these rules, do let me know how you found them, and any suggestions you might have for improving them in future years.

And remember, please drink responsibly (*ahem!*), and definitely don’t drink and drive, attempt DIY, deep fat frying, change important passwords or operate heavy machinery. Finally, your hangover is your problem, not mine, so don’t come crying to me in the morning!

Read more from the Country Skills blog >>

Don’t be Sour – a dalliance with yeasted ‘quick’ bread

Regular readers of the blog (and those familiar with the intermittent Sourdough Saga series of posts) will know that I *love* my sourdough starter. It’s fair to say I love it like another pet, like a member of the family.  I feed it and care for it (and, admittedly, stash it in the fridge for a fortnight at the time – please note that this is not generally advisable treatment of household pets!) and in return it rewards me and feeds me with some of the very best bread I’ve ever eaten, anywhere in the world.  It seems a more than fair exchange for my time and effort!

Sourdough loaf selection

The beauty of a sourdough loaf, its rich deep flavours and developed texture, are the result of the long, slow, patient process of fermenting, kneading and raising, followed by a blistering hot (and preferably steamy!) baking oven.  My ‘big batch’ of sourdough bread makes two large loaves, or two smaller loaves plus some rolls or a pizza, uses 1.25kg of flour, and lasts us about 10 – 14 days, freezing the second loaf.  But making it takes about 24 hours, starting the night before baking with the creation of the sponge, followed by a whole day during which the dough has to be kneaded and shaped periodically, finally baking around dinner time.  It’s not a chore – to me at least! – but it does require a whole day at home, and of course I don’t always have that pleasure!  The trouble with getting used to really fabulous home-baked bread is that nothing that you can get in the shops comes anywhere close.

So, obviously, I needed a solution for good, home-baked, ’emergency bread’.  The sort that, if I needed to, I could start in the evening after I get home from work, and have baked and out of the oven before I go to bed – about a 3 hour window.  Yes, you could use a bread machine in that time frame (and we have done, in the past), but I find the bread too sugared and salty when made according to the instructions, and highly ‘unpredictable’ in its behaviour if you start deviating from the recommended formulae!

Sourdough loaves keep basically forever (she says, without a scrap of exaggeration!), in that they don’t go off the same way as yeasted loaves (they’re protected from mould growth, it turns out, by one of the fermentation products of linoleic acid – you can read the paper, in the Journal of Environmental Microbiology, here).  Sure, they go stale and dry with time and exposure to air, but they don’t go furry – and once they’re too dry to eat, you can turn them into breadcrumbs, so there’s no waste, either!  My emergency loaf needs to be a yeasted loaf, and obviously needs a smaller batch size, so that we’ll get a chance to finish eating it while it’s still at its best!

I asked around on Twitter (what did we do before Twitter, folks?) and the lovely Lisa (@Cookwitch) offered me her version of a recipe for Pain D’Epi, which looked like it might well fit the bill.  I was pretty pleased with my first attempt at it a couple of weeks ago, but didn’t think to take photos at the time (bad food blogger, no biscuit!).  We’re out of bread again, I was working this morning, and I fancied something nice to go with breakfast tomorrow, so I’m making it again right now.

As I make it, you want the following –

  • 275g of strong bread flour (white flour is traditional, and it won’t be a ‘Pain D’Epi’ otherwise, obviously, but use whatever you like – or a mix, if you have ‘rag-tag’ ends hanging around like I usually do)
  • 175ml of warm water
  • 7g sachet of fast-action bread yeast (the sort that comes in the little double-sachets of small yeast pellets, that you can buy everywhere)
  • A scant half-teaspoon of sea salt
  • A good ‘glug’ of olive oil

Start by combining all the dry ingredients in a bowl and mix together – you could use a whisk, but I’d use my fingers!  Now add the 175ml of warm water, and combine to form a dough.  Add a little bit more flour or water if you need to get the consistency right, just not ‘sticky’ but not too dry as a dry dough will make too dense a loaf.

Kneading your doughNow give your dough a really good knead on a floured work surface.  Set aside 10 minutes to do this, and really give it the time and effort.  This is a single-levened bread, so this is the one and only chance that you get to develop the gluten in the flour and consequently the texture in your final loaf.  Once the dough is starting to develop a silky, elastic texture, rather than just feeling like play-dough, add a generous glug of olive oil and continue to work this in.

Shaped loaf in tinOnce you’re happy with the texture, shape your loaf, and either put it in an oiled and floured 1lb loaf tin, or shape it as required and place it on a sheet of oiled baking parchment on a good thin metal baking sheet.

I would guess that this batch could also make about 8 reasonable-sized dinner rolls, though I haven’t tried this myself.  The traditional form of the Pain D’Epi, as you might infer from the name if you’re francophone, is in the shape of an ear of corn – you can see the finished effect, and how you achieve it (surprisingly straightforwardly, using scissors!) here.  It’s a great tear-and-share shape and I really must try it some day!

Covered with oiled cling filmBut back to my loaf, which is sitting in its much more traditional British loaf tin.  Cover the tin loosely with oiled cling-film (PVC-free, please, especially if you’re using it with oily food), and put it somewhere warm.  Mine is going by the fire this evening – because yes, we have the fire going in what, really, is mid-March. Isn’t that depressing?

Allow it to rise for an hour or two, depending on temperature, until it has at least doubled in size (and filled the tin nicely, if you’re using one).  The initial preparation and kneading takes about 15 minutes, which means that I can usually squeeze it in while dinner’s cooking.

Risen loafOnce the loaf is nicely raised, score the surface with a sharp knife in a pretty pattern of your preference (or construct ears of corn, if you’re feeling flash!) and put it into a pre-heated oven at 200 degrees centigrade for about half an hour – it will rise some more in the oven, if you’re lucky (though not anywhere like so much as I’m used to with the well-developed sourdough) and is done when it’s a lovely golden colour all over and the base sounds hollow when you tap it.  I tend to take tin loaves out of their tins and return them to the oven for a final few minutes to get a nice crispy crust all over.  Free-formed loaves may benefit from being taken off their baking sheets and placed straight on the oven rack, in the same way, to make sure they’re not at all soggy-bottomed!

Baked loaf, coolingOnce your loaf is baked, take it out of the oven and allow to cool on a wire cake-cooling type rack if you have one – I only bought mine very recently, and always used to use a cold oven rack I’d taken out before starting to bake the bread, which unsurprisingly works just fine!  Revel in the lovely smell of fresh bread that now permeates your house, and look forwards to the morning!

Overall, this is a really quick, useful, ’emergency bread’ recipe, that seems to work very nicely with all sorts of flours (today’s loaf was made with some malted granary bread flour I had sitting around at the back of the baking ingredients shelf).  It’s streets ahead of anything you can buy from the supermarket or corner shop, though it doesn’t quite stack up in terms of flavour and texture against slower-fermented yeasted loaves that you might make at home, or buy from a good artisan bakery.  Texture wise it does tend to be a bit ‘cakey’ and edges towards being a little on the heavy side, which I ascribe to the single kneading and rising cycle and lack of opportunity for gluten development.  Still, these are knit-picky complaints when you consider how quick and convenient it is to make, and how much nicer it is than any of the commercial alternatives!

Finished loaf

I wrote, back in June of last year, after my first successful sourdough loaf, that “the bar for ‘good bread’ has just shot skywards in our household, and I suspect things may never be quite the same again.”  I was right.  I’m such a bread-snob now!  But this is good, quick, simple bread, and definitely earns a place at our table.

Read all the posts in the Sourdough Saga >>

Read more from the Country Skills blog >>

Living in Glass Houses – DIY greenhouse build

I have to admit to having wanted a decent greenhouse for as long as I can remember. Growing up, my grandmother’s neighbours had a beautiful greenhouse and vegetable garden, which I used to admire from over the fence, and I suspect my life-long enthusiasm for the glass-house springs in part from this!

Dave, showing off his new greenhouse!

Apologies, incidentally, for the quality of the photography in this post – I made the mistake of thinking I had enough on my hands and that photos from my mobile phone would be ‘good enough’ rather than worrying about the SLR as well as everything else.  The photos took ages to tidy up and even now aren’t really up to my usual standard!

A little while after Christmas, while we were watching telly, I asked hubby whether we were really going to get on and build a greenhouse this year.  Yes, he agreed, we definitely were. So I did a bit of digging around, and had more or less decided that for what we required, a baby polytunnel was probably going to be more cost effective and sensible.  Then, deploying his superior (well, so he says) google skills, he turned up a 6ft x 10ft aluminium and polycarbonate greenhouse for about the sort of price I was finding for tunnels.  It seemed like a no brainer, so we got on and ordered it. It arrived a week or so later.

It’s been sat in the garden in two boxes since then, of course, because the weather we’ve had this winter can only be described as ‘not compatible with construction projects’.  As it happens, I’ve given up complaining about the weather for Lent (yes, it’s been that bad!), so I’ll spare you the details.  It finally started to dry out a little a couple of weeks ago, so we finally had a window to get going with the ground works.

The intended site for the greenhouse is on our ‘paddock’, which is a scrappy bit of ridge and furrow pasture land, most of which we planted for an orchard three years ago.  The grass is very established and the land isn’t level (the clue is in the ‘ridge and furrow’!). The only way we were ever going to get a level frame for the greenhouse was to dig a ‘slot’ for it out of the pasture grass to level it, and set a frame of breeze-blocks on which to rest the building.

You’ll need a good spade, a turf cutting tool and ideally, a mattock. We measured out the 6ft by 10ft rectangle and got to work.  Once we’d cleared the space, it occurred to us to consider in more detail the ‘6 x 10ft (aprox)’ size given on the greenhouse packaging.  It turned out the greenhouse was sized in something that could only be described as ‘metric feet’ by its German manufacturers.  Armed with the metric measurements, we enlarged the slot by a reasonably generous margin, and turned in for the evening, pleased with ourselves for having completely cleared the required space, and confident we could crack right on with building the greenhouse the following day.

The next day dawned cold.  Really cold – barely above freezing, in fact, despite being late February.  Undaunted, we put on our ski jackets and thick woollen socks, and headed back out to the greenhouse site. We’d gathered together enough lightweight breeze blocks to do the job – the sort that are made from a sort of concrete ‘froth’, a bit like an aero bar, and would float, if you let them.  Our sophisticated building and levelling tools were the spade and mattock from the previous day, a spirit level, and some string.  The blocks themselves were to act as ‘squaring’ guides, in due course.  And, as we hadn’t yet managed to pick up a bag of sharp sand, we had only the soil itself to use to pack the blocks straight and level.

Assembling the brake blocksThe first course of blocks assembled itself quite straightforwardly.  The mattock is a great help in cutting a clean trench, and then the blocks just go in one after another, with a check on level and height adjustment on each.  After setting the corner as square as we could using one of the blocks for reference, a couple of pegs and a length of string set the alignment for the next course.  Things were going well!

Two courses more or less complete, we wanted to make sure we had the right dimensions for the greenhouse, so we decided to get out the base from the kit and get that assembled for reference.  This done – and it was nice and straightforward (though it revealed that the assembly instructions were a ~50 page pictographic document, in the IKEA tradition) – we offered the frame to the greenhouse site, and discovered our slot was too narrow, given the width of the blocks.  In a stroke of good luck, we also discovered the base build could be bodged to use only whole blocks, which was a huge bonus.

Three courses placedCarrying on with the cut, measure, level, we had three courses installed.  We laid out, crudely, the blocks for the fourth course.  Inevitably, this is when you discover that, rather than a neat rectangle, and despite your most careful efforts, you’ve built some sort of trapezoid only theoretically known to mathematics. A bit of head-scratching and adjustments to the squaring, requiring a bit of extra turf cutting, and we put down the fourth course.

Greenhouse base, complete

It had been trying to snow all afternoon, and we’d been outside for five continuous hours laying the foundation blocks. It seemed apparent that one of the corners (the back one, in this photo) was lower than it should have been, but we were running out of energy, and light.  We tidied up and came back indoors, and gave up for the weekend.

Pro-tip: you know you’re really, properly, cold to the core when you *start* shivering several minutes after you get into a nice warm bath…

Skip ahead, then, through a working week to this weekend.  Finishing the greenhouse was our main order of business.  The weather, at least, is improving – no snow this weekend and even moments of sunshine!

Fixing the base down onto the blocksFirst up on Saturday, completing the levelling of the base.  Easy enough with the base frame sitting on top to confirm our suspicion that the back corner was ‘down’.  We’d got hold of a bag of sharp sand, so correcting this by lifting the two sides progressively was pretty straight forward.

Then, after placing the base as square as we could on top of the blocks, we marked the fixing holes, drilled these out with a hand drill, and then after placing rawlplugs, screwed the greenhouse frame down into place.  (Hint – mark carefully, and then *check* – it’s annoying when the holes aren’t quite in the right place!)  Skip any holes which are really close to an edge, as the block will just crumble away. Note that we’ve used no mortar at all in constructing this base.  You could, of course, if you wanted a more permanent foundation.

Out of the ground at lastThe sun was thinking about coming out, and we were ready, finally, to get the greenhouse build out of the ground.  The construction guide is purely pictorial, and weighing in at 51 pictographic pages, is something out of a flat-pack-furniture-phobe’s screaming nightmare. In the end, it’s just a question of following the instructions, as carefully as you can.

Our greenhouse was manufactured by ‘Palram’ and is a ‘crystal clear’ (read vaccuum-formed, single-ply) polycarbonate glazed aluminium framed greenhouse.  We bought it via B&Q but their greenhouses are stocked by lots of different retailers.  We’d built a tiny (6ft x 4ft) polycarbonate and aluminium greenhouse in our previous townhouse garden, and I was expecting the same, two-ply corrugated polycarbonate glazing that we’d had before, and which we were very pleased with.  I can only surmise that the insulation properties of this single-ply material won’t be as impressive as the other option.  And handling the glazing panels, which seemed alarmingly lightweight, was a bit hairy in places.  That said, once complete, the finished greenhouse does seem reassuringly ‘solid’. So, time will tell!

Side panels installedBut, back to the build.  Proceed carefully according to your pictograms.  Those on the cover informed me two people would be required, and that was certainly the case – at various times this build would have been completely impossible to perform single-handed. I was expecting to assemble the four walls individually and then combine them, but this wasn’t the case – the whole thing came vertically out of the base, acquiring glazing as it went, and then the build continued up into the gables and finally onto the roof.

We made one mistake (repeated at all four corners), which gave us some trouble until we noticed what we’d done wrong – fortunately our efforts at mitigation only involved some very slight trimming of some edges of the polycarbonate panels, nothing with any lasting consequences. Hint – if there’s more than one possible hole you could screw in, check, and check again before committing (and stop that giggling at the back!).

I gave a few small blood sacrifices on the sharp metal edges of the frame while threading the glazing panels.  The instructions tell you to wear gloves, of course, but it’s impossible to do this while fiddling with the 120 pairs of small metal nuts and bolts that hold this monstrous Meccano set together, and in the end I gave up, and suffered the consequences.  Overall we felt that, at least where it came to the glazing panels, the manufacturing tolerances were probably wider than the assembly ones, which made things a bit tricky from time to time.

Greenhouse roof installedGetting the roof apex installed did require a ladder (at least for us – though we’re both a little on the short side!), which isn’t on the list of required equipment.  It would have been a bit of a nuisance if we hadn’t had one conveniently available!  With the sun setting, and the roof on – missing only the final fitting of the window vent, and the door – and after seven hours solid work, we gave up and went to the pub for a well-earned steak dinner and a couple of pints of rather nice Ringwood bitter.

This morning, after a more sedate Sunday breakfast, we got on with the finishing-up tasks. The window went in quite straightforwardly.  The door was a bit fiddlier but posed no major challenges (and is very thoughtfully designed, in fact). By lunchtime, we had a completed greenhouse frame and glazing.

Hubby had work to do this afternoon, so after a whistle-stop trip to Wickes, he got on with that while I cracked on with the inside of the greenhouse.  I was hoping, rather ambitiously, to finish this evening with the hard-standing for the staging installed, as well as a paving slab path, the staging fitted, and the borders initially dug-over with a ceremonial planting – perhaps a row of early carrots, or something – completed.

Laying the slabsLevelling the ground and installing the slabs was probably, in fairness, a good worked example of why you shouldn’t let amateurs do hard-landscaping!  The soil at the back of the greenhouse, where the staging was going, produced a rich vein of solid clay, the kind that would probably have made a victorian brick-maker’s month.  Again, we wanted to avoid concrete or mortar, so the paving slabs are to be laid directly onto a layer of landscape fabric on top of the soil, using some ‘pads’ of sharp sand to help level them.

Hard standing installedThere are gaps between my slabs, which I’ll fill with some gravel once I’ve remembered to buy a bag.  Eight blocks across the back of the greenhouse provide a space for some shelving, and then a five-block path runs between the two greenhouse borders from the door.  I’m hoping that the slabs will also provide some useful heat-sink effect to hold warmth into the evenings as the temperature drops.

It’s around this stage in the process, when you’re raking the soil under the pathway to a fine tilth, while treading your precious borders harder and harder, that you remember that gardening is about pretty flowers in the same way that house-building is about paint colours for the hall.  In the end, it’s mostly hard labour!

Greenhouse staging 'installed'Just as I was ready to give myself a big pat on the back and congratulate myself on a job well done, I realised I had a small problem with my (great, cheap!) greenhouse staging.  The pack, describing itself as 2ft 11in (x2) greenhouse shelving (and I’d measured the gap!!) turned out to have the ‘aprox’ behaviour in the, compulsory, unhelpful direction.  They don’t fit!  Until I decide whether I want to take a hacksaw to eight lengths of steel tubing, they’re installed at a rather ‘jaunty’ angle…

No ceremonial carrots, but three big pots of compost with my newly-arrived hop rhizomes in them, pending the preparation of their final planting site.  There’ll also be a water butt to collect the run-off from the roof and reduce the distance I have to walk to fill the watering can.

Completed greenhouse

I think we’re both, it’s fair to say, seriously pleased with our efforts, even though it’s been physically very demanding and taken about twice as long as we had imagined it would.

To finish, and following Ross’s example in his excellent barn door guest blog post, some summaries:

Costings –

  • Greenhouse kit, including base & glazing – ~£350
  • Breezeblocks – £32
  • Paving slabs – £32
  • Sharp sand – £1.81
  • Landscape fabric – can’t remember, it was in the back of the shed

Time invested –

  • Ground clearance ~1 day, two people (or a bit longer for one)
  • Installing breeze-blocks ~1 day, two people
  • Greenhouse build ~ 1 day, two people (if you get up sharpish or have more hours of light than we did!) allowing extra if you want to do silly things with paving slabs inside.

Lessons learnt –

  • Measure, then measure again. Then have someone else measure too.  Don’t trust the measurements on packets, especially when they may be ‘metric’ feet-and-inches!
  • Wear gloves, unless you want to discover quite how sharp the sliced edges of extruded aluminium components can be.
  • Consider the weather forecast.  It can be really *really* cold in February! And finally,
  • If there is more than one possible hole… insert your own joke here.

I can’t wait to really get growing!

Read more from the Country Skills blog >>

Built Like A Barn Door – or, how to make your own shed doors [Guest Blogger]

Lemon TreeOur Guest Blogger is Ross, from Christchurch, NZ.  

You may recall the lovely series of lemon-glut busting recipes which Ross has shared with the blog.  As well as all that preserving, he’s been doing some DIY lately – and I was so impressed by this new shed door that I rather cheekily asked him for a write-up!

So, as they say, now for something completely different! But something which is still undoubtedly a very useful country skill – woodwork.

Scenario

We have a shed. It’s timber-framed, and until recently it was clad with asbestos boards. We got some professionals in to remove and dispose of it properly, and then had a local builder come and reclad the shed in plywood. So far so good, but his quote didn’t include reinstating the door – which, to be fair, was old, rotting, and had a sliding track which was ruined when the asbestos guys ripped it off.

Shed, doorlessWhat to do?

The aperture was 190-191cm high and 140-141cm wide. (Yes, the edges are not parallel; what do you expect?) An unusual size, and if I did get a door made to fit that, I’d also have to shell out for delivery as it wouldn’t fit in the car. Such a wide door would have quite a large swing, which could be a bother.

I got some door designs from various DIY books and websites. The traditional basic ledged-and-braced door design – described as having a “rustic” feel – would certainly work for us. In short, you lay out some planks side-by-side, then nail or screw two horizontals and a diagonal to keep them together, and there’s your door.

Single door panel
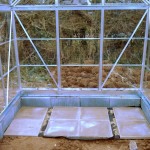
I don’t have a good picture of the design that doesn’t infringe somebody else’s copyright, but – skipping ahead a bit – here’s what one of ours looks like.

I rapidly came to the idea of a double door to reduce the swing size. But if I made a pair of ledged and braced doors, I’d still have the same problem getting the parts home from our local DIY barn as the wood would be too long to fit in the car.

There was a bit of head-scratching, and a few minutes more spent getting the splinters out from under my fingernails, before I realised what I could do. Stable doors. That is to say, a pair of doors with the ability to swing independently but which fill the frame vertically.

So, to deal with the swing issue as well, I’d make a double stable door. That is to say, four doorlets to fill the space. What could possibly go wrong? I should point out that, between my partner and I, we have limited tools, skill and experience. We have an electric drill and a Workmate, and know what end of a hammer to hold (beginners please note, not the metal end), but New Yankee Workshop this ain’t…

Design

door drawingHere’s the design. H for hinge, S for a door-stop, and the brown rectangles are tower bolts.

If you compare it with other ledge and brace doors, you’ll notice this is a modified design. Traditionally the ledges would both be a little distance in from the top and bottom of each door. Here I have moved the central ledges nearly flush to the edge, for convenience in bolting them together. (I still needed to be able to bolt one side at the top and bottom, but I figured I would use off-cuts to extend the ledges where I needed to. You probably don’t want both ledges to be flush with the edges in case you need to shrink the doors later.)

So I spent a good while in Mitre 10 figuring out which of their available pre-cut timber widths would give me a reasonably convenient time of assembling it all. (I had hoped to find tongue and groove, but they don’t keep any. That was OK as their regular boards are uniform enough; some are a bit warpy but not too bad.)

It broke down like this:

  • Right side: 7x 13.5cm x 9mm boards per door
  • Left side: 2x 23cm x 9mm boards per door
  • Bottom half: Boards to be 1.2m long, uncut
  • Top half: The same 1.2m boards, to be initially cut a few cm too long, then later cut to fit precisely.
  • Ledges (horizontals): Cut to same width as their respective doorlets. I realised later they need to be a little smaller to allow for the swing of the door.
  • Braces (diagonals): Pythagoras tells us that these are going to be longer than the verticals or the horizontals. As they’re blocks with a non-zero width the length will be slightly longer than by Pythagoras, but it worked out within about 1%.

You may notice that (7 x 13.5cm) + (2 x 23cm) comes to 140.5cm, for an aperture that varies between 140 and 141cm in width. This would prove to be annoying later.

Assembling each doorlet

Assembling the doorletLay out your panels side by side. Use a spare block of wood to square up the ends. (For the 7-panel doorlets I did this in two stages, four boards then three, as my working area wasn’t quite wide enough.)

Clamp the ledges into place. I also used a sash clamp to hold the planks together laterally; I don’t know whether this was essential but I suspect I’d have needed more G-clamps if I hadn’t.

Then pin the ledges to the planks. You can do this with nails but I used screws (drilling pilot holes first, of course). I attached each end of the ledge to its corresponding board with three screws, then put one screw into each intermediate board; the same for the other ledge. This may have been overkill.

Next cut and attach the braces. We just marked these with a pencil and steel rule, then sawed as close as we could to the line (fixing up later). The braces have to fit well as they spread the weight of the door. I fixed each ledge with two screws into each end board and one into each intermediate. On reflection this was definitely overkill.

Then paint, varnish, or apply whatever decoration you wish. For efficiency we painted only the outward faces at this point (we have still to paint the shed exterior, after all) – in a less clement climate you might be well advised to paint all of it before hanging to try and prevent damp getting in and warping the wood to next week and back again.

The hinge conundrum

I had read in my DIY book that a tee-hinge was “traditional” for this sort of design of door, so I bought some without thinking much about it. Mistake! For an outward-opening door, it was only going to be possible to put these on the outside of the door, with the screws exposed to all comers: no good for security. (Thank you, Mitre 10 returns policy…!)

I replaced them with some ordinary door hinges, of the kind that doesn’t require you to cut a rebate into the frame.

It’s important to think about where the hinges will attach to, on both the door and the frame. You can’t put screws into the end-grain of a block of wood and expect them to hold. Similarly, putting them into the side of the plywood cladding would have been hopeless. These were going to have to go into a door frame, the shed’s timber framing, or something securely attached thereto.

Shed frameOn one side I had the timber stud. No worries – just have to chisel away a small section of the plywood edge so I could attach the hinges properly into the stud and not foul their pins.

Existing shed constructionOn the other side things were a bit more interesting. There’s no frame to be seen – just the edges of the interior wooden cladding, and a bit raggedy at that.

Adding part-frameTurns out the frame is just behind, so I bought a couple more boards to act as a part-frame, which I attached with long screws through the inner cladding and into the frame.

Hanging the doors

Finally, it was time to hang the doors. You can hang a single door yourself, but it’s a bit troublesome and involves a couple of wedges; much easier with a spare pair of hands. (Sadly, I didn’t have a third pair of hands to photograph this process.)

I started out with the lower two doorlets. Obviously, the bottom doors don’t go all the way down to the deck; you want them to sit slightly off the ground (one source I read said 6mm) for clearance over any debris that may lurk. First fit the hinges (remembering not to put screws into the end grain of a ledge); then put the door into its open position, jacked off the ground; mark the positions of the holes, drill your pilots, then screw it into place.

Except, if you’re me, at some point in this process you think “hey, if I cut rebates for the hinges on that side, even if they don’t need it, I’ll save the couple of mm that will mean I don’t have to trim the doors.” Mistake! I’ve never cut rebates before, and they were distinctly less than even. Worse, the rebates I cut were sufficiently deep that when closing the doorlets fully the pressure tried to rip the hinges off! I ended up packing the hinges with cardboard and crossing my fingers. This may yet come back to bite me, but at least it’s “only” a matter of turning the fake-frames over and rehanging two of the doors, right…?

Offering up the second (larger) door it was clear I was going to have to trim a few mm off the edge for it to fit. On hanging it I found I had somehow managed to give them a 6mm height differential. I wasn’t worried; they swung well, and it’s not surprising as the ground isn’t flat, but if only I had realised this first and hung one to match the other…

Bottom doorlets installedBy now it was getting late. I had bought four heavy-duty tower bolts for securing the doors to each other and the frame, so I used one of them to keep the doors from swinging freely, then called it a night.

Fitting the upper two doors was very much like the lower two, but less close to the ground. We offered each up in turn and trimmed them to fit vertically, as planned.

On closing them for the first time (one at a time), one of the ledges prevented the other door from closing, so we cut a bevel into it. Then the doors fitted!… just. Very very tight, not really usable, so we spent a few minutes hand-sanding the mating edges down. It’s just about usable. I am reticent to take more off yet until the doors have hung for a couple of weeks as they may settle, changing their shape subtly.

Door furniture

All doorlets with boltMy plan for using the door was to treat the whole thing as a double door most of the time. I fitted a tower bolt across each vertical pair to keep them together; this is why I put the central ledges where they are.

Most of the time we won’t need the full width of the door so will only open the larger half. I fitted a tower bolt vertically at the top and bottom half of the smaller pair to secure them. (I added a couple of off-cuts in the corners, butting up to the ledges, so I could attach the bolts with the same deep screws I had been using on the rest of the door. The shed sits on a concrete slab, so making a hole for the bottom bolt to drop into required a couple of minutes with a big masonry bit.)

Inside view, bolts installedThe door is secured by a hasp, staple and padlock across the top pair. I may fit a further tower bolt inside the bottom pair so we can have it held fast while the top pair are open stable-style.

A couple of door stops (not yet fitted at the time of writing) will complete the security, preventing the larger half of the door from being forced inwards when the shed is unattended.

Next steps

After the doors have had time to settle (a few weeks) I will have a good look at them and see if I need to adjust or re-trim anything. I suspect I will want to plane a few mm horizontally off the upper doors where they stick. You can see they don’t sit perfectly; can I claim some sort of amateur’s privilege?

Finished, doors closed

If you have a big gap between double doors you might want to fit an astragal. I may yet fit one on ours – depends how much I remove after it has had time to settle.

Materials and costings

[The costings won’t be of too much use if you’re not in NZ, but they give you an idea. At the time of writing the exchange rate is about NZ$1.90 to £1.]

  • Materials cost: $384.08  – of which $233 was wood, $97 door furniture, $44 paint.
  • Consumables: Sandpaper and sanding block; several dozen screws.
  • Tools used: hammer, wood chisels, electric drill (several different wood bits, a countersink, and a big masonry bit I bought specially so the bottom bolt could drop into the floor), screwdriver bits for the drill (a big sanity saver!), hand plane, G-clamps, 1.2m sash clamp (bought specially for this project; $48.15). Black & Decker Workmate.
  • Time taken: The lion’s share of three days, including trips to the DIY shop. A little more time will be needed after the doors have had time to settle.
  • Labour cost: zero!

The satisfaction of doing it ourselves: *Priceless!*

Lessons learned:

Think through your design. No, really. Don’t assume that hinges will be so inconsequential as to not require thought.

Mortising rebates is hard – or, at least, I don’t have the knack. Beware, it’s very easy to cut too much, which you can’t easily undo.

If you buy hinges that don’t require to be rebated, don’t cut rebates for them!

Remember that the door swings. A thick door, or one thickened by ledges and other attachments flush with the edge, is harder to swing than a thin one.

When hanging a pair of doors that you can see the tops of (e.g. a double stable door like this project), you might want to try and make sure the tops are level.

Ross is an expat thirtysomething Brit who went to the Shakey Isles in search of adventure. Works in technology, enjoys creating, has a love-hate relationship with his kitchen.

Thanks, Ross, for this great DIY tutorial!

It’s been so much fun having these guest blog posts from Ross – and they seem to have been appreciated, too!  So if any readers out there have favourite ‘country skills’ they’d like to share with the blog – particularly if, like Ross, you live on the other side of the world, or have great ‘urban’ country skills – then drop me a line on kate@countryskillsblog.com and we can have a chat!

Read more from the Country Skills blog >>

When Life Gives You Lemons – Part 5: sweet lemon pickle [Guest Blogger]

Lemon TreeOur Guest Blogger is Ross, from Christchurch, NZ.  

You may recall the lovely series of lemon-glut busting recipes which Ross shared with us back in November last year.  He’s back today, with another lovely lemon preserve.  He says of this one “This recipe is a keeper! Much, much nicer than the hot oily one.”

Sweet lemon (or lime) pickle

The hot lemon pickle recipe is, well, hot. Great if that’s what you’re looking for, but sometimes you want something sweeter, less oily and less incendiary. This pickle is easier to make, too.

Prep time: 20 mins
Maturing time: 3-4 weeks

This makes somewhere over 1kg of pickle (I didn’t think to weigh it).

  • About 500g of lemons. (Or limes. Confusingly, the two words seem to often be used interchangeably in Indian English. I haven’t tried this recipe with limes but I expect it’ll be just as great.)
  • 100g salt
  • 500g white sugar
  • 250g demerara sugar (Note: Some recipes call for grated jaggery. If you can get hold of some, great!)
  • 1 tsp turmeric
  • 1 tbsp chilli powder of your desired heat

This recipe is almost entirely jar-based. You need space to throw the salt and sugar around, so it’s back to our old friend the large kilner jar – sterilised, of course.

Wash and dry the fruit. As usual, make sure you’ve removed any wax.

Squeeze a few fruits until you’ve collected about 125ml (1/2 cup) of juice. Keep the skins!

Cut the skins, and the remaining whole fruit, into pieces that are the right sort of size that you want to find in your pickle. This might be eighths or quarters, depending on your taste and the size of the fruit. Put all the chopped pieces into the jar.

Mix the juice, salt and turmeric, pour it over the fruit.

Compress the fruit in the jar so that it’s all covered by liquid.

When you add the sugar, it sinks.Put the lid on and leave the jar in a warm sunny place. While it’s ‘cooking’, give the mixture a good shake-up every couple of days. You’re waiting until the fruit has softened; expect this to take about a week and a half, longer if it’s cold.

Throw in the sugar and mix well.

Put the jar in a safe place (doesn’t have to be sunny this time) for another week and a half or so. The sugar sinks, so give it a good stir every couple of days. Before adding the chilli.When most or all of the sugar has dissolved, it’s ready. I found three distinct layers – floating lemon pieces, the denser sugary syrup, and the undissolved sugar.

After adding the chilliFinally, add the chilli powder and stir well.

It’s now ready to bottle and/or eat immediately. If you bottle it later, be sure to stir well as the fruit tends to rise in the sugary mixture.

No need to refrigerate. Apparently it keeps for over a year if you leave it in a cool dry place – but it’s so yummy, I’m not sure it’ll be around that long!

The finished product

Afterword:

I’ll be making more of this, it’s awesome with poppadoms or as a side with a curry.

You could probably try this recipe to good effect with other citrus fruit, but the combination of the sour lemons and sugar really works well on the taste buds.

Ross is an expat thirtysomething Brit who went to the Shakey Isles in search of adventure. Works in technology, enjoys creating, has a love-hate relationship with his kitchen.

If you’ve enjoyed this recipe, have a look at Ross’s other lemon glut-busting recipes for lemonadelemon liqueur, and lemon sorbet (which you might be needing, if you decide to experiment the hot pickle!).

Read more from the Country Skills blog >>

Stocking Fillers – perfect home-made giblet stock – Blog Advent (24)

We made it, WE MADE IT!  First of all, a huge thank-you to those of you who’ve followed me through this little blogging adventure, for your kind comments, ‘likes’, and contributions.  We did it!  24 days of daily blogs for Advent.  Well, it’s Christmas tomorrow, NORAD is tracking Santa towards us as I type (best get to bed before he gets here!), the Boxing Day ham is boiled and glazed, the gifts are wrapped, and the giblet stock is made.

Giblets are so often overlooked.  The grotty little plastic bag that accompanies any ‘special’ roasting bird (sadly now completely absent from generic supermarket chickens) and which, I fear, most people will be throwing away some time tomorrow morning.  Offal is so horribly out of fashion that an awful lot of people – certainly those who aren’t of the older generation – have no idea where to start.

Last year, on Christmas morning, while I was waiting for my guests to wake up, I blogged my ‘how to’ for giblet stock.  I didn’t have any photos at the time, so here it is again, in the hope it’ll be useful to some of you, re-edited and with some new photographs to help you along!

If you’ve bought a bird for roasting today, there’s a good chance it’s come with a little plastic packet of ‘bits’.  Whatever you do, don’t throw them away!

All the gibletsThese bits are the giblets – the offal – from top-left, clockwise –  the neck (in one or two pieces), the gizzard, the liver, and the heart.  The gizzard is a thick, muscular structure with two hard abrasive grinding plates that the bird uses to crush up corn and other food items to make them digestible.  

Giblet stock is quick, simple, and makes the most wonderful Christmas gravy.

I have a goose this year, but the following applies just as well if you have a chicken or turkey.  Personally, I use the goose heart and liver in one of my stuffings, so only the neck and gizzard are available for the stock.  But if you’re not going to use the heart and liver this way, just chop them roughly and add them to the stock-pot with the rest of your giblet meat.

Stock vegetables, herbs and spicesIn addition to the giblets, you need the following:

  • Stock vegetables.  I use one onion (red or white) and a couple of carrots.  I don’t like celery so I don’t use it, even though it’s the often-quoted third member of the stock vegetable trinity.  But if you do like it, you should add a couple of sticks.
  • A bouquet garni.  This is just a posh culinary term for some herbs. I use some bay leaves, rosemary, and sage, along with some whole peppercorns.  Dried herbs are fine, if you don’t have fresh to hand.
  • Water.  Glug of white wine (optional).
  • A splash of olive oil.

Prepared gizzardsPrepare your gizzard by cutting away and discarding the hard plates (use a small sharp knife inserted below and parallel to the plates).  It can be a bit tricky to get your knife through the outer membrane, but once it’s in, as long as it’s sharp enough, you can just run it behind the plate.  Discard the hard plate material, along with any grotty-looking offcuts.  Then, simply chop the rest of the meat roughly into cubes.

Brown giblets and vegetablesAdd a splash of olive oil to a nice big saucepan, and brown the neck and gizzard meat, and then add the roughly chopped onion and carrots and sautee for a couple of minutes.  Now add about a litre of water (and the splash of white wine if you want) and the bouquet garni, bring to the boil and simmer for about an hour.  

Stock, before simmeringOnce you’re happy with your stock, strain it, discarding the solids, and return the stock to the pot and boil again until reduced in volume by half.  That’s it.  Set aside in the refrigerator until you make your gravy (the stock will easily keep overnight – so make it on Christmas Eve if you have time). You won’t regret it!

Well, here we are – the advent candle is all but burned down, and the Blog Advent journey is over.  I’d love to say it’s been an undiluted pleasure – more than one evening I’ve got home from work, sat down after dinner, and muttered something about ‘still having to do the sodding blog!’, but it’s great to know that I can do it, even at this time of year.

Advent - day 24

I plan to have a few days off now – I think Hubby’s feeling like a bit of a blog-widow!  I wish you all a wonderful Christmas (don’t forget that tomorrow is only the start of the 12 Days of Christmas, which go on until Epiphany – it’s not called Twelfth Night for nothing!), and after the dust has settled I’ll have a few updates, and things which are still secrets for now, to share with you.

Merry Christmas everyone!

I’m trying to write a post a day during Advent, so, please come along with me while I try to Blog Advent – the Country Skills Way – and forgive me if I don’t quite manage it!

Read more from the Country Skills blog >>