Mustard and Rosemary Chicken, from Chicken Meals in Minutes – Cooking the Books, week 20

Hurray! I’ve rescued the pictures from the faulty memory card, so we can skip back and catch up with The Missing Episode!

This is rather a neat little recipe, which makes a great quick supper. It’s full of flavour, quick, fresh, and (whisper it) healthy.

To serve two, you will require –

  • Mustard chicken ingredientsTwo chicken breasts, skin on (my preference)
  • A whole lemon
  • 2 tsp grain mustard
  • 2 tsp chopped fresh rosemary (you could substitute about 1 tsp of dry)
  • 1 clove of garlic
  • 300g potatoes (small new-type potatoes would be ideal)
  • 125g baby spinach leaves
  • Butter
  • Olive oil
  • Salt and pepper

A quick note on chicken, first – if you buy chicken portions from the supermarket, stop it right now. Dividing a whole chicken into portions is so easy, with a little practice it can be done in a minute or two. You will save money, and get better portions (the chicken breast portions you buy are woefully under-sized and over-priced compared with buying a whole roasting chicken), and also not be participating in the stupidity that sees the UK import white chicken meat from places like Thailand and Vietnam, while at the same time we’re net exporters of chicken leg meat. Madness. Right, rant over, and on with the recipe!

Make marinadeIn a bowl, coat the chicken breasts with the mustard, rosemary, crushed garlic, a pinch of pepper, a squeeze of lemon juice, and a little glug of olive oil, and set aside to marinade for half an hour or so, if you have the time – don’t worry if you’re in a rush, though, you can go ahead and cook straight away. I had two wings from my portioned whole chicken, so I put those in, too.

Chicken in roasting dishThe recipe calls for cooking the chicken on the BBQ (it’s an Australian recipe, after all), but for UK convenience, on a slightly drizzly evening, I chose to roast it in the oven. Preheat your oven to 180C. In a roasting tin or tray, arrange your chicken pieces. Once the oven is up to temperature, slide in the chicken, and roast for 35 – 40 minutes.

Buttered boiled potatoes
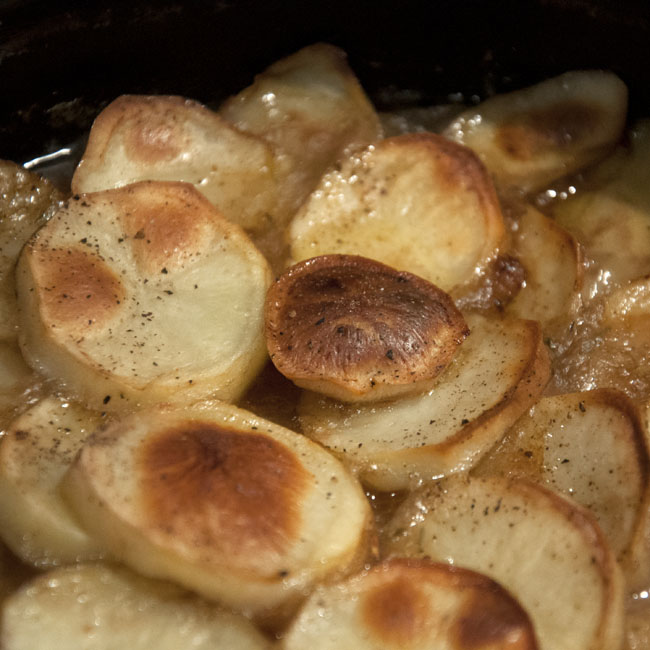
After about 10 minutes, cut your potatoes into bite-sized pieces (or use small new or salad-type potatoes, which you might just want to halve) and boil until tender. Drain, and mix in a good dollop of butter. Your potatoes can wait now with a lid on until the chicken is ready, which shouldn’t be long.

Once the chicken is done, remove from the oven, and rest, covered loosely with foil. Pop the buttered potatoes back on the hob, and add the spinach to the pan with a tiny splash of boiling water. It will look like far too much spinach, but don’t worry, it will wilt down quite dramatically. Shake & mix the veggies from time to time, with the lid on, until the spinach is all wilted down. Season with plenty of black pepper, and a little salt to taste.

That’s it, it’s ready to serve, with a slice of lemon on the side.

Mustard and rosemary chicken - serve

There are some peculiar features to this recipe. Presumably they can be explained by the whim of the publisher, which is The Australian Women’s Weekly. I’m the last person to over-season with salt – I find it quite intrusive, if done to ‘cheffy’ levels – but the recipe mentions seasoning nowhere, and if you skip the black pepper, particularly, I think the flavours will be the weaker for it. I presume there’s a salt-avoidance rationale behind it somewhere. Likewise the recipe expects skinless breast fillets, which is bound to be down to fat-reducing, but compromises on flavour and texture for me. Make up your own mind!

The combination of mustard and rosemary flavours works really well – I say this as someone who is not historically a great fan of mustard as a dominant flavour – and the chicken does go very well with the potato and spinach side dish. It was quick and simple to prepare but the flavours are big, fresh, and quite bold without being overpowering or unbalanced. This is healthy everyday food that doesn’t set off ‘diet food’ alarm bells. I recommend you try it!

Chicken Meals in Minutes - cover**
Chicken Meals in Minutes, The Australian Women’s Weekly Cookbooks
ACP Publishing Pty Ltd, 2002
ISBN 978-1-863-962605
Soft cover (magazine binding), 120 pages, full colour. RRP £5.99.

[Full disclosure: This is my book. I have received no payment or sponsorship for this post, nor have I accepted a review copy. I do not have an amazon affiliate account and do not profit from any links provided.]

This is an odd little book, and one of a series. I can’t rightly remember how it came into my possession, whether it was a gift or a bargain bin purchase, but unlike many ‘collection’ books, it’s rather better than you might expect from the outside!

Chicken Meals in Minutes - page viewAs you might suspect from an Australian mass-market recipe collection around the turn of the millenium, it’s quite heavy on asian-influenced dishes without requiring a larder full of specialist ethnic ingredients; this makes it refreshinly easy to shop for in our local village Co-op! The food is light, fresh, and very suitable for summer eating. There are a variety of BBQ dishes which I will definitely return to during the course of the summer.

The lack of seasoning follows through all the recipes, and can only have been an editorial decision. Fat and kJ values are given for the recipes, but the collection doesn’t appear to have been selected on this basis, which is refreshing! All in all, it’s a nice surprise, then. Better than expected. I wouldn’t suggest you all dash out and buy it, but if it happens to be hanging out on your bookshelf, perhaps give it another look?

‘Cooking the Books’ is my self-imposed blog challenge for 2014 – I’ll be trying to cook a new recipe from one of my (rather extensive!) collection of cookbooks once a week, write it up and review it. Wish me luck!

Read more from the Country Skills blog >>

Elderflower Vinegar, From the Forager’s Kitchen by Fiona Bird – Cooking the Books, Week 22

No elderflower champagne for me this year (*sob*) but I refuse to miss out completely on the floral bounty of the season. Last year I made a very small experimental batch of elderflower vinegar – just stripped some flowers into a Kilner jar, topped up with cider vinegar, and forgot about it for a couple of weeks before straining it and putting it back into the bottles it came out of. I was delighted with the results, which captured the fresh elderflower fragrance remarkably – even more so, if it’s possible, than cordial or champagne do. It was a tiny batch, so I had very little to share around, but everyone who tried it seemed amazed by it.

So this year, obviously, I had to make a little more. Not as much as I would have liked, because it has to move house with us in a few weeks, but I thought I could just about justify a two litre batch… And then I thought, before diving straight in and just making it up as I went along like last year, I ought to have a look at the cookbooks…

Forager's Kitchen - page I wasn’t really expecting to find anything, but The Forager’s Kitchen came up trumps – it has some remarkable infused vinegar suggestions, including violet vinegar (which is the recipe that first drew me in to this fabulous little book), so I shouldn’t really have been surprised I guess! Fiona’s elderflower vinegar is a fair bit more sophisticated than my efforts last year, with a double-infusion and the addition of a little lime zest. So here goes!

Picked elderflowersFor a two litre batch, you will require –

  • 60 elderflower heads (30 now, 30 later)
  • Two litres of cider vinegar
  • One lime
  • A 2l Kilner jar or similar

Pick 30 your elderflowers on a warm, dry, bright (and ideally sunny!) day.

Shake off any visible insect life, but don’t under any circumstances be tempted to wash them, as you’ll flush away all the beautiful flavour. Now you need to remove the tiny little flowers from the flower heads. Yes, I know it’s a pain, but sit down comfortably, and you’ll be done in about half an hour.

All the little flower heads in a jarMy technique is more like rubbing the flowers between my thumb and fingers than picking individual flowers, and once you’ve got the knack it’s surprising how quickly you can do it. The flowers will probably be crawling with tiny little black insects – if this bothers you, try not to look at them! (We all eat bugs all the time – even veggies and vegans! – you only have to look at the FDA permitted levels of contaminants in food products if you don’t believe me!)

Top up with vinegarTransfer all your tiny little flowers to a clean sterilised 2l jar, and top up with cider vinegar. Put the caps back on the empty bottles and put them safely to one side, you’ll want them again later.

With a vegetable peeler, peel the lime zest in strips, taking as little of the white pith as you can, and add this, too. Seal up the jar and put it somewhere nice and warm, shaking occasionally, for 10 days.

Don’t waste the rest of your lime, slice it up, and put it in a bag in the freezer. It’ll still go a treat in your gin & tonic!

Peel lime zest Slice lime Bag lime for the freezer

After about ten days, pick yourself 30 more flower heads, remove the flowers as before, strain off the vinegar from the elderflowers and lime zest, and replace them with the freshly picked flowers. I wouldn’t worry about really fine filtering at this stage, a normal sieve ought to be fine. Put the jar back somewhere warm and repeat the occasional shaking for several days.

Place in a warm place, shake occasionally

You’ll see that there’s quite a lot of pollen settled at the bottom of the jar. If you want a really clear vinegar, you’ll want to filter it finely before bottling. I suggest initially straining off the flowers, before passing the vinegar through a fine jelly bag or several layers of muslin. Once filtered, return the vinegar to the bottles it came from. I don’t bother to re-sterilise these, by and large, since they shouldn’t have had a chance to become contaminated since the vinegar was poured out, as long as they’ve been kept capped. Fiona advises using sterilised bottles, though, and she’s probably right!

The vinegar will keep in a cool larder cupboard for at least a year, if you can make it last that long!

**
Forager's Kitchen - coverThe Forager’s Kitchen, by Fiona Bird
CICO Books, 2013.
ISBN 978-1-908862-61-7
Hard cover, 192 pages, full colour. RRP £16.99.

[Full disclosure: This is my book, which I bought. I have received no payment or sponsorship for this post, nor have I accepted a review copy. I do not have an amazon affiliate account and do not profit from any links provided.]

This is such an incredibly beautiful book that it’s easy to forget what a great resource it is for wild eating! It covers a huge range of foraging habitats and seasons, hedgerow to coastline.

There are plenty of foraging handbooks out there (I’ve reviewed a couple in the past) – what makes this book remarkable is the quality, inventiveness and sophistication of the recipes, all of which genuinely seem to respect and require the foraged ingredients. There is a freshness and originality about these recipes that I’ve rarely seen elsewhere and which makes me want to make them all, just as soon as I can wrap my grubby little forager’s mitts around the required ingredients!

If you’re at all interested in wild food (with the proviso that it really is UK-focused, and probably progressively less use the further afield you might be) go and buy this gorgeous little book!

‘Cooking the Books’ is my self-imposed blog challenge for 2014 – I’ll be trying to cook a new recipe from one of my (rather extensive!) collection of cookbooks once a week, write it up and review it. Wish me luck!

Read more from the Country Skills blog >>

Cannelloni al Forno, from ‘Pasta’ – Cooking the Books, week 21

Apologies, first, for the late running of this blog series! Those more observant souls among you will have noted both that we’ve arrived at week 23 of the calendar and only managed to reach week 21 of the series, and that we seem to have skipped inexplicably over week 20 (technical difficulties, I’m afraid – I’m waiting for an SDHC card reader to come so that I can hopefully recover the images from a corrupted memory card!). I’m doing my best to get caught up, despite life happening in the form of an imminent house move, so please bear with me!

Apologies also for the quality of the photography in this (and subsequent) blog posts – until I’ve sorted out the memory card issues on the dSLR, we’re on iPad photographs I’m afraid!

Pasta - cover viewThis recipe is another Hubby-request. ‘I fancy cannelloni’, he said, when I asked what I should make for dinner. Now, I don’t believe I have ever made cannelloni in the eight years of our marriage (or before, for that matter), and I have no idea what put the idea in his head, but any excuse for a new cookbook is a good one, so I dived straight for this rather thick paperback tome, titled ‘Pasta’, which surely would contain the answer?

To make things all the more interesting, I’ve unearthed our recently-neglected pasta machine in the course of pre-move tidying, so why not really push the boat out and make a batch of fresh pasta, just for the occasion?

I must warn you, before you’re tempted to wade in and make this recipe – it takes an inordinate amount of time (about three hours), will make just about every pot, pan, bowl, and gadget in your kitchen dirty, and the end result is… well, read on, we’ll get to that bit!

For the fresh egg pasta, you will require –

  • Pasta ingredients300g ‘type OO’ flour (or strong white bread flour, if you can’t get the proper stuff)
  • Three eggs (please ignore the photographs only having two!)
  • A teaspoon of finely-ground sea salt
  • Semolina (optional but helpful)
  • A hand-cranked (or electric, if you’re posh!) pasta machine

Of course, you can skip the fresh pasta making and either use fresh lasagne sheets or prepared cannelloni tubes from the shop, if you prefer!

Make your doughIn your roomiest mixing bowl, add the flour and make a well, and break the three eggs into the centre. Sprinkle the salt and mix it into the eggs, breaking up the yolks, before slowly incorporating the flour. If you have hens like mine who tend to lay rather large eggs, you may need to add a little extra flour to stop the pasta dough being too sticky.

Once all the flour is incorporated, remove the dough from the bowl and kneed for about five minutes on the countertop. The dough will be much denser and firmer than bread dough, so don’t worry if you’re used to this. Then wrap the dough in cling film and set it aside for 20 – 30 minutes.

[You should start cooking the mince now, but for the sake of clarity I’m going to stay with the pasta and come back to the filling in a minute!]

Pasta machineFix your pasta machine firmly to a table or worktop using the clamp, and spread the surface generously with semolina. On the widest setting, run the pasta through the rollers. It will look like a complete dog’s dinner, torn and lumpy. Don’t worry. Fold the resulting mess in half, dust with semolina. If you haven’t got semolina, it’s not a big problem, just use flour – but you’ll miss out that characteristic texture. And repeat. And repeat. You’ll probably want to push it through the thickest setting at least ten times (this is essentially part of the kneading process) until what comes through is even textured, silky, and has relatively neat edges.

Single sheet of finished pastaThen, one step at a time, start to narrow down your rollers. The pasta sheet will get longer as it gets thinner (obviously, I suppose – but quite dramatically so!) so if it’s becoming difficult to handle, you can cut it in half. Keep the surface well dusted with semolina or the pasta will tend to stick to itself if you fold it over to handle it. As the sheet becomes thinner it should become really soft and silky – it’s really great stuff!

Finished pasta sheetsIn the end, it should be somewhat transparent (you can see the print of this oilcloth table cloth straight through it), silky and flexible. Cut out 12 lasagne-sized sheets and dust these generously both sides with flour or semolina, cover with a tea towel or cling film, and set aside. Any extra cut into sheets (or into ribbons if you prefer) and dry to use another day – hang them or lay out well spaced on a baking sheet lined with grease-proof paper and well dusted with flour or semolina.

For the meat filling (to serve four) you will need –

  • 300g of good quality minced beef
  • 50g of cold cooked ham or sausage. I improvised and used a Cumberland sausage along with a thick slice of smoked pancetta, because that was what I had available. I don’t think it matters!
  • Half an onion
  • One clove of garlic
  • Dried mixed herbs
  • 100ml of stock (I used vegetable bouillon powder, but beef stock would be better)
  • 2 tbsp bread crumbs
  • A handful of freshly-grated parmesan cheese
  • 1 egg
  • Salt and Pepper

Fry beef with onions and garlicStart by frying off the beef, finely chopped onion and minced garlic in a little olive oil until lightly browned. This will take about 5 – 10 minutes. Then add the stock, a teaspoon of dried mixed herbs, and a good pinch of pepper, cover with a lid, and simmer for about 20 more minutes. By this time most of the stock will have been absorbed and the onions will be extremely tender. Set aside in a bowl to cool.

[Now, you’ll want to start on your tomato sauce – but for the sake of clarity, again, I’ll follow through the beef filling first. Don’t worry, I’ll add a timeline at the end – yes, it really is that sort of recipe!]

Filling ingredientsChop up your cooked, cold ham or sausage, and add this to the cooled beef, along with the parmesan cheese, breadcrumbs, and egg, and mix well. The recipe tells you to taste this for seasoning, which, given you’ve just added a raw egg, probably isn’t advice that many people ought to follow – I would trust your seasoning to date, remember your ham / sausage, parmesan and stock are likely to contain salt, and just add a little black pepper.

Take each sheet of fresh pasta, spoon on some of the beef filling, and roll. Set these aside for now. Now to the tomato sauce.

Fill your cannelloni    Set filled cannelloni aside

For the tomato sauce –

  • Half an onion
  • Half a carrot
  • 1 clove of garlic
  • A celery stick (if you like – I really don’t so I don’t keep them in the fridge!)
  • 1 can of chopped tomatoes (400g)
  • 1/2 tsp dried basil
  • 1/2 tsp dried oregano
  • Olive oil, salt and pepper

Finely chop the onion, carrot (and celery, if you’re using it) and mince the garlic, and fry these gently in a little olive oil until softened.

Tomato sauceNow add the can of chopped tomatoes, herbs, salt and pepper (I used a little vegetable stock powder instead of salt to season, to compensate for the lack of celery – this is something I often do when making sauces, actually!). I also nearly always add a little splash of vinegar to tomato sauces – balsamic is good, but I prefer the fruity character of my home-made elderberry vinegar. Add about half a can of water, too.

Mix well, cover and simmer for about 20 minutes. Once it’s cooked, blend with a stick blender or in a food processor so it’s (nearly) smooth.

Assemble dish with tomato sauceYou can start to assemble the dish now – put a thin layer of tomato sauce in the bottom of your oven dish, then arrange the filled cannelloni (in one layer if at all possible!) followed by the rest of the tomato sauce on top.

But we’re still not there yet! Preheat your oven to 190C.

Now you just need the white sauce…

  • 30g butter
  • 30g plain flour
  • 600ml milk
  • Nutmeg (whole, ideally)
  • A handful of freshly grated parmesan

Ready for the ovenMake your white sauce – melt the buter gently in the pan, add the flour and stir in, and cook the butter and flour mixture for a minute or two (keep stirring). Then add the milk, a little to start with and whisk it into the roux, then add the rest and cook until you get it about the thickness of double cream. Add in some freshly grated nutmeg to taste.

Pour  the white sauce over the top of the cannelloni, and then sprinkle over the parmesan. Put the whole thing in the oven for about 40 – 45 minutes until rich golden on top and the pasta is tender.

That timeline, for clarity (you really do want to do it this way, if you do one at a time the whole thing will take closer to five hours than three!) –

  1. Make pasta dough, set aside to rest.
  2. Cook off beef with onion and garlic, add stock and cover
  3. While the beef is cooking, roll out the pasta into sheets and cut up
  4. Once the beef is done, set aside to cool
  5. Start veggies for tomato sauce
  6. Add tomatoes and set to simmer
  7. Make up the meat filling with additional ingredients
  8. Assemble your cannelloni with their filling, set aside
  9. Blend tomato sauce, assemble tomato & filled cannelloni in oven dish
  10. Set oven to 190C
  11. Make your white sauce, pour over, sprinkle parmesan
  12. Put in oven
  13. Finally pour yourself a well-deserved glass of wine.
  14. But don’t relax too much, you should probably tackle the enormous mountain of washing up!
  15. Serve and enjoy!

Cannelloni al forno

*Phew*! Exhausting or what?

So, what about the recipe? Well, I scaled it down from serves-6 to serves-4 by reducing the quantities by 1/3rd – all apart from the tomato sauce, which I really couldn’t be bothered with, since it used a whole can of tomatoes, and sensible quantities of other things. Despite this, the cooked cannelloni is really very dry – tastes good, but all of the moisture in the tomato and white sauce was completely sucked into the pasta.

12 cannelloni between 4 is too many, I think – I would probably reduce to 8 cannelloni but keep the same amount of filling. I think you could easily get away with doubling the volume of the tomato sauce, though if you reduced the pasta by 1/3d you may get away with increasing by 50%. I would add some extra stock, or maybe some wine, and increase the carrot to a whole one. I might also consider adding some ricotta cheese to the beef filling, to moisten it a little.

The recipe proofreading leaves a lot to be desired. The onion appears in the ingredients list for the beef filling but is never mentioned in that part of the instructions, so I just had to guess (I can’t see that you would want to leave it out, it seems essential to me). While I personally am willing to eat raw egg, advising tasting for seasoning after this addition in a recipe without caution is probably inappropriate.

Re-heated with extra stockI re-heated the second half of this for lunch today (adding about half a pint of good rich stock made from roasting juices) covered tightly in a medium oven. It was improved by the extra liquid, and reheated well.

I don’t think I would ever re-make this recipe just for the two of us. It’s far too much time, trouble and washing up! It is quite a promising recipe, but I wouldn’t call it good, as it stands. There are some interesting flavours and textures. I think a few rounds of trial and error and you could create something really fabulous from this starting point, starting by correcting the obvious deficiencies above – but I’m not convinced I wouldn’t be better off just finding a better cannelloni recipe!

Modulo the above, it *could* be a really good meal for feeding a large crowd, especially as you could make the cannelloni and the tomato sauce ahead of time – the day before, even (keep them separate, and in the fridge, until you’re ready to bake).

**
Pasta, Jeni Wright (contributing editor)
Hermes House (Anness Publishing Ltd), 2003
ISBN 978-1-843-099-277
Soft cover, 512 pages, full colour. No RRP published.

[Full disclosure: This is my book. I have received no payment or sponsorship for this post, nor have I accepted a review copy. I do not have an amazon affiliate account and do not profit from any links provided.]

Pasta - inner page viewThis is a cookbook with a ‘contributing editor’ instead of an author, and as I’ve worked though the cookbooks on my shelf, that’s becoming more and more of a red flag. Admittedly on a sample size of a single recipe (out of the 350 ‘inspirational recipes’ promised on the cover), there are mistakes, omissions, and the result, while it shows definite promise, is moderately unsatisfactory as-is.

The frustrating thing is that, due the highly-illustrated style of cookbook, someone has clearly cooked this recipe in order to photograph it – if they noticed the problems with the recipe, nothing was done about it!

I may give this book a second try, but I think there’s a good chance of this one ending up in the charity-shop pile in due course. I’m learning my lesson, though – at the end of this year of recipes, I think I’m going to be a much more discerning customer of the bargain bin!

‘Cooking the Books’ is my self-imposed blog challenge for 2014 – I’ll be trying to cook a new recipe from one of my (rather extensive!) collection of cookbooks once a week, write it up and review it. Wish me luck!

Read more from the Country Skills blog >>

Lean Lamb Hotpot, from The Hairy Dieters – Cooking the Books, week 19

This little cookbook was an impulse purchase when it came out a couple of years ago, like many impulse purchases soon relegated to the shelves and mostly ignored. But I was looking for something to help me empty the freezer and this hotpot was just the job to use up a couple of lamb chops!

[Yes, I know I’m running behind with these blog posts! Life is a bit doolally just now, I’m afraid. But if everything goes well there might even be two further ‘Cooking the Books‘ posts before the end of this week!]

To make this hotpot for two, you will need a casserole dish with a lid (or some stout tin foil) and –

  • Hotpot ingredients350g lamb chops or leg steaks, deboned, trimmed, and cut into pieces 2-3cm in size
  • 1 onion
  • 3 carrots
  • 250g potatoes
  • Lamb stock cube (enough for 300ml reconstituted)
  • Fresh or dried rosemary and thyme
  • Worcestershire sauce
  • Oil
  • Plain flour
  • Salt and pepper

Preheat your oven to 170C. I’m not on a diet (if you read this blog regularly, that hopefully goes without saying!) so I was less than entirely fussy about trimming ‘any visible fat’ off the lamb. I did trim off the biggest chunks, though!

Brown off the lambSeason the lamb a little and fry brown it off in batches in a frying pan with a little oil (just a single teaspoon, if you’re following the recipe!) before transferring to the casserole dish. I also softened the onion and *whisper it* added a crushed clove of garlic, which may not be quite traditional for a proper Lancashire hotpot!

Mix ingredients in casserole dishPeel and cut the carrots into chunks. Add the carrots and onions to the meat in the casserole dish, sprinkle over 1.5tbsp of plain flour, and mix well. Make up 300ml of lamb stock with the stock cube (mine made 450ml, so I used 2/3rds) and add this to the casserole dish, along with a generous pinch each of dried rosemary and thyme and a tablespoon of Worcestershire sauce. Finally add a big pinch of black pepper, and mix well.

Arrange sliced potatoesPeel and slice the potatoes about 5mm thick, and arrange them decoratively over the top. Add an extra sprinkle of pepper over the top, cover snugly and pop in the oven for 1hr.

Browned on topAfter an hour, take off the lid and return to the oven for a further 45 minutes. The hot pot is done when the potatoes are beautifully browned.

Serve with lovely seasonal steamed vegetables, and enjoy!

Tuck in!

**
The Hairy Dieters, by Dave Myers and Si King
Weidenfeld & Nicolson, 2012
ISBN 978-0-297-86905-4
Soft cover, 192 pages, full colour. RRP £14.99.

Hairy Dieters - cover[Full disclosure: This is my book, which I bought. I have received no payment or sponsorship for this post, nor have I accepted a review copy. I do not have an amazon affiliate account and do not profit from any links provided.]

I think I’ve been a bit unfair to this cookbook – it was bought with ‘good intentions’, particularly because I hoped it might contain some packed-lunch inspiration. The ‘lunchbox’ section at the back turned out to be rather short and a bit disappointing, and so it went to live on the shelves, more or less ignored until I got it out again last week for the blog challenge.

Hairy Dieters - page viewUnusually – particularly as I’m having to be especially fussy about using what I’ve got and not buying random ingredients just now – I had a choice between several different recipes, and didn’t need to substitute creatively, either!

These recipes are, first and foremost, good decent food, selected because they happen to be lower in fat / calories / whatever. Now, I fundamentally don’t like diet recipes, because they tend to include a raft of nasty ‘cheats’ to con the flavour back into food which has been lost due to removing fats, oils, and carbs. There’s none of this here, just normal store-cupboard ingredients; if you soft-pedal on the slightly obsessive fat-avoidance, there’s some great stuff here. From Si and Dave of ‘Hairy Bikers’ fame, I suppose that should come as no real surprise!

There are plenty of recipes here that I’m going to want to make in the future – from the cassoulet, to a selection of ‘fake-away’ curries and Chinese meals, stews, pies, and one-pot suppers. Ignore the ‘diet’ marketing, and add this little cookbook to your collection – this is a (coincidentally healthy) weekday-supper goldmine!

‘Cooking the Books’ is my self-imposed blog challenge for 2014 – I’ll be trying to cook a new recipe from one of my (rather extensive!) collection of cookbooks once a week, write it up and review it. Wish me luck!

Read more from the Country Skills blog >>

BBQ Tikka Chicken, from Feasting on Flames by Annette Yates – Cooking the Books, week 18

BBQ season is here! The evenings seem noticeably longer, almost every day, and it’s warm enough to hang around outside until sunset. And as if that wasn’t enough, it’s a bank holiday weekend here in the UK. So really, I had to go to the cookbook collection to find some BBQ cooking inspiration.

Finally insert skewers to hold shapeI have modified this recipe slightly – the original calls for six bone-in breast pieces, but I much prefer to do a whole bird. You could portion it up and cook the pieces separately, but I think doing it whole, as a spatchcock, is much more fun!

To make this, you will require –

  • One whole chicken, prepared as a spatchcock or divided into portions
  • 6 tbsp natural yoghurt
  • 1 small onion
  • Tikka BBQ ingredients2 large garlic cloves (I used smoked cloves, as I had them)
  • 2 tbsp garam masala
  • Zest and juice of one lemon
  • A thumb-size piece of fresh root ginger
  • 1 tsp malt vinegar
  • 1 tsp paprika (I used quite a mild, smoked paprika – you could use a hot paprika for a spicier result)
  • 1 tsp salt

Ingredients before mixingFinely chop your onion, mince or crush the garlic cloves, remove the zest from the lemon with a grater or zester (or use a vegetable peeler and slice the peel finely), and grate the root ginger finely. For a smoother result, you could put the onion, garlic, lemon zest and ginger through a food processor to get a thick paste.

Combine all the ingredients in a large wide bowl, and mix.

Make incisions into chickenTake your chicken, and make several deep slices into the breast and thigh meat, to help the marinade permeate. Before you start rubbing the marinade into the chicken, it can be useful to set a small bowlful aside for basting onto the chicken during cooking – it’s important to set it aside now, if you’re going to do this, as the rest of the marinade is going to end up mixed with raw chicken juices, and probably shouldn’t be put back on later in the cooking process!

Rub in marinade and set asideRub the marinade all over your chicken, top and bottom, and into all the slices, cover, and set aside in the fridge for at least a couple of hours (longer is fine!).

You can either cook this chicken entirely on the BBQ, or do most of the cooking in the oven, and then finish it off over the coals.

Cook over charcoalThe latter is a great idea if you’re not confident in cooking large items on the BBQ – I would roast it on a rack for about 1hr at 180C before finishing it over the coals. You can check that it’s essentially cooked with a meat thermometer before transferring to the BBQ grill. For a crispy skin, BBQ the ‘inside’ first, and then finish it skin-side down. Dividing the cooking like this is also really handy if you’re cooking for lots of people, as it leaves the BBQ grill free for cooking other items in the meantime!

Beautiful crispy skinFor full BBQ cooking, I like to start skin side down, turn over after about 20 minutes, and then turn back skin-side down to finish. Keep the chicken covered during cooking, with a tent of heavy tin foil or a BBQ lid (if you have one). We have a big old aluminium wok lid which is great for covering things while they cook on the BBQ. Keeping the chicken covered means it cooks much more quickly and evenly.

Divide up into portionsIf you’re going to cook this way, do use a meat thermometer to make sure your chicken is properly cooked through – you’re looking for a minimum internal temperature of 75C at the centre of the thickest part of the breast. If you’re at all unsure of your ability to find the thickest part, then shoot for a slightly higher temperature to give you a margin of safety.

Once your chicken is cooked, divide up into portions using a sharp knife – for me, half a breast portion and a thigh or drumstick per person is a nice serving size. Serve with rice and a green salad dressed with a nice mustardy vinaigrette.

Serve your tikka chicken

This is a really subtly flavoured, aromatic tikka and will suit those with spice-sensitive tastebuds. If you like yours a bit hotter, use a hot paprika and add a whole finely chopped fresh or dried chilli (or the appropriate amount of dried chilli flakes).

**
Feasting on Flames - coverFeasting on Flames, by Annette Yates
The Apple Press (Quintet Publishing Ltd), 1998
ISBN 978-1-85076-954-0
Soft cover, 128 pages, full colour. RRP £8.99.

[Full disclosure: This is our book, which we bought. I have received no payment or sponsorship for this post, nor have I accepted a review copy. I do not have an amazon affiliate account and do not profit from any links provided.]

This paperback cookbook pretty much does what it says on the tin, with a good variety of fish, poultry, meat and vegetable dishes, and even some deserts, for cooking on the BBQ. These are accompanied by a collection of side dishes, and some menu suggestions, making this a pretty decent one-stop shop for anyone who wants to extend their BBQ cooking beyond the classic sausage, burger and drumstick fare we’re all so familiar with!

Feasting on Flames - page viewI like the fact that these recipes (like the tikka recipe above) are based on fresh ingredients, rather than taking the short-cuts of using prepared sauces and pastes, but it does mean the ingredient lists end up being quite long. They’re not unusual ingredients, though, on the whole, and should be in most people’s store cupboards. These are pretty quick, simple recipes, which cover a wide range of tastes and cuisines.

Is it a must-have book? No, probably not. It does what you’d expect, pretty competently, without any real ‘standout’ moments. There are, I imagine, many like it. If you get the chance to pick it up cheaply, by all means do, but I probably wouldn’t specifically seek it out. If it’s already on your shelf, and has been a bit neglected, maybe dig it out again and give it another look?

‘Cooking the Books’ is my self-imposed blog challenge for 2014 – I’ll be trying to cook a new recipe from one of my (rather extensive!) collection of cookbooks once a week, write it up and review it. Wish me luck!

Read more from the Country Skills blog >>

Pesto Pasta with Chorizo and Artichokes, from James Martin Easy Every Day – Cooking the Books, week 17

This is a book with good memories attached, it’s autographed and came directly from James Martin himself, at the masterclass I was privileged to attend a couple of years ago. For all that, I haven’t cooked from it very much at all – a good time to change that, then! I fancied something light and fresh, and this pasta recipe – particularly with the fresh home-made pesto, really caught my eye.

Pesto ingredientsFirst, you’ll need to make your pesto. You will need –

  • 50g of fresh basil,
  • A large juicy clove of garlic,
  • Three anchovy fillets,
  • A tablespoon of pine kernels,
  • 25g of parmesan, and
  • Olive oil

Toast the pine kernelsIn a dry pan, toast your pine kernels until they’re starting to go golden brown in places. Meanwhile, grate your parmesan cheese.

Now, you can do this the easy way, or the more interesting, but harder way! You can just fling all your ingredients into a food processor, blitz them up and add olive oil until you get the consistency you want. Easy, but boring, and for me the texture leaves a bit to be desired. So I prefer to make my pesto in a pestle and mortar. But don’t even consider this approach if your pestle and mortar isn’t of the very large and heavy variety – the sort that you might use for crushing the occasional fresh spices isn’t going to do the trick here!

Crushed garlic & pine kernelsStart by crushing your garlic roughly, then add the toasted pine kernels and break these up. You should add the anchovies at this stage, but I forgot so mine went in much later! It’s fine, though. Now roughly chop the basil into the mix a handful at a time, along with a bit of the grated parmesan, and a drizzle of oil, and work away at it. Yes, it is hard work, but you’ll get there in the end! Add as much olive oil as you need to get the consistency you want.

Fresh hand-made pestpThis fresh pesto is a beautiful colour – a lovely fresh bright green rather than the slightly brown colour of the stuff from a jar – and even if you’re buying your basil like I had to this time (regretfully, it came all the way from Kenya) and account for the full cost of a tin of anchovies, it still works out comparable in price to the shop bought stuff. Later in the year, when there’s plenty of home-grown basil available, it works out about half the price. So really, it’s a no-brainer.

Cover the pesto very snugly until you’re going to use it (I wrapped it tightly with cling film) – any leftover will keep in the fridge for several days in a jam jar. Pour in a little extra olive oil to form a layer over the surface to exclude all air, as the basil blackens quickly if exposed to oxygen. These quantities are generously enough for four people worth of pasta. I love how the handmade approach leaves variable-sized little bits of recognisable basil leaf in the mix, rather than rendering it all to a homogenous pulp!

Prepared fresh pesto

You can enjoy this pesto just as it is, stirred through freshly cooked pasta, with a sprinkling of parmesan. But I wanted something a little more complex. The recipe for ‘Pesto Pasta with Chorizo and Artichokes’ is on the page next door to the pesto recipe in James Martin’s book – but it’s really just a variation on our family favourite we know as ‘Pasta with Pesto and Stuff’ – where ‘stuff’ will often encompass some combination of bacon, chorizo, mozzarella, sun-dried tomatoes, artichoke hearts, olives… you get the idea. Perfect for a quick satisfying dinner straight from the store cupboard. What makes this variation special is the wonderful fresh pesto, and the thoughtful combination of additions.

Pesto pasta with chorizo and artichokesTo serve two, you will need –

  • About half a quantity of freshly made pesto (above)
  • 250g good quality dried pasta
  • 100g chorizo sausage
  • 100g artichoke hearts in olive oil
  • Parmesan
  • Salt, pepper, and olive oil

This is a really quick meal, if you’ve made the pesto ahead of time. (You could of course use pesto from a jar, but the result will be more ‘everyday family supper’ than ‘gastro treat’!)

Get a big pan of water boiling rapidly, and add a big pinch of sea salt and a glug of olive oil, before adding the pasta. I’ve said this before, but if you’re not in the habit of buying the really good, Italian, dried pasta, please do give it a go. Yes, it’s about twice as expensive as the supermarket own-brand stuff, but pasta is such a cheap ingredient that you’re really only talking an extra pound, or less, per pack. The difference is really striking – the cooked texture is much better, with a nice bite without going stodgy. The other mistake that many people make when cooking pasta is trying to cook it in too little, under-salted water. Use your biggest pan, the pasta loves plenty of space to move around. And don’t overcook it for goodness’ sake!

Thinly slice your chorizoAs soon as your pasta goes on, thinly slice your chorizo, and fry it gently in a frying pan, turning regularly, until it starts going crispy. Then set aside. Slice your artichoke hearts into segments, if they’re not that way already. Once your pasta is cooked, drain it, reserving about half a mug of the cooking water. Put the cooked pasta back in the pan, and pour over a glug of the seasoned olive oil from the artichoke jar, and toss them around so they don’t stick.

Now, quickly, mix in the pesto (about a desert spoon per person), the fried chorizo and the artichoke hearts, and some of the pasta water if you feel a bit of extra moisture is required. Shave over some nice curls of parmesan (you don’t need a special tool for this, a perfectly ordinary vegetable peeler works just fine!), a sprinkle of freshly ground black pepper, and serve immediately.

Pesto pasta ready to serve

Doesn’t it look mouthwatering? It tastes just as good as it looks, with wonderful peppery punchy aromatic freshness from the home-made pesto. Yes, the raw garlic is likely to hang around on the breath for a bit – you could use roast garlic instead but you’d sacrifice the hot bite that it contributes. Don’t leave out the anchovies, please, even if you don’t think you like them – they just augment the salty savouriness of the parmesan cheese (really effectively actually!), there’s nothing ‘fishy’ about this pesto, I promise! The cooked chorizo pieces have a lovely sweetness to them, and the artichoke hearts add a nice mild freshness.

This pesto is, I must admit, very similar to my previous home-made pesto recipe, except for the addition of the anchovies, which is inspired. It’s a small improvement but little incremental variations like this are so often the difference between ‘good’ and ‘fabulous’.

James Martin - cover**
Easy Every Day, by James Martin
Mitchell Beazley, 2012 (paperback edition)
ISBN 978-1-84533-667-7
Soft cover, 304 pages, full colour. RRP £14.99.

[Full disclosure: This book was autographed and given to me as part of a masterclass I attended with James Martin, which was a competition prize in 2012. I suppose, in some respects, it might be considered a review copy! I do not have an amazon affiliate account and do not profit from any links provided.]

James Martin - page viewThis book is actually a re-collection of recipes from two of James Martin’s older books, ‘Delicious!’ and ‘Eating in with James Martin’. There’s some really good stuff here – from pasta dishes like this one, and risottos, to lovely meat and fish recipes, breads, sweet treats, and even some preserves. There’s also a useful set of menu suggestions at the back, which makes picking three complementary courses for a special dinner a bit of a doddle.

Frontispiece - autographThe editorial slant is towards dishes that don’t require protracted preparation, and while in a lot of cases that gives lovely, simple, fresh results, there are some ingredients in use here, such as prepared tomato-flavoured pasta sauces for pizza toppings, which just feel like a shortcut too far for me; they’re not in my kitchen cupboards, I don’t like them – over-sweet and cloying – and I’m not going to be buying them just because James Martin says so!

That said, this is a minor gripe, really, in what is generally a really excellent collection of approachable recipes with a definite ‘wow’ factor. If you’re looking for a recipe book to help you find the confidence for dinner party entertaining – as well as some very posh family suppers! – this may be a good place to start.

‘Cooking the Books’ is my self-imposed blog challenge for 2014 – I’ll be trying to cook a new recipe from one of my (rather extensive!) collection of cookbooks once a week, write it up and review it. Wish me luck!

Read more from the Country Skills blog >>

Braised Beef with Horseradish, from The Slow Cooker Cookbook – Cooking the Books, week 16

I asked Hubby to select the cookbook for this week’s recipe and review, and of course he set me a challenge! The Slow Cooker Cookbook came into my possession by accident, mistakenly delivered as part of an order from Lakeland a few years ago; when I let them know, they said they didn’t want it back. So this rather smart-looking large format hardback made its home on my ‘tall cookbooks’ shelf and has been there, more or less ignored, ever since.

Slow Cooker Cookbook - coverThe main reason for this, you may have guessed, is that I don’t in fact own a slow cooker. I’ve had my eyes on one for a number of years, but I simply don’t have the storage space to put one away when not in use, or the counter space to leave it out all the time.

I’m currently coveting a Wonderbag, which if it works as well as they say it does, has most of the properties of a slow cooker without any power use – magic or what? But we’re on quite a tight budget just now, so purchases of new shiny things – even lovely energy saving ones! – are going to have to wait a while.

I knew we had a pack of lovely braising steaks in the freezer, so the recipe more or less chose itself. The rest of the ingredients are store cupboard and pantry standards – though there are rather a lot of them – which makes this a great economical recipe. I have made a few small modifications to suit the ingredients and quantities I had available. It would happily serve four – for the two of us it made two meals, and tasted just as good reheated on the second day.

To make this lovely braised beef dish, you will need about six hours, a large stock-pot, a frying pan, and –

  • Braised beef ingredientsFour small or two large pieces of braising steak – about 700g / 1.5lb in all
  • Plain flour
  • Oil for shallow-frying (I used rapeseed oil)
  • Four medium onions. I used two large spindle-shaped shallots, one yellow and one red onion, because that’s what I had. The recipe calls for twelve small round shallots – but I really can’t see what difference it makes.
  • Two garlic cloves
  • 1/4 tsp ground ginger
  • 1 tsp curry powder
  • 3 tsp dark muscovado sugar
  • 1 1/2 tbsp Worcestershire sauce
  • 3 tbsp creamed horseradish
  • 700ml of beef stock (I used a mixture of beef stock cubes, and vegetable bouillon powder)
  • Red wine, if available. Substitute this up to half of stock.
  • Two large carrots. The recipe calls for baby carrots. I don’t like baby vegetables much (unless they’re thinnings from the veggie garden!) and even if I did, they tend not to be available in our local village co-op.
  • 2 bay leaves.
  • Dried thyme (my addition)
  • Salt and pepper.

On a plate, season a couple of tablespoons of plain flour with salt and pepper. Cut the braising steak into large pieces (probably about 3 x 3 inches or thereabouts) and dredge in the seasoned flour. In the frying pan, heat a little oil, and then fry the pieces of floured beef quickly, just for a minute or two until they start to brown. Only do a few pieces at once, so you don’t crowd the pan, and once they’re done, transfer them to the bottom of your stock pot.

Now slice your onions into quarters though the root, so as to keep the layers together, and peel off the skin. Fry these in a little oil until they’re just starting to go golden, then add the garlic (minced, crushed or chopped very finely), the ground ginger and curry powder, and fry on for a minute or two so the flavours combine and the garlic just softens. Once you’re happy with it, add the onion mixture to the stock pot on top of the beef.

Make up your stock mixture with boiling water, or if you’re using real beef stock, which obviously would be better, heat it to nearly boiling on the stove. Add the liquid to the stock pot, followed by the sugar, Worcestershire sauce, horseradish, bay leaves, and a big pinch of dried thyme. Peel the carrots and slice them into ‘baby carrot’ pieces – I halved each carrot and then sliced these pieces into quarters lengthways – and add these, along with a big pinch of black pepper. I wouldn’t add any salt at this stage, especially if you’ve used stock cubes or powders – you can always adjust the seasoning at the end of cooking if you find it lacking.

Everything in the potMix well to combine everything, and put the stock-pot on the hob to bring it to a simmer. Meanwhile, heat the oven to 180C. Once the pot is boiling, fit the lid and put the stock pot in the oven. After the first hour, turn the oven down to 120 C and allow it to cook on for another four hours. It’s not a bad idea to take it out every hour or so and give it a gentle stir, as it will tend to form a skin on the surface as this layer dries out a little.

I served this lovely rich braised beef dish with roast potatoes and parsnips – I’m lucky to have two ovens, but if you only have the one then you can take the pot out of the oven and keep it just ticking over on the hob while you use the oven for your roast vegetables. In fact, you could do the whole thing on the hob, but it will require a fair bit more attention since it’s far more likely to catch and burn on the base of the pan.

I have to admit to having had my doubts about this recipe – the ground ginger and curry powder particularly I would never have thought to add to a dish of this sort. Through the long cooking process, they meld down into a deep complex earthy spicy character and lose their distinctive individual flavours. There’s a good but gentle heat to the finished dish, mostly from the horseradish. The braised beef is fork tender – the pieces break down further during cooking, yielding nice bite-sized pieces – and the carrots somehow avoid becoming mushy, developing instead a profound sweetness.

Braised beef - serve

I love this recipe, and will definitely be making it again. It’s a fabulous winter warmer, but would dress up (and scale up) very nicely for entertaining. It re-heats extremely well, so you could make it the day before, but given the long cooking process all the work for dinner is done just after lunchtime anyway, leaving plenty of time to sort out all the trimmings! For lunch today, we enjoyed the leftovers it with some lovely toasted buttered home-made bread, which was also great.

**
The Slow Cooker Cookbook, by Catherine Atkinson
Lorenz Books, 2008 (2nd edition)
ISBN 978-0-7548-1486-3
Hardcover, 256 pages, full colour. RRP £16.99.

[Full disclosure: This is my book (though it did come to me free of charge in slightly unusual circumstances!). I have received no payment or sponsorship for this post. I do not have an amazon affiliate account and do not profit from any links provided.]

Slow Cooker - page viewI must admit to having been a bit dismissive of this book – due to the lack of a slow cooker, yes, but also because these sorts of themed-collection cookbooks have a tendency to be a bit disappointing, and often feel cobbled-together to fill a gap in someone’s publication list, or as promotional items for some kitchen gadget or other.

Well, if the rest of the recipes in this book are anything like as good as this one, I’ve been neglecting a bit of a gem! Flicking through, I think it’s quite possible that they might be, though as the frontispiece credits 18 people in addition to the author for recipes, I can’t exclude a degree of variability! The book features a huge variety of different dishes – 220 in all, from the very traditional to the really quite unusual, and from a wide range of cuisines, though French influences seem predominant. There are the obvious braised and casserole dishes, like this one, but also far more unexpected things – I had no idea, for instance, that you might be able to make cakes and brownies in a slow cooker, or that they could be used as a ‘bain marie’ for cooking patés and terrines. Students with limited cooking facilities – take note!

I think there are recipes here which could help break regular slow cooker devotees out of a culinary rut, and plenty of ideas which are generally adaptable to slow one-pot cooking, with or without a slow cooker.

As for me, in due course – will I be buying a slow cooker, on the strength of this, or sticking with my instincts and trying that Wonderbag instead? I’m still not sure… watch this space!

‘Cooking the Books’ is my self-imposed blog challenge for 2014 – I’ll be trying to cook a new recipe from one of my (rather extensive!) collection of cookbooks once a week, write it up and review it. Wish me luck!

Read more from the Country Skills blog >>

Rhubarb Cocktails, from The River Cottage Year – Cooking the Books, week 15

Against the grain of this blog series, the recipe for this week is actually one that has been a regular pleasure going back all the way to my university days! I remember treating myself to this book, at about this time of year. It was an indulgence on my student budget, and a distraction, I suspect, from upcoming exams!

Love it or hate it (this is a bone of contention in my marriage – Hubby thinks it’s the Devil’s vegetable), it’s rhubarb season! This rhubarb syrup is delicate and fruity with subtle floral notes, and makes a glorious cocktail ingredient. It’s simplicity itself to make, too, and will keep in a jar or bottle in the fridge for longer than it will take you to drink it all (about a month, according to the recipe, but I’ve never managed to test this!).

You will need –

  • Rhubarb syrup ingredients400 – 500g of trimmed rhubarb (the pale pink forced rhubarb is fine, if that’s what’s available locally, and will produce a lovely syrup with a more delicate colour)
  • ~100g of sugar (I used golden granulated, but white sugar would be fine)
  • 2 oranges

Chop your rhubarb into ~1″ chunks and put them in a saucepan. Add the juice of your oranges (I ended up using three because they were disappointingly un-juicy ones) and four tablespoons of sugar.

Stew the rhubarb until soft

Stew the rhubarb gently until soft, then strain it. You can eat the rhubarb after straining if you like – it’s very tasty with ice cream, and waste not want not! Pour the syrup into a clean bottle or jam jar and stick it in the fridge to chill until you’re ready to use it.

Strain the stewed rhubarb  Strained syrup  Store in a jam jar in the fridge

My favourite way of using this syrup is mixed with sparkling wine to make a rhubarb bellini – a ratio of syrup to fizz of about 1:4 seems perfect for me, and makes a fresh, cheerful cocktail with one of the unmistakable tastes of spring. It would make a lovely little aperitif, I think – how about making it this Easter?

Rhubarb Bellini

Through my student years I’ve taken little bottles of this nectar to a few parties, and experimented with some different (and, indeed, ‘different’!) variations. I can report it’s good with almost everything, but do beware, mixed with ice cold vodka, this is glorious, and far more quaffable than is really good for anyone!

River Cottage Year - cover**
The River Cottage Year, by Hugh Fearnley-Whittingstall
Hodder and Stoughton, 2003
ISBN 978-0-340-828212
Hardcover, 256 pages, full colour. RRP £18.99.

[Full disclosure: This is my book, which I bought. I have received no payment or sponsorship for this post, nor have I accepted a review copy. I do not have an amazon affiliate account and do not profit from any links provided.]

Full of highly seasonal recipes for garden produce and hedgerow ingredients, of course I was going to be drawn to this book. It’s a smaller book than many of the River Cottage tomes, but none the worse for it in my opinion.

River Cottage Year - page viewIf you grow your own, or shop at farmers markets, then this will give you some great inspiration for how to use your produce at it’s best and freshest, month by month. It’s not a vegetarian book, but with veggies the really obvious seasonal ingredients, there’s inevitably a fruit and veggies bias to the recipes, which, in a world where we’re now supposed to be eating seven-a-day, is probably no bad thing!

If you’re vegetarian, or cook for one regularly, I would definitely recommend you give this book a look. An honourable mention for fresh seafood dishes, too, which look stunning – unfortunately, living in the Midlands, these are of limited use to me at the moment. You never know, this may change..!

Really, what’s not to like?

‘Cooking the Books’ is my self-imposed blog challenge for 2014 – I’ll be trying to cook a new recipe from one of my (rather extensive!) collection of cookbooks once a week, write it up and review it. Wish me luck!

Read more from the Country Skills blog >>

Milk Loaf, from ‘How To Bake’ by Paul Hollywood – Cooking the Books, week 14

This bread, I have to tell you, is a revelation – a genuine flavour of my continental childhood. The first taste was one of those ‘madelaine’ moments, where time peels away and you’re no more than five or six years old again, standing in your childhood kitchen with a slice of bread and butter in your hand. Heaven.

Of course, milk bread may not have the same associations for you as it does for me. Still, I would suggest you give this bread a go, because, childhood memories or not, it’s marvellous.

For one large loaf, I used –

  • Milk loaf ingredients500g strong white bread flour
  • 30g unsalted butter (softened before use, if you keep it in the fridge)
  • 25g caster sugar
  • 320ml semi-skimmed milk
  • a 7g sachet of instant yeast
  • 1 tsp salt
  • Olive oil
  • Some extra milk for a milk wash before baking

In a large mixing bowl, rub the butter roughly through the flour until no large lumps remain. Then add the sugar, salt and yeast to the bowl, keeping the yeast and salt on opposite sides of the bowl. Add about two thirds of the milk, and mix gently using your fingers.

The recipe calls for the addition of warmed milk. To save on wastage, I warmed 250ml of milk to blood heat in the microwave, and used this for the initial addition. The rest of the milk, I added straight from the bottle. Add it a little at a time until you form a nice soft dough. My favourite way of judging this is to add the milk (or water, in a traditional bread recipe) until the dough is *just* getting a bit too wet, then add back a sprinkle of extra flour to compensate. That way, you know your dough is as well hydrated as it can be.

Before provingOil your work surface and knead the dough until it is soft, smooth, silky, and elastic. I love kneading bread, there’s something deeply therapeutic and – dare I say it? – sensual about it. Then return your dough to an oiled mixing bowl and cover loosely with cling film, and leave it to rise for a couple of hours.

Risen doughI find that this dough goes off like a rocket – it must be the sugar in the mix, the little yeasty beasties really set to and it rises like a balloon being inflated. Still, give it time (which develops flavour, too) and let it tripple or more in size.

For me, milk bread has to be in the form of a plaited loaf. It’s just traditional. This dough is remarkable, elastic stuff, something I learned to my cost the first time I made it. If you work it too much during knocking back, before trying to form your loaf, you will end up with tight springy little balls of dough that resist stubbornly any attempt to shape them into the long sausage-shapes you need to make your plait.

So, turn the risen dough out onto an oiled work surface, and divide it by eye into three even portions (they won’t end up even, but don’t worry about this too much!). Taking each one, knock it back gently and then immediately start folding the sides towards the centre to form your sausages. You may need to roll these a little, using your hands as if the dough is a rolling pin, to get the length you need.

Turn out your dough  Divide into three  Form into sausage shapes

Once you have your three pieces, join them together at one end, make a plait, and turn both ends under to make it tidy. Place your plaited loaf on a lined baking sheet, cover loosely again (I prefer oiled cling film), and set it aside to rise. Allow it to at least double, just be careful it doesn’t rise so fast it tries to escape from your baking sheet!

Place the plait on baking sheet  Cover loosely with oiled cling-film  And allow to rise!

Once it’s well risen, pre-heat your oven to 210 C. Brush the loaf gently all over with a little extra milk, and then slide it straight into the oven and bake it for 25 minutes until the crust is quite a dark brown colour and the loaf sounds hollow when tapped underneath. Cool on a wire rack (or on a cold oven shelf, which used to serve me perfectly well for cooling loaves and cakes before I bought a ‘proper’ one).

Brush with milk  Fresh from the oven!

What can I say about this loaf that isn’t unbearably mawkish? Well, it’s pretty perfect. That dark, shiny crust conceals a wonderful soft even white crumb. It’s not sweet, despite the sugar addition, but has a rich smoothness from the milk. It’s wonderful on its own, with butter and jam, but also makes a quite marvellous soft bacon sandwich. I commend this loaf heartily to you.

Slice, and enjoy!


**
How to Bake - cover‘How To Bake’, by Paul Hollywood
Bloomsbury Publishing PLC, 2012
ISBN 978-1-4088-1949-4
Hardcover, 304 pages, full colour. RRP £20.

[Full disclosure: This is my book, which was a lovely recent birthday gift! I have received no payment or sponsorship for this post, nor have I accepted a review copy. I do not have an amazon affiliate account and do not profit from any links provided.]

I reviewed ‘Paul Hollywood’s Bread’ earlier in this series, and this book is it’s immediate predecessor, on the same imprint. As you’d expect, then, pretty much everything I said then also applies here – with lavish illustration throughout and good ‘step by step’ photography of the basic processes.

How to Bake - inner page viewThe scope of this book is a little wider than ‘Bread’, with chapters on basic and flavoured breads, an extensive section on sourdough baking, as well as good coverage of enriched doughs (croissants, pastries and brioche), and a decent selection of cakes, biscuits, puddings, pies and tarts, too. This additional breadth may or may not be a benefit, depending on your specific interests! This book lacks the accompanying ‘serving-suggestion’ recipe for each of the loaves that was a feature of ‘Bread’.

Overall I would definitely consider adding this book to your library if you’re at all interested in expanding your home baking repertoire. I can see myself experimenting with a lot more of these recipes in the future, and this milk loaf has jumped straight onto the ‘house standards’ list.

‘Cooking the Books’ is my self-imposed blog challenge for 2014 – I’ll be trying to cook a new recipe from one of my (rather extensive!) collection of cookbooks once a week, write it up and review it. Wish me luck!

Read more from the Country Skills blog >>

Banner320-260

Salmon with Leeks and Cream, from ‘Two Fat Ladies Full Throttle’ – Cooking the books, week 13

It was with great sadness that I heard of the death of the indomitable Clarissa Dickson Wright last month. She, and her Two Fat Ladies co-star Jennifer Paterson, who died in 1999, were in many ways quite the best sort of eccentric British women. They just don’t make them like that any more!

Two Fat Ladies - coverIt seemed right to choose a recipe from the Two Fat Ladies cookbook on my shelf – an Oxfam bookshop find a couple of years ago. The dust-jacket notes describe Clarissa and Jennifer ‘visiting the far corners of the British Isles in their continuing mission to rescue us from food fads and philistinism’ and really, wasn’t that always the point of the Two Fat Ladies?

The recipe I chose, as titled in the book, is ‘Salmon Cutlets with Leeks and Cream’ – and this immediately caused me a problem which would have Jennifer and Clarissa either spinning in their graves, or, I hope, chuckling gently to themselves.

Salmon cutletsThe humble salmon cutlet – or salmon steak portion – sliced straight across the fish with the backbone in the centre, and which I remember being a regular feature of the special-occasion dinner table while I was growing up has, it would appear, gone so far out of fashion that it’s no longer available from supermarket fish counters. Here in the Midlands, supermarket fish counters are they’re more or less our only fresh fish option.

The fishmonger shrugged apologetically as she explained that unless they had a whole salmon to sell off, it just wasn’t a cut they sold these days. Apparently fish with bones in isn’t the done thing any more.

And so, with profound apologies to Jennifer (for it is her recipe), salmon fillets it had to be. To serve two, you will need –

  • Slice & fry leeks Two salmon portions. Cutlets / steaks if you can get them, fillets if, like me, you can’t.
  • Two mid-sized leeks
  • 150ml double cream
  • Unsalted butter
  • ~100g of cooked prawns (mine were frozen, and defrosted before use)
  • A lemon
  • Salt and pepper

Preheat your oven to 190C. Slice the leeks reasonably thinly and fry until softened with a large knob of butter.

Whip creamWhile the leeks are cooking, whip your cream until it reaches ‘dolloping’ consistency. This is remarkably hard work to do by hand, especially if like me you’re carrying an old wrist injury, so I suggest you don’t follow my example and instead use an electric whisk if you have access to one!

Spoon the remaining leeks overLightly butter or oil two pieces of aluminium foil, large enough to enclose each salmon portion generously. Start with about half the softened leeks in the centre, lay the salmon portion on top of these, and then spoon the rest of the leeks over.

Ready for the ovenFinally add a generous dollop of whipped double cream and half the prawns to each portion. Squeeze over about a teaspoon of lemon juice and season with salt and pepper. Now carefully fold up your foil parcels, place these in an oven proof dish, and put in the pre-heated oven for about 25 minutes.

Fresh from the ovenOnce they’re cooked, unwrap your little packages, and serve with your choice of accompaniments (I made some boulangère potatoes, which were a good match). Squeeze over a dash more lemon juice, if you like.

This is a really nice dish – probably a bit swish for a weekday supper but actually, apart from the cream whipping palaver, pretty quick and straightforward. It feels a little bit like food from another era – and in some respects, of course, it’s just that – but the flavours are fresh, distinct, and complement each other nicely. I wasn’t initially convinced by the idea of the prawns, but they do add a sweetness and a different texture to the dish.

And serve!

**
Two Fat Ladies Full Throttle, by Jennifer Paterson and Clarissa Dickson Wright.
Ebury Press, 1998.
ISBN 978-0-091-865-016
Hard cover, 192 pages, single-colour printing with full colour plates. RRP £17.99.

[Full disclosure: This is my book, which I bought second-hand from a charity bookshop. I have received no payment or sponsorship for this post, nor have I accepted a review copy. I do not have an amazon affiliate account and do not profit from any links provided.]

This book accompanied the third (and penultimate) series of Two Fat Ladies. The recipes are contributed equally by Jennifer and Clarissa and seem to leap off the page in their original voices, which is lovely. Yes, these are recipes full of sugar, butter and cream, offal, game and red meat. Really, what did you expect?

Two Fat Ladies - inner pageA lot of the recipes are highly seasonal or call for rather unusual ingredients (seafood and game feature strongly) and you may struggle to find all the bits and pieces on a trip to an average provincial supermarket! This is no bad thing in my opinion – too many recipe books these days seem to be compiled with one eye on the contents of the shelves of the local Tesco (I can’t help but think Jennifer in particular would have been appalled by how far the hegemony of the supermarkets has progressed in the last decade and a half).

The book, in both its content and presentation, couldn’t be more of a contrast to Jamie Oliver’s ‘Naked Chef’ reviewed here a few weeks back – it’s a bit startling to realise that the Two Fat Ladies and The Naked Chef overlapped on UK television in 1999 (and indeed shared a production company, Optomen Television) – they feel so much like food culture from different eras. The publication date, 1998, is just a year before Jamie’s first blockbuster book offering hit our shelves.

If Jamie was the first in the vanguard of the young, cool, celebrity chefs, then Jennifer and Clarissa were undoubtedly part of the culture of old-school cooks. As a reminder, then, that it serves us to look backwards to our own traditional food culture, as well as outward to that of other countries, these recipes deserve a place in all of our collections.

‘Cooking the Books’ is my self-imposed blog challenge for 2014 – I’ll be trying to cook a new recipe from one of my (rather extensive!) collection of cookbooks once a week, write it up and review it. Wish me luck!

Read more from the Country Skills blog >>