Taming the Tomato Glut – Part 4: fresh tomato passata

Passata is a great, versatile store-cupboard ingredient. In bottles or cartons, stashed at the back of the shelf, it comes out to save the day in soups, sauces, anywhere you want lovely fresh tomato flavour but without the texture of seeds and flesh that accompanies tinned tomatoes.  Until this year, I’d never made any of my own. And then, along came the tomato glut…

This is a really really simple passata process, but does require a couple of slightly unusual bits of kitchen equipment. If you haven’t got them, though, you can work around without them – they will just save you quite a lot of time and trouble.

To make this fresh tomato passata, you will require –

  • Fresh, ripe, home-grown tomatoes
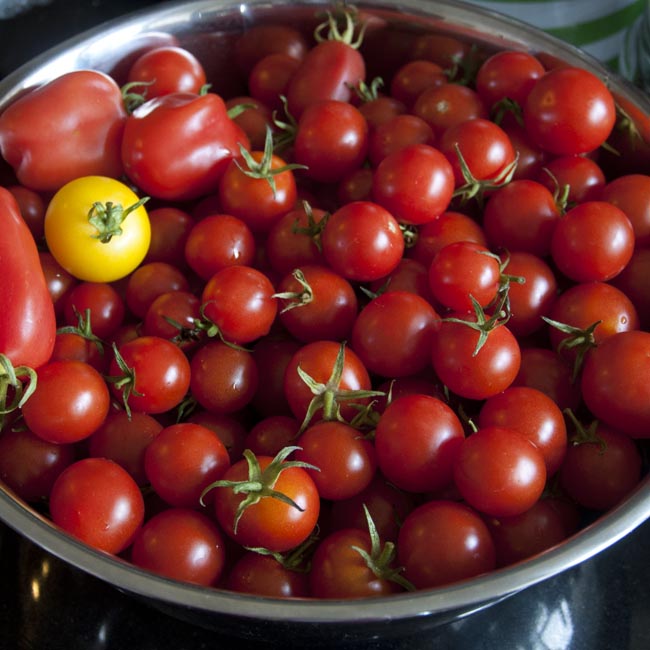
A quantity of perfectly ripe tomatoes (this batch was about 2kg)
  • A few fresh basil leaves
  • A saucepan, a colander, and a slotted spoon
  • A mouli* (hand-cranked mincer / puree mill) with the fine puree plate installed, and a bowl to go under
  • Beer bottles, cleaned & dried, a crown capping tool and enough new crown caps to seal all your bottles**. (To give you a sense of the storage capacity you’ll need, 2kg of tomatoes produced about 1.7l of passata. I bottled 1.5l and used the extra fresh.)
  • A large stock-pot, big enough to contain your bottles or jars.

* If you haven’t got a mouli, you can get the skin and seeds out by pushing it through a fine-ish metal sieve, by hand. You can easily make enough for one meal, but it’s not a useful technique if you’re making in any quantity, unless you have helpful kitchen-slaves to hand!

** If you’re not a home-brewer like me and haven’t got bottles, crown caps and a capping device, you can always store your passata in jam jars. As with the bottles, no need to sterilise, just make sure they’re clean and dry, and the lids are in perfect condition. When you come to process them later (we’ll get to that bit), keep them upright in the water.

Simmer tomatoes to split skinsWash your tomatoes carefully. Now, in the saucepan, get a couple of inches of water simmering gently. A handful at a time, add your tomatoes into the simmering pan. Watch them carefully – as soon as the skins split, fish them out again straight away, into your colander. This will probably take between 30s and a minute, but will depend on your tomatoes. Watch carefully – you’re not trying to cook them!

With skins split, drainingAllow them a couple of minutes resting in the colander to drain away any excess water. Now put them into the mouli, a few at a time, and process them through. The seeds (most of them, anyway!) will be retained on the top-side of the puree plate, along with the skins, while the beautiful fresh tomato pulp passes through into the bowl below.

Pass through the mouliI should say, I *adore* my mouli. It’s a new kitchen gadget for me this year, bought with our home-grown veggies in mind, and I already can’t imagine how I did without it. I’d love to say it was my Grandma’s (in fact, I don’t remember her having one), but it’s exactly the same design as much older ones I’ve seen – if it ain’t broke, don’t fix it, eh?

Rinse and repeat until you’ve processed all of your tomatoes through this very simple two-step chain. You may find you need to disassemble your mouli every so often to wash off the plate if it gets clogged with tomato skin – you could of course peel your tomatoes by hand before you start, to avoid this problem, but really, life’s too short. Just be careful, when you’re doing this, that you don’t waste any beautiful puree or drop skins or seeds into the bowl underneath.

Passata produced, along with 'waste'By the end of the process, you’ll have a surprisingly good yield, as you can see from this picture, the total ‘waste’ in seeds and skins amounted to about half a pint, with the rest of the tomatoes processed very efficiently into gorgeous fresh tomato passata. It’s orangey in colour, compared to what you might expect from a commercial tomato product, but that’s because it hasn’t been cooked down at all, or coloured artificially! Taste some, it’s beautiful, fresh, fragrant tomato nectar. You could drink this stuff.

Fill your bottlesSo now you have some lovely fresh passata you could certainly use to make bolognese or lasagne this evening. The final step is bottling & pasteurisation to allow it to be stored for a considerable time in a cool dark place. Using a funnel and ladle – or a jug, or whatever suits you really! – transfer your passata into your beer bottles, leaving about 5cm airspace in the bottle necks. Into each bottle, also add a single, carefully washed fresh basil leaf.

Seal the bottles carefully with your crown caps, using a capping tool. If you’re using jam jars, ensure they’re in perfect condition with no cracks, chips, or faults in the lids (consider buying new lids, if necessary) and seal them carefully.

Seal bottles with crown caps

Fill your big saucepan or stock pot half to two-thirds full of cold tap water. Place a tea towel in the bottom, and then put in your bottles, in layers, lying on their sides. If you’re using jars, they can sit ‘upright’.

Bottles in the stock potMake sure the water completely covers the bottles or jars. Now get some heat under the pot, and slowly it to a gentle boil, bottles / jars and all, and keep it boiling for 30 minutes before turning off the heat. Leave the bottles in the pot until everything has cooled back down to room temperature. This boiling process essentially sterilises the contents of the sealed bottle or jar, rendering it shelf-stable. Once cool, you can fish out your bottles, dry, label them, and stash them in your pantry until needed.

[I based my passata process, in great part, on this lovely blog about traditional family passata-making by Italian-Australian cooks – it’s well worth a read!]

Read more from the Country Skills blog >>

Taming the Tomato Glut – Part 3: ‘sun’ dried tomatoes

Today we decided to call ‘time’ on the tomato growing season, and clear out the greenhouse. As a result, I have a kitchen quite literally overflowing with tomatoes. Don’t believe me? Here they are!

Now that's what you call a glut!

But, sun-dried tomatoes? In the UK? In *October*? Some kind of witchcraft, surely?

A couple of weeks ago, I finally caved in and bought a dehydrator.  Some of those little beauties you can see there will be making their way into it very soon. I’ve made two batches already, and I’m extremely pleased with the results. The process is a little time-consuming, and slightly faffy in the preparation, but the final product is amazing, and hugely rewarding.

To make these ‘sun’ dried beauties, you will require –

  • Some lovely ripe tomatoesA glut of home-grown tomatoes, perfectly ripe but not over-ripe and going soft. I used cherry-sized tomatoes and above, since they’ll shrink anyway.
  • Sea salt
  • Mixed dried Italian herbs
  • Citric acid
  • A large bowl, colander, slotted spoon, measuring jug, and a sharp paring knife
  • A dehydrator. I selected mine on the basis of extensive background research. Erm,  hang on, no, that’s not right. I bought the cheapest one on Amazon.

Halved tomatoesWash all your tomatoes carefully and remove their little ‘top-hats’. Now, get a really sharp little paring knife, and slice the tomatoes in half. Honestly, this is my single important top tip here, if you’re slicing tomatoes, you want a really really sharp knife. Otherwise it’s all nasty hard work, and if you’re unlucky the knife will slip on the tomato skin and you’ll lose a finger. Don’t say I didn’t warn you!

Tomatoes soaking in acidulated waterIn your large bowl, put a litre of fresh cold tap water and add a teaspoon measure of citric acid, and dissolve by stirring energetically. The citric acid improves the preservation of the tomatoes, and enhances their colour retention as they dry. If you don’t have any, you can sometimes get it from pharmacies, and always from home-brew suppliers.

Acidulated tomatoes, dryingPlace your halved tomatoes in this acidulated water and leave them for ten minutes (you can get on with chopping the next lot meanwhile) and then remove them with the slotted spoon and place them in the colander to drip for a bit.

Arrange halved tomatoes on traysOnce you’re happy they’ve stopped dripping, arrange them on the dehydrator tray, with the skin sides down. Just touching is fine but don’t overcrowd them or let them overlap.  This takes a bit of time first time and is really fiddly, but once you’ve done it a few times you’ll find a technique which makes it a lot faster. Carry on until all your dehydrator trays are filled. Mine seems to take about 2-3kg of fresh tomatoes.

Sprinkle with salt & herb mixBefore ‘firing her up’, sprinkle a mix of sea salt and dried herbs sparingly over the cut surfaces of your tomatoes. I used a half-and-half mix, and just an ordinary dried herb mix from the shops, but if you have gorgeous fresh herbs then by all means chop those up finely and use them! Sprinkle over sparingly, but do try to make sure each piece of tomato has at least a flake of salt and a piece of herb on it.

Stacked up in dehydratorNow stack the trays up in the dehydrator, set your temperature if your dehydrator has a thermostat – I used 55C, but consult any instructions that come with your machine. While the dehydrator is running, rotate the position of the trays every few hours so that they dry evenly (the bottom of my machine, where the warm air comes out, was about 20C hotter than the top, when I checked it with a temperature probe, so this is a real factor).

As they dry, the house will fill with a beautiful sweet tomato smell. (Hubby dislikes this because he says it makes him think of pizza. Takes all sorts!) You’ll notice the tomato pieces shrinking, wrinkling, and darkening in colour.

At the end of the drying processMy tomatoes were dry after about 36 hours, but this will vary hugely depending on the temperature you use, the characteristics of your machine, size of your tomatoes… You get the idea!  Aim for the smaller pieces being really, plasticky-dry, the larger pieces will still have a bit of flex in the flesh but shouldn’t have any wetness (check for this in the middle, under the seeds).

Now remove your greatly-shrunken tomatoes and put them in a large Kilner jar, or something similar. Whether you’re planning to keep your tomatoes as they are, freeze them for longer storage, or store them in oil, you’ll still want to put them in a jar for a few days, as this helps them ‘condition’ – effectively, it allows the less-dry pieces to donate their excess moisture to the more dried out ones, so that the humidity of the dried tomatoes evens out.  Give the jar a shake a few times a day for three or four days. Of course, you’re not going to be able to resist having a taste, so dig in.  They’re amazing, sweet, little flavour-bombs. I’ve been munching on them like sweeties!

Finished 'sun' dried tomatoes


From a glut-busting point of view, you’ve transformed a massive bowl of fresh tomatoes 2 – 3 kg in weight, into less than a litre volume of dried tomatoes, *and*  they’re going to keep. Really, what’s not to like?

That’s it, simple, no? Of course, there’s so much else you can do with the dehydrator, too..!

Read more from the Country Skills blog >>

Very Cheesy – baked camembert with garlic and thyme

My local co-op has had those little wooden boxed camembert cheeses on special offer recently.  I bought one a couple of weeks ago, planning to bake it, but of course life intervened and it was only this week that I finally got around to it.  This is no problem, of course, as it just gave the cheese a chance to mature and ripen nicely.

I think it’s probably a side effect of my early upbringing in Switzerland, but I have to admit to being a teeny bit obsessed with melted cheese. And this is one of the quickest, simplest, and most self-indulgent melted cheese suppers of them all.

Baked camembert with bread & chutney

Who could ask for more after a long day at work? You will need –

  • Unwrapped camembertA whole camembert, in a wooden box. The cheaper ones tend to have cardboard bottoms. This isn’t a problem as long as at least one half of the box has wooden top and sides.
  • A clove of garlic, minced.
  • A few sprigs of fresh thyme (dried, at a push).
  • A tot of dry white wine.
  • To serve, a fresh crispy baguette (or other bread if you prefer – some home-made sourdough would be wonderful, of course!) and some chutney (I chose my spiced plum chutney, but choose whatever you like!).

Open the box and unwrap the cheese, taking off any plastic or paper surrounding the cheese itself. Return it to half of the wooden box, and place the box on a baking tray. Set the oven to heat at 180C.

Prepared camembert with garlic and thymeCut four our five parallel slices through the top skin of the cheese. I’ve seen some recipes call for cutting this off entirely, but I really can’t see the point. Mince up your clove of garlic, and rub it into the top of the cheese, making sure you get some into the slices you’ve made. Strip the leaves from the fresh thyme sprigs, and sprinkle these over. Finally, pour over a tot of wine (about a single spirit measure, or a good ‘glug’).

Tuck in!That’s it, really. Could it be simpler? Slide the prepared cheese into the oven, and pour yourself a well-deserved glass of that nice dry white wine. After about 10-15 minutes, put the bread in alongside it to warm through and get all crispy and gorgeous and leave it all for another five minutes.

Then serve, with some chutney on the side. Go ahead and dig straight into the silken melted heart of the cheese with a big piece of crispy baguette.

I think it would be great served with a crisp green salad with a nice sharp vinaigrette, perhaps using some gorgeous chive flower vinegar, but it had been a long day at work, so I just settled for totally indulgent bread and cheese!

All gone!

As you can see, it went down a treat. Make this, you won’t be disappointed!

Read more from the Country Skills blog >>

Taming the Tomato Glut – Part 2: tomato and chilli chutney

The home-grown tomato glut continues apace, and after yesterday’s harvest, I had over 1.5kg (about 3lb) of lovely ripe tomatoes in bowls on my kitchen counter. Obviously even the most energetic eater of fried tomatoes couldn’t make much of a dent in that with their full English breakfast (though, believe me, I tried!). I wasn’t planning to do any preserving today, but the idea of them going to waste was more than I could bear – so I decided to whip up a batch of tomato chutney, with chillies, since I have a few of those from the greenhouse, too!

This is a bit of a chutney of opportunity / necessity, made out of what I had in the fridge and cupboard, loosely based on this recipe for ‘sweet chilli and tomato chutney‘ from the Pink Whisk blog.

To make this chutney, you’ll need to get together:

  • Fresh ingredients1.5kg of fresh, ripe (home-grown) tomatoes – all shapes and sizes are fine
  • 5 onions (varying sizes)
  • 2 red peppers
  • 4 cloves of garlic (I used half smoked, half fresh)
  • 1 rather over-grown courgette (optional – I had one that had ‘got away’ a bit in the vegetable garden)
  • A few fresh chillies. I chose four large mild red ones (variety ‘Vampire’) and two small-but-fiesty ones (variety ‘Twilight’) which I’ve been growing this year. If you’re in doubt about the properties of a particular chilli, for goodness sake slice off a very small piece and taste it before cooking with them!
  • 800ml of malt vinegar (I used what I had in the cupboard, which was about 400ml dark malt vinegar, 200ml of white malt vinegar and 200ml of spiced preserving vinegar left-over from pickling beetroot – use whatever you have / fancy. Wine or cider vinegar would also be fine, but probably a bit of a waste of money.)
  • Variety of sugars600g of dark sugar (again, this was a cupboard-clearing effort, I used a mixture of demerera, soft dark sugar and golden caster sugar)
  • 4 tsp of whole yellow mustard seeds
  • 1 tsp cayenne pepper
  • 1 tsp paprika
  • 2 tsp sea salt
  • A chopping board, good sharp knife, large stainless steel cooking pot and enough jars to contain your chutney. Also helpful, a ladle and a bottling funnel.

Now, there are a few strongly held beliefs that I try to live by, and not least of these, I’m afraid, is the view that life is far to short to spend it peeling tomatoes – particularly when there’s 1.5kg of them, and many of them are tiny, sub-cherry size. I looked up my grandmother’s green tomato chutney recipe this afternoon, just to check (more on which later, with a little luck!), and it turns out she didn’t peel her tomatoes either. Well, if it was good enough for Grandma, it’s good enough for me! Of course, if you find the idea of tomato skin in your chutney offensive, do feel free to blanch and peel them before you start.

Wash your tomatoes and chop them into roughly even pieces (halves, quarters, or smaller portions depending on the size of the tomato). I left the tiniest toms – those smaller than 1cm – whole. Chuck these into the pan, then chop your onions and peppers (deseeded, and with the white pith removed) into smallish pieces and add them, too.

Peel the courgette and slice it up as finely as you can – I chopped mine pretty roughly, expecting that it would break down to a nice soft pulp during cooking, but it didn’t – probably because the sugar and vinegar in the mix firmed it up nicely! – and I ended up fishing the bigger bits back out to chop them up more finely towards the end of cooking, which is a task I’m sure you can all live without!

Chillies and spicesChop up your fresh chillies very finely (you may want to remove the pith and seeds, where some of the heat is hiding!) and remember to wash your hands very carefully afterwards, including under your fingernails!

Add your chopped chillies to the pan with the sugar, vinegar, crushed garlic and dry spices. Get some heat under it and bring it to a good rolling boil before turning it down a little. Leave it simmering gently, uncovered, and stir occasionally.

Chutney at start of cookingNow, you have time to sort out your jam jars and lids. Wash them carefully in hot soapy water, dry them, then lay them out in a cold oven and set it to 150 degrees C. Make sure that the lids you’re planning to use are plastic-coated, as the vinegar in the chutney will corrode exposed metal. I tend to turn the oven off once it’s been up to temperature for about 20 minutes, and just leave the door closed until I need the jars.

It will take about an hour and a half to cook the chutney – mine took a bit longer than that, so follow your judgement. It’s ready when you can catch a glimpse of the shiny bottom of the pan when you stir the mixture. It will have lost a fair bit of volume (perhaps up to half) and darkened to a rich dark red colour, with no watery liquid left. Once you’re happy it’s done, bottle directly into your hot sterilised jars. These quantities made a little under 2 litres for me, but this will vary depending on your precise ingredients – how watery your tomatoes are and so on. And please, don’t be too hung-up on the details of the recipe – be creative and use what you have, or vary it to your own taste!

My quantities filled whole jars just perfectly (six small ones, and three larger ones), so I haven’t got any ‘left overs’ to enjoy in the next few days from the fridge – a bit of a shame, as I was looking forward to some with a nice cheese sandwich! But this will just heighten the anticipation as the flavours develop over the next month or so. The sneaky tastes I took during cooking (quality control, right?) certainly promise very good things – a lovely sweet-sour background with a gentle chilli heat.

Lovely jars of chutney

Chutney will keep in a cool dark place for ages (I’ve opened – and eaten, and lived to tell the tale – jars of home-made chutney with dates that would make some people’s eyes come out on stalks!). It’s probably best, though, to aim to let it mature it for a month, and then eat it at it’s best within a year. As with all home-made preserves, it’s best to keep it in the fridge after opening. And of course, like any home-made jam or preserve, they will make great gifts!

Read more from the Country Skills blog >>

Taming the Tomato Glut – Part 1: roasted tomatoes with chicken and pasta

The tomato glut has started!  I picked all these gorgeous red beauties in a single session a few days ago. I’m growing that old stalwart, ‘Gardener’s Delight’, along with ‘San Marzanno’, the traditional Italian cooking-type large plum tomato, and two small bush cherry tomato varieties, ‘Lizzano’ and ‘100s and 1000s’.

The tomato glut is here!

Nothing beats a freshly picked home-grown tomato – the sweet flavour, and the delicate perfume so completely lost in fruits picked green half way around the world and ripened artificially in a dark warehouse full of ethylene gas – and up ’till now we’ve been getting through all of them lovely and fresh. We’ve eaten a lot of tomato salads the last few weeks! But with this sudden upsurge in ripening fruit, we’re not keeping up any more.

There are the classics of glut-busting – preserving recipes like passata, chutney, and ketchup – and of course they have their place. Depending on how the fruit output keeps up, I may well make some or all of them in the next few days and weeks. But while preserving allows us to capture a taste of summer in the depths of winter, nothing really beats enjoying fresh, home-grown, seasonal produce at the peak of it’s freshness. Which is why, as well as preserving recipes, every good glut-busting effort needs a few great meals in it, too.

This is my very favourite way of enjoying lots of gorgeous, fresh, ripe tomatoes, simply cooked. You could make this recipe with shop-bought tomatoes, but they’re unlikely to be really lovely and ripe, and you’ll need a lot of them – a decent sized punnet of cherry tomatoes at least for two people. But if you have a local market, you may be able to get hold of lovely ripe tomatoes at this time of year for not much money, so it’s definitely well worth a look.

To make this great chicken dish for two people, you will need –

  • Fresh ingredientsLots of lovely ripe home-grown tomatoes – about a bowl-full
  • Chicken breasts, skin on, one per person if you’re hungry, half per person is fine if you’re not so ravenous. If you’re buying packed chicken breasts, it’s well worth learning the simple skill of butchering a whole chicken into portions – you’ll get much nicer meat, and save money in the process!
  • One small or half a large white onion
  • A nice large clove of garlic or two small ones, (smoked, if possible)
  • A good handful of fresh basil (if you’re growing enough tomatoes to have a glut, and not growing your own basil, you’re doing something wrong!)
  • Hard cheese of your choice. I used mature cheddar because it was what I had, but almost anything would work just fine, I think.
  • Olive oil & balsamic vinegar (or even better, elderberry vinegar)
  • Salt and pepper

Optionally, for the pasta side-dish:

  • Enough good quality Italian dried pasta for two people – linguini would be great, I had spaghetti so that’s what I used. I used to buy supermarket own-brand dry pasta, but the decent Italian stuff is barely more expensive and is streets ahead in terms of cooking quality.
  • A couple of spoonfuls of fresh homemade green pesto, or alternately a generous glug of good spicy olive oil.

Chicken breasts, after fryingSlice up all your tomatoes so they’re about even sized pieces. Tiny ones can be left whole. While you’re doing this, heat a little bit of olive oil in a frying pan. Season the chicken breasts lightly with salt & pepper (be more generous on the skin side) and fry quickly until slightly coloured. Then place the chicken breasts in an oven dish big enough to contain them reasonably snugly with a small gap around.

Prepared fresh ingredientsAdd the onion, garlic and shredded basil to your chopped tomatoes in a bowl, and toss to mix. Season lightly with salt and more generously with pepper, and add a generous glug of oilve oil and a drizzle of balsamic or elderberry vinegar, as if dressing a tomato salad. To give a sense of scale & quantity, this is a large wide bowl of the kind often used to serve pasta.

Ready to go in the ovenSpread the tomatoes around and over the chicken breasts in the oven dish, and grate about a handful of cheese over the top. Now wrap the dish tightly with tin-foil (or put on the lid, if it has one) and snuggle it into an oven at 180 degrees for about an hour.

After an hour has passed, take the lid or foil off your dish and return it to the oven. I love to serve this with pasta, so now’s the time to get a big pan of water to a rolling boil, with a generous pinch of salt and a glug of olive oil, and get your pasta cooking.

When the pasta’s done to a nice ‘al dente’, strain it and stir in a small amount of pesto, if you like, or just toss it generously in good peppery olive oil. You’re not aiming for ‘pasta in pesto’, here, just a very delicate sprinkling of basil and pine kernel pieces through your cooked spaghetti.

Out of the oven!Get your roasted tomatoes and chicken out of the oven. It should be a gorgeous golden caramelised colour on top, and will smell just amazing.

I served the chicken breasts whole, but you could just as easily pick them out at this point and slice them cross-ways into bite-sized pieces, which would make it easier to eat this as a traditional pasta dish with a spoon and fork!

Don’t waste a drop of what’s in this roasting dish – serve up a chicken breast per person, with all the tomatoes and any pan juices spooned over the top. The juice is pure, concentrated, tomato sweetness, and is the absolute highlight of the dish, in my opinion.

Ready to eat!

You’re all very lucky there *is* a photo of the finished dish, as Hubby was looking on as if I’d lost my mind when I got the camera out again. We were both starving after a very busy day, and just wanted to dig right in!

So, if you have a glut of home-grown tomatoes on your hands, please do give this recipe a try. It’s a fabulous taste of late summer, and I promise you wont’ be disappointed!

Read more from the Country Skills blog >>

Elderflorescence – it’s not too late for elderflower cordial, champagne, and how about vinegar?

The scent of an elder tree or shrub, in full flower on a hot sunny afternoon, is one of the heady, intoxicating, unmistakeable aromas of high summer.  This year the elders seem to be making up for last season’s poor showing – they’re simply smothered with elderflowers right now, dressed up from tip to toe in ivory flowers like a fairytale bride.

Elderflower buds, just breaking

Last year, we really struggled to harvest the elderflowers I needed to make my traditional annual batch of elderflower cordial and champagne. I blogged at the time about the ritual of gathering my elderflowers, and what it means for me. Well, this year, the elderflowers are in abundance – what took several hours and a five mile walk last year, we achieved in ten minutes on a short length of our country lane on Sunday. That’s one of the things about foraging – it’s never ever the same!

A chilled fizzy glass of summer!I adore elderflower ‘champagne’. My grandmother used to make it, and it was my gateway to home brewing, I suppose! My favourite recipe is here, with full instructions. It’s a great and rewarding introduction to home brewing, so even if you’ve never tried to brew before, do consider giving it a whirl. It’s not as scary as it seems, I promise, and the result is a fun summer tipple, fantastic for bbqs and parties, and which costs very little.

Under Pressure!Unfortunately for us, it’s really bad timing for starting a batch of elderflower champagne just now – but you most definitely should! Just be aware, it’s a lively beast, and I would under no circumstances advise trying to store it in glass bottles – even those tempting-looking pop top Grolsch-style ones. Just look what it did to the stout small plastic bottles I used last year!  With a little luck there will still be enough flowers around that I can get a late batch on the go in a few weeks time! Otherwise – and this would be nothing short of a minor tragedy – we’ll have to go without this year!

Elderflower cordial, steepingBut – thank goodness – I have found time to make my elderflower cordial, and it  is steeping in the kitchen as I write – I’ve made it this way for a few years now (full instructions & photos blogged last year), and the results are always amazing. If you’re not a brewer, or don’t want to use campden (sulphite) to stabilise the cordial for storage at room temperature, how about freezing it in carefully washed out milk bottles or juice cartons?

Filled marlalade jarsAnd don’t neglect the lemon and orange slices from the cordial once it’s finished – they make really great marmalade!

Those of you who read the blog regularly know that I’m always up for trying something different! So, considering the success of the chive blossom vinegar, I’ve started an experimental batch of elderflower vinegar.

Stripped elderflowersFor this, I’ve stripped the elderflowers off their stems – I finally found a technique that works for me, which is closer to rubbing the flowers and stamens off the green stems than it is to picking off the tips, and gives flowers almost entirely without green material.  Give the flower bunches a good sharp shake first, to dislodge any ‘passengers’ who might be hitching a ride.

You will probably find, despite this, there are some tiny little insects in amongst your flowers once you’ve picked them. Just ignore these (certainly don’t be tempted to wash the flowers as you’ll wash away much of the lovely flavour!). The vinegar will be filtered through fine muslin later, in any case, and if that still doesn’t reassure you, consider that you eat large numbers of insects and associated material every day already – just take a look at the US Food & Drug Administration’s pamphlet on allowable levels of insect and other contaminants in different foodstuffs if you don’t believe me!

Elderflowers steeping in vinegarI filled about half a 1 litre kilner jar with loose flowers, and then filled it up with cider vinegar. In retrospect, I may have used something with less aroma of its own, like rice wine vinegar, but cider vinegar was what I had, and hopefully the fruity note of the cider vinegar will complement the elderflowers beautifully. Put the filled jar somewhere warm to infuse – unlike the chive flower vinegar, there’s no need to keep it out of the light as there’s no problem with colour fading.  I expect to leave it for a couple of weeks before straining and bottling.

This vinegar smells beautiful after only 24 hours,  with a gorgeous fresh elderflower fragrance. So does the cordial, actually, so my kitchen is a sweetly-scented haven right now, and with my living room full of little posies of gorgeous sweet peas from the garden, the house smells nicer than a perfumery!

Elderflowers and citrus fruit

So, if you do nothing else this week, seize the opportunity to capture – even if just in a small batch of cordial or vinegar – one of the ephemeral scents and flavours of high summer.  During the long dark winter months, it’s amazing what a taste and smell of elderflower can do to lift my spirits!

And of course, with elderflowers so abundant this year, we can only hope for a great elderberry season to come!

Read more from the Country Skills blog >>

The Key, The Secret? – spicy pickled ash keys

I first came across the idea of pickled ash keys in Adele Nozedar’s lovely book ‘The Hedgerow Handbook, which I reviewed last year. I was intrigued at the time, but it was the wrong time of year to forage nice young ash keys (actually, I think I may have been a little late this year, too, but more of that later).

A lovely veteran ash treeAsh trees have been in the news lately, at least in the UK, with the arrival last year of ash dieback, a fungal disease now threatening some of the great, veteran trees of the British landscape. Historically, oak, elm and ash were the ‘big three’ trees in these parts, majestic and long-lived, our elms sadly disappeared for the most part several decades ago, succumbing to Dutch elm disease, and it seems now as if the ash, too, may be at risk of all but disappearing from our landscape.

Ash keysBefore too long, ash keys (the twisted seeds of the ash tree, which hang in luxurious bunches from the branches of some – but not all – ash trees at this time of year) may be a vanishing treat, the caviar of the forager’s larder. So why not try them now, before it’s too late? Incidentally, don’t confuse the common ash with the mountain ash, or rowan tree, which produces clusters of (also highly forageable!) bright orange or red berries in autumn.

So, you’ve found a local ash tree positively dripping with lovely young, green ash keys. What now?

After pickingWell, first, you’ll need to pick some, obviously. I made rather a large batch of pickled ash keys, starting with about 800g (approximately a mean couple of pounds). The older they get, the tougher and stringier they will become, so pick them as young and tender as you can.

As well as your ash keys, you will require –

  • 1.5l / 3 UK pints of white distilled malt vinegar (spirit vinegar)
  • 3 tbsp of paprika
  • 3 tbsp of curry powder (I used a medium madras powder, because it was what I had on the shelf)
  • 1.5 tbsp of cayenne pepper
  • 4 tbsp sea salt
  • a heaped teaspoon of whole mixed peppercorns
  • a level teaspoon of whole yellow mustard seed
  • 6 – 8 garlic cloves
  • 12 small hot dried red chillies (I used my own home-grown and dried little chillies left over from last year)
  • A large stainless steel or enamel saucepan or stockpot, a smaller pan (also non-reactive), large colander, a fine sieve and a piece of muslin, and enough jam jars for your batch.

Washed ash keysPick all the ash keys free from their bunches, and wash them carefully. The first part of the process involves gently simmering your ash keys for about an hour and a half, in all, in four changes of water.  This process, while irritatingly time consuming and faffy, reduces the bitterness of the ash keys which would otherwise make them rather unpleasant to eat.

Simmering the ash keysThe smell that this process generates is not very promising – it will smell rather like you’re boiling up a pot full of bits of tree, which you are, of course. But this abates each time you change the water, and after the fourth water change the colour of the ash keys is closer to olive green than to the bright green that you started with, and if you have a speculative nibble on one (I couldn’t resist), it’s quite stringy, not particularly strong tasting, but not noticeably bitter.

Spiced vinegar steepingWhile your keys are simmering away gently, you need to make your spiced vinegar. In your smaller saucepan, combine the spirit vinegar, paprika, cayenne pepper, and curry powder, bring to the boil and then take immediately off the heat.

Strain the spiced vinegarThis smells quite marvellous. Once it’s cooled a bit (you can help it along by sitting the saucepan in a sink full of cold water), strain it through the muslin in the sieve, and if you’re not quite ready to use it, you can use a funnel to put it back inside the vinegar bottles for safekeeping. Incidentally, I’d forgotten I had some muslin and initially tried to strain the vinegar through a paper coffee filter. I can report this was very frustrating and a huge waste of time, effort and coffee filters. So, now you know not to bother!

Ash keys mixed with saltOnce the ash keys have done their four turns around the simmer 20 minutes, strain, change water circuit, they’re an olive-green colour and ready to be stewed (yes, some more!). Add the 4 tbsp of sea salt, and plenty of fresh water, and bring to a brisk boil for a quarter of an hour, before turning the heat down, covering, and simmering for another 60 minutes before finally straining again.

At the end of this, they will have softened a fair bit, and have a gently salted taste, and you will probably be royally fed up of boiling up ash keys. Don’t worry, it’s nearly done!

Strained spiced vinegar, set aside  Chillies, peppercorns, garlic & mustard  Ash keys in spiced vinegar with garlic and chillies

Now, add to the strained ash keys the spiced vinegar, along with the whole dried chillies, peppercorns, mustard seeds and peeled whole garlic cloves. Bring to a brisk boil for 15 minutes, and take off the heat. That’s it, you’re (essentially!) done, and your house probably smells like a very strange hybrid of a chip shop and a curry house. Set the pickled ash keys aside to cool. I left mine overnight, because it was pretty late by the time I finished them, and my big stock pot holds its heat quite stubbornly.

Fill your jarsWash, dry and sterilise your jam jars in the oven, then allow to cool before filling. I used 13 little ‘dumpy’ jars and two 330ml pickle jars for my batch. Assume you need at least the volume of your vinegar, and probably a bit extra, in jar capacity. Pack the ash keys, along with the chillies, garlic, peppercorns and mustard seeds, evenly but quite tightly into your jars. Once you’ve done this, fill the jars right to the brim with the spiced vinegar, and seal.

Filled jars of pickled ash keys

Don’t they make a pretty little lot? They need to be matured now in a cool, dark place for at least 2 – 3 months. But I did have a taste, and the omens are really promising – there’s a long but gentle heat from the combination of the whole chillies and the spiced vinegar, a little garlic note, and out of nowhere a subtle but noticeably ‘olive’ flavour from the ash keys themselves.  The acidity is not at all harsh, which is unexpected, there’s an almost sweet character which must come from the keys themselves as there’s no sugar in the pickle. They are, though, still a bit stringy (though much less so than earlier in the cooking process) – I think if I’d picked in May rather than leaving it until June, this may have helped! I expect they’ll continue to soften while they steep in their jars of vinegar.

All in all, then, a bit of a revelation, these ash keys! I’m not sure what I was expecting, but I don’t think it was much like this! I can’t wait to see what they’re like in a couple of months time, but I think they’ll make a very nice substitute for olives or capers, and will probably go a treat with a nice mature cheddar.

Read more from the Country Skills blog >>

Chive Flower Vinegar – a liquid taste of summer – make this NOW!

If you have chives in your garden, and live in the northern hemisphere, it’s a good bet you’ve got chive flowers now. Please, if you do nothing else this weekend, don’t let all that beautiful chive blossom go to waste – seize the opportunity to make some chive flower vinegar!

Chive flowers growing in the garden

I made this for the first time last year, just a small batch in a 330ml jam jar, with white wine vinegar and about a dozen chive flowers from the garden. It was *glorious*.

The vinegar is somewhere between a slight blush pink and a brash almost pinky-purple, and has a lovely fresh onion flavour which complements salads and savoury dishes perfectly. I guarded my single bottle of 2012 vintage chive flower vinegar jealously, knowing it would be a year before I’d be able to make any more.

But this story, sadly, has a tragic end.  On Christmas Eve, while I was buzzing around the kitchen trying to do all of those last minute things, I opened an over-full kitchen cupboard and my precious bottle of chive flower vinegar tumbled off the shelf, bounced on the counter, and smashed into a million pieces on the slate floor. The kitchen was filled with the gorgeous fresh smell of chives. I could have cried. Instead, I mopped, not at all comforted by the fact that the floor came up absolutely *beautiful* from its vinegar rinse!

It’s fair to say that I’ve been waiting for chive flower season ever since. And now it’s here. Usually, I’d wait to blog a recipe or process like this until it was complete and I could show it to you all the way through. But you need to make this now – not in a few weeks time when the vinegar will be infused and ready to bottle – so here goes.

So, for your very own, glorious chive flower vinegar, you will need to get together the following –

  • Gather all your lovely, fresh, open chive flowers.  Even if you only have about a dozen, it’s worth making a small batch (I successfully made about a 330ml volume of vinegar in a large jam jar lat year). Pick them with as little stem as you can, and give them a good shake to dislodge any resident insect life.
  • I like to use white wine vinegar, though I know others use cider vinegar, rice wine vinegar, or even white malt vinegar. Champagne vinegar would be a ‘premium’ choice. Choose something light coloured to bring out the  lovely colour of the chive flowers.
  • A jar the right size to take all your chive flowers and vinegar. A kilner-type jar with a rubber gasket is ideal, but a large jam jar will do fine, as long as it has a plastic-lined lid. Wash and dry the jar carefully before use.
  • A colander to wash the flowers, and a salad spinner, if you have one (I don’t).

Wash and dry your chive flowersI’m going to come clean here, and admit that I didn’t grow all of these chive flowers. Hubby was able to scrounge them from a lovely kitchen garden!  After removing as much of the stalk as you can, give them a good wash to remove any bugs and insects – a few ants were all that seemed to come in on these ones – and give them a good shake to remove any water, or put them in a salad spinner for a few turns.

Put the flowers into your jarThen put all your flowers in your jar. Mine is a 2l kilner jar but use whatever you have conveniently to hand – probably not something quite this large! Mine happens to be filled but it doesn’t need to be, 1/4 to 1/3rd full will still give you a lovely infusion, though the colour won’t be so striking.

Top up with vinegarNow top up with your choice of vinegar. To give you an idea, the 2l jar filled with flowers took just over 1.5l of vinegar to fill it all the way to the top.

Keep the vinegar bottles – you can re-fill them with the infused vinegar later. As an extra bonus, the labels came off these bottles pleasingly easily!

Now, close your jar, and put it somewhere cool and dark for a couple of weeks.  I’m planning to infuse it for 3 – 4 weeks, but  keep an eye on it and have the occasional taste, as it may be that you’re happy with it earlier. Once you’re happy, strain the vinegar through a fine sieve or a muslin back into the vinegar bottles, label, and store in a kitchen cupboard or larder until you’re ready to use it.

Infusing in kilner jar

There you go – simplicity itself! It’s thrifty, too – just the price of some basic vinegar, and a little bit of time, give you this gorgeous very special condiment. Make some this weekend, I promise you won’t regret it. In a few weeks you’ll be enjoying this gorgeous, fresh, oniony-summery-savoury note with all your favourite salads and summer dishes.  But keep some back, too, for later in the year. Like elderflower cordial, it brings an amazing bottled aroma and taste of summer to your table in the colder, darker months!

Look at this amazing colour!

P.S. Just a quick update to give you an idea of the colour – this is my vinegar jar after just 48 hours infusing in the cupboard under the stairs. Gorgeous, isn’t it?

Read more from the Country Skills blog >>

Don’t be Sour – a dalliance with yeasted ‘quick’ bread

Regular readers of the blog (and those familiar with the intermittent Sourdough Saga series of posts) will know that I *love* my sourdough starter. It’s fair to say I love it like another pet, like a member of the family.  I feed it and care for it (and, admittedly, stash it in the fridge for a fortnight at the time – please note that this is not generally advisable treatment of household pets!) and in return it rewards me and feeds me with some of the very best bread I’ve ever eaten, anywhere in the world.  It seems a more than fair exchange for my time and effort!

Sourdough loaf selection

The beauty of a sourdough loaf, its rich deep flavours and developed texture, are the result of the long, slow, patient process of fermenting, kneading and raising, followed by a blistering hot (and preferably steamy!) baking oven.  My ‘big batch’ of sourdough bread makes two large loaves, or two smaller loaves plus some rolls or a pizza, uses 1.25kg of flour, and lasts us about 10 – 14 days, freezing the second loaf.  But making it takes about 24 hours, starting the night before baking with the creation of the sponge, followed by a whole day during which the dough has to be kneaded and shaped periodically, finally baking around dinner time.  It’s not a chore – to me at least! – but it does require a whole day at home, and of course I don’t always have that pleasure!  The trouble with getting used to really fabulous home-baked bread is that nothing that you can get in the shops comes anywhere close.

So, obviously, I needed a solution for good, home-baked, ’emergency bread’.  The sort that, if I needed to, I could start in the evening after I get home from work, and have baked and out of the oven before I go to bed – about a 3 hour window.  Yes, you could use a bread machine in that time frame (and we have done, in the past), but I find the bread too sugared and salty when made according to the instructions, and highly ‘unpredictable’ in its behaviour if you start deviating from the recommended formulae!

Sourdough loaves keep basically forever (she says, without a scrap of exaggeration!), in that they don’t go off the same way as yeasted loaves (they’re protected from mould growth, it turns out, by one of the fermentation products of linoleic acid – you can read the paper, in the Journal of Environmental Microbiology, here).  Sure, they go stale and dry with time and exposure to air, but they don’t go furry – and once they’re too dry to eat, you can turn them into breadcrumbs, so there’s no waste, either!  My emergency loaf needs to be a yeasted loaf, and obviously needs a smaller batch size, so that we’ll get a chance to finish eating it while it’s still at its best!

I asked around on Twitter (what did we do before Twitter, folks?) and the lovely Lisa (@Cookwitch) offered me her version of a recipe for Pain D’Epi, which looked like it might well fit the bill.  I was pretty pleased with my first attempt at it a couple of weeks ago, but didn’t think to take photos at the time (bad food blogger, no biscuit!).  We’re out of bread again, I was working this morning, and I fancied something nice to go with breakfast tomorrow, so I’m making it again right now.

As I make it, you want the following –

  • 275g of strong bread flour (white flour is traditional, and it won’t be a ‘Pain D’Epi’ otherwise, obviously, but use whatever you like – or a mix, if you have ‘rag-tag’ ends hanging around like I usually do)
  • 175ml of warm water
  • 7g sachet of fast-action bread yeast (the sort that comes in the little double-sachets of small yeast pellets, that you can buy everywhere)
  • A scant half-teaspoon of sea salt
  • A good ‘glug’ of olive oil

Start by combining all the dry ingredients in a bowl and mix together – you could use a whisk, but I’d use my fingers!  Now add the 175ml of warm water, and combine to form a dough.  Add a little bit more flour or water if you need to get the consistency right, just not ‘sticky’ but not too dry as a dry dough will make too dense a loaf.

Kneading your doughNow give your dough a really good knead on a floured work surface.  Set aside 10 minutes to do this, and really give it the time and effort.  This is a single-levened bread, so this is the one and only chance that you get to develop the gluten in the flour and consequently the texture in your final loaf.  Once the dough is starting to develop a silky, elastic texture, rather than just feeling like play-dough, add a generous glug of olive oil and continue to work this in.

Shaped loaf in tinOnce you’re happy with the texture, shape your loaf, and either put it in an oiled and floured 1lb loaf tin, or shape it as required and place it on a sheet of oiled baking parchment on a good thin metal baking sheet.

I would guess that this batch could also make about 8 reasonable-sized dinner rolls, though I haven’t tried this myself.  The traditional form of the Pain D’Epi, as you might infer from the name if you’re francophone, is in the shape of an ear of corn – you can see the finished effect, and how you achieve it (surprisingly straightforwardly, using scissors!) here.  It’s a great tear-and-share shape and I really must try it some day!

Covered with oiled cling filmBut back to my loaf, which is sitting in its much more traditional British loaf tin.  Cover the tin loosely with oiled cling-film (PVC-free, please, especially if you’re using it with oily food), and put it somewhere warm.  Mine is going by the fire this evening – because yes, we have the fire going in what, really, is mid-March. Isn’t that depressing?

Allow it to rise for an hour or two, depending on temperature, until it has at least doubled in size (and filled the tin nicely, if you’re using one).  The initial preparation and kneading takes about 15 minutes, which means that I can usually squeeze it in while dinner’s cooking.

Risen loafOnce the loaf is nicely raised, score the surface with a sharp knife in a pretty pattern of your preference (or construct ears of corn, if you’re feeling flash!) and put it into a pre-heated oven at 200 degrees centigrade for about half an hour – it will rise some more in the oven, if you’re lucky (though not anywhere like so much as I’m used to with the well-developed sourdough) and is done when it’s a lovely golden colour all over and the base sounds hollow when you tap it.  I tend to take tin loaves out of their tins and return them to the oven for a final few minutes to get a nice crispy crust all over.  Free-formed loaves may benefit from being taken off their baking sheets and placed straight on the oven rack, in the same way, to make sure they’re not at all soggy-bottomed!

Baked loaf, coolingOnce your loaf is baked, take it out of the oven and allow to cool on a wire cake-cooling type rack if you have one – I only bought mine very recently, and always used to use a cold oven rack I’d taken out before starting to bake the bread, which unsurprisingly works just fine!  Revel in the lovely smell of fresh bread that now permeates your house, and look forwards to the morning!

Overall, this is a really quick, useful, ’emergency bread’ recipe, that seems to work very nicely with all sorts of flours (today’s loaf was made with some malted granary bread flour I had sitting around at the back of the baking ingredients shelf).  It’s streets ahead of anything you can buy from the supermarket or corner shop, though it doesn’t quite stack up in terms of flavour and texture against slower-fermented yeasted loaves that you might make at home, or buy from a good artisan bakery.  Texture wise it does tend to be a bit ‘cakey’ and edges towards being a little on the heavy side, which I ascribe to the single kneading and rising cycle and lack of opportunity for gluten development.  Still, these are knit-picky complaints when you consider how quick and convenient it is to make, and how much nicer it is than any of the commercial alternatives!

Finished loaf

I wrote, back in June of last year, after my first successful sourdough loaf, that “the bar for ‘good bread’ has just shot skywards in our household, and I suspect things may never be quite the same again.”  I was right.  I’m such a bread-snob now!  But this is good, quick, simple bread, and definitely earns a place at our table.

Read all the posts in the Sourdough Saga >>

Read more from the Country Skills blog >>

When Life Gives You Lemons – Part 5: sweet lemon pickle [Guest Blogger]

Lemon TreeOur Guest Blogger is Ross, from Christchurch, NZ.  

You may recall the lovely series of lemon-glut busting recipes which Ross shared with us back in November last year.  He’s back today, with another lovely lemon preserve.  He says of this one “This recipe is a keeper! Much, much nicer than the hot oily one.”

Sweet lemon (or lime) pickle

The hot lemon pickle recipe is, well, hot. Great if that’s what you’re looking for, but sometimes you want something sweeter, less oily and less incendiary. This pickle is easier to make, too.

Prep time: 20 mins
Maturing time: 3-4 weeks

This makes somewhere over 1kg of pickle (I didn’t think to weigh it).

  • About 500g of lemons. (Or limes. Confusingly, the two words seem to often be used interchangeably in Indian English. I haven’t tried this recipe with limes but I expect it’ll be just as great.)
  • 100g salt
  • 500g white sugar
  • 250g demerara sugar (Note: Some recipes call for grated jaggery. If you can get hold of some, great!)
  • 1 tsp turmeric
  • 1 tbsp chilli powder of your desired heat

This recipe is almost entirely jar-based. You need space to throw the salt and sugar around, so it’s back to our old friend the large kilner jar – sterilised, of course.

Wash and dry the fruit. As usual, make sure you’ve removed any wax.

Squeeze a few fruits until you’ve collected about 125ml (1/2 cup) of juice. Keep the skins!

Cut the skins, and the remaining whole fruit, into pieces that are the right sort of size that you want to find in your pickle. This might be eighths or quarters, depending on your taste and the size of the fruit. Put all the chopped pieces into the jar.

Mix the juice, salt and turmeric, pour it over the fruit.

Compress the fruit in the jar so that it’s all covered by liquid.

When you add the sugar, it sinks.Put the lid on and leave the jar in a warm sunny place. While it’s ‘cooking’, give the mixture a good shake-up every couple of days. You’re waiting until the fruit has softened; expect this to take about a week and a half, longer if it’s cold.

Throw in the sugar and mix well.

Put the jar in a safe place (doesn’t have to be sunny this time) for another week and a half or so. The sugar sinks, so give it a good stir every couple of days. Before adding the chilli.When most or all of the sugar has dissolved, it’s ready. I found three distinct layers – floating lemon pieces, the denser sugary syrup, and the undissolved sugar.

After adding the chilliFinally, add the chilli powder and stir well.

It’s now ready to bottle and/or eat immediately. If you bottle it later, be sure to stir well as the fruit tends to rise in the sugary mixture.

No need to refrigerate. Apparently it keeps for over a year if you leave it in a cool dry place – but it’s so yummy, I’m not sure it’ll be around that long!

The finished product

Afterword:

I’ll be making more of this, it’s awesome with poppadoms or as a side with a curry.

You could probably try this recipe to good effect with other citrus fruit, but the combination of the sour lemons and sugar really works well on the taste buds.

Ross is an expat thirtysomething Brit who went to the Shakey Isles in search of adventure. Works in technology, enjoys creating, has a love-hate relationship with his kitchen.

If you’ve enjoyed this recipe, have a look at Ross’s other lemon glut-busting recipes for lemonadelemon liqueur, and lemon sorbet (which you might be needing, if you decide to experiment the hot pickle!).

Read more from the Country Skills blog >>